

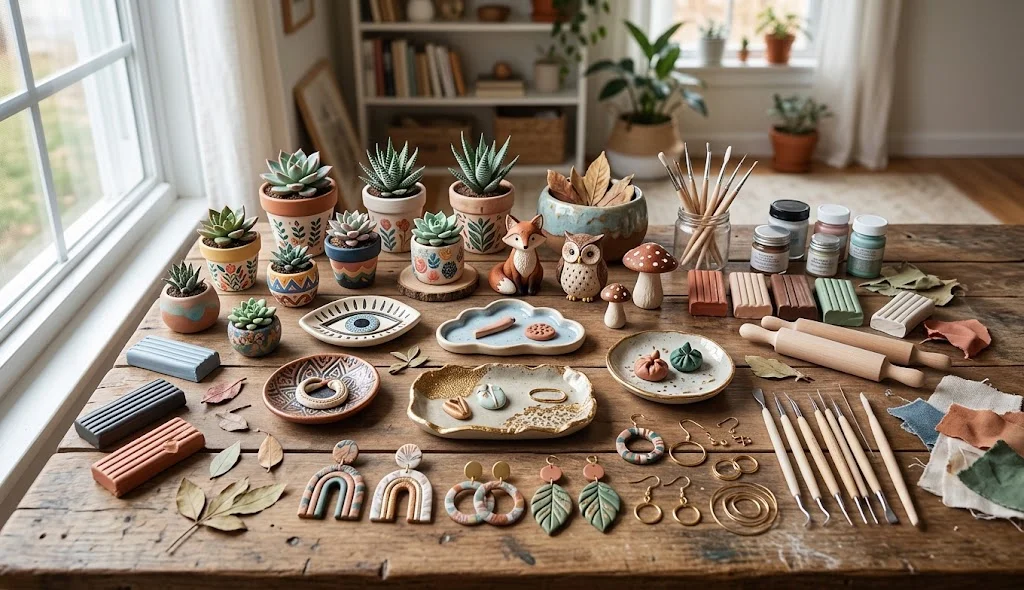
Clay is one of the most versatile materials for creative projects. It can be shaped, textured, painted, and customized in countless ways, making it perfect for handmade decorations, accessories, gifts, and small creative projects. DIY crafts clay ideas are especially popular because you can create unique designs with relatively simple tools and materials.
Whether you are a beginner, a student, a craft lover, or simply looking for a relaxing weekend project, these DIY clay crafts can help you turn ordinary clay into beautiful handmade creations.
Why Try DIY Crafts Clay?
Clay crafts are enjoyable because they allow you to experiment with shapes, textures, colors, and patterns. Many projects can also be personalized for your room, desk, or as handmade gifts.
Some benefits include:
- Easy to customize
- Great for creative beginners
- Suitable for many types of decorations
- Useful for handmade gifts
- Allows you to experiment with textures
- Can be made in different colors and shapes
- Great for small home decor projects
- Encourages creativity and patience
1. DIY Clay Trinket Dish
A small clay trinket dish is a useful project for holding rings, coins, keys, or other small items.
Materials:
- Air-dry clay or suitable modeling clay
- Rolling tool
- Small bowl for shaping
- Acrylic paint
- Paintbrush
- Optional clear finish
Method:
- Take a suitable amount of clay and soften it according to its instructions.
- Roll the clay into an even sheet.
- Place it over the outside of a small bowl to create a curved shape.
- Smooth the edges carefully.
- Allow the clay to dry or cure according to the manufacturer’s instructions.
- Remove the clay dish from the bowl.
- Paint it with your preferred colors and patterns.
- Let the paint dry completely before using it.
2. DIY Clay Plant Markers
Create decorative plant markers to identify herbs, flowers, or small plants.
Materials:
- Air-dry clay
- Rolling tool
- Wooden sticks
- Letter stamps or a pointed tool
- Paint
- Paintbrush
Method:
- Roll the clay into a flat sheet.
- Cut several small rectangular or rounded shapes.
- Add plant names using letter stamps or a suitable tool.
- Make a small opening or attach each clay piece to a wooden stick.
- Allow the clay to dry completely.
- Paint the markers in colors that match your garden.
- Place them carefully near your plants.
These handmade markers are both decorative and practical.
3. DIY Clay Wall Hanging
Make a simple decorative wall hanging using clay shapes.
Materials:
- Air-dry clay
- Rolling pin
- Shape cutters
- Wooden stick
- String
- Paint
- Glue if needed
Method:
- Roll the clay to an even thickness.
- Cut several shapes such as leaves, circles, stars, or arches.
- Make small holes near the top of each piece before the clay dries.
- Let the clay dry according to its instructions.
- Paint the shapes in complementary colors.
- Thread string through the openings.
- Attach the pieces to a wooden stick.
- Add a hanging cord at the top.
This can become a simple handmade decoration for a bedroom or creative workspace.
4. DIY Clay Candle Holder
Create a small decorative candle holder from suitable clay.
Materials:
- Suitable air-dry or oven-cure clay
- Rolling tool
- Small cutter
- Paint
- Candle-safe insert or suitable holder
Method:
- Shape the clay into a small container or holder.
- Create an opening that fits the intended candle holder or insert.
- Smooth the edges carefully.
- Add simple patterns or textures.
- Allow the clay to dry or cure according to its instructions.
- Paint the outside if desired.
- Use an appropriate candle holder or insert rather than placing a flame directly against unsuitable clay.
For safety, follow the manufacturer’s instructions for both the clay and candle product.
5. DIY Clay Refrigerator Magnets
Make colorful clay magnets for your refrigerator or magnetic board.
Materials:
- Modeling clay
- Small shape cutters
- Acrylic paint
- Small craft magnets
- Suitable adhesive
- Paintbrush
Method:
- Roll the clay into a flat sheet.
- Cut small shapes such as fruits, flowers, stars, or hearts.
- Add texture or small details.
- Allow the clay to dry or cure.
- Paint the shapes.
- Attach a suitable magnet to the back using an adhesive appropriate for the materials.
- Let everything dry before placing the magnets on a magnetic surface.
6. DIY Clay Photo Holder
Create a small clay base that can hold a photograph, note, or inspirational card.
Materials:
- Air-dry clay
- Wire
- Clay tools
- Paint
- Photo or card
Method:
- Form a small, stable clay base.
- Insert a suitable piece of wire into the top while the clay is workable.
- Shape the upper part of the wire into a simple holder.
- Add texture to the clay base.
- Allow the clay to dry completely.
- Paint the base in your preferred color.
- Place a photograph or small card into the wire holder.
This makes a cute desk decoration or handmade gift.
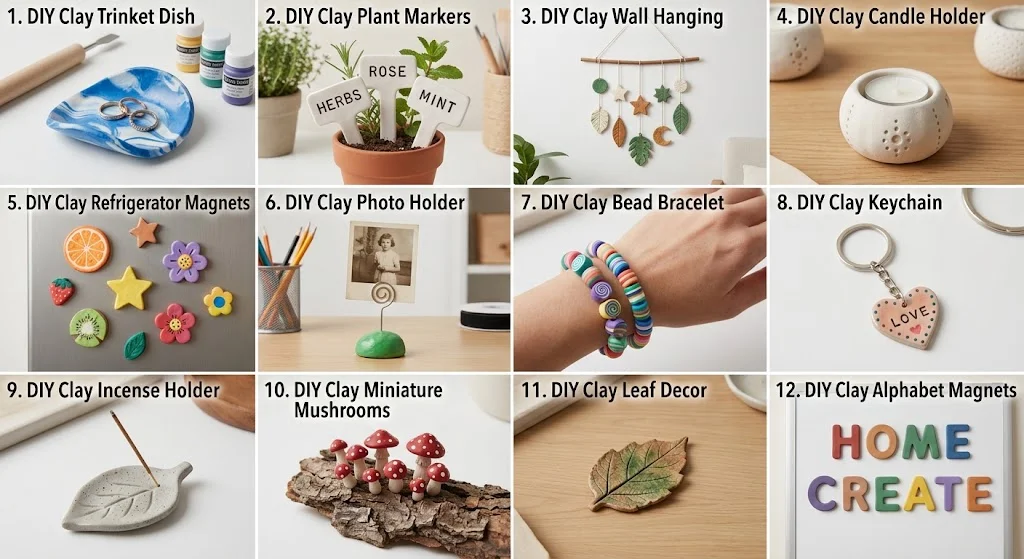
7. DIY Clay Bead Bracelet
Clay beads can be used to create colorful handmade jewelry.
Materials:
- Polymer clay or suitable bead-making clay
- Small clay tools
- Jewelry cord
- Scissors
- Optional letter beads
Method:
- Divide the clay into small pieces.
- Roll each piece into a small bead.
- Create a hole through the center of each bead.
- Add simple patterns or combine different colors.
- Cure the beads according to the clay manufacturer’s instructions.
- Allow them to cool completely.
- Thread the beads onto suitable jewelry cord.
- Secure the bracelet carefully.
You can create personalized patterns using initials, favorite colors, or different bead shapes.
8. DIY Clay Keychain
Make a small personalized clay charm for your keys or bag.
Materials:
- Polymer clay or suitable modeling clay
- Shape cutter
- Keychain ring
- Small connector
- Paint
- Clay tool
Method:
- Roll the clay into an even sheet.
- Cut out a small shape.
- Create a hole near the top for the connector.
- Add initials, patterns, or small decorative details.
- Cure or dry the clay according to its instructions.
- Paint the piece if desired.
- Attach the keychain hardware after the clay is completely ready.
Avoid making the charm excessively large or heavy.
9. DIY Clay Incense Holder
Create a decorative clay holder designed for suitable incense products.
Materials:
- Suitable clay
- Rolling tool
- Clay shaping tools
- Paint
- Optional decorative finish
Method:
- Shape the clay into a small base.
- Create an appropriate opening for the incense stick.
- Add decorative patterns around the surface.
- Smooth the edges.
- Allow the clay to dry or cure according to its instructions.
- Paint the holder after it has fully set.
- Use it only as intended and place it on a stable, heat-safe surface.
Always follow the safety instructions for the incense and clay products you use.
10. DIY Clay Miniature Mushrooms
Create tiny clay mushrooms that can be used as decorative pieces.
Materials:
- Modeling clay
- Clay tools
- Acrylic paint
- Small brush
- Optional clear finish
Method:
- Shape a small piece of clay into a mushroom stem.
- Create a rounded cap from another piece.
- Combine the two pieces carefully.
- Add tiny texture details to the cap.
- Allow the clay to dry or cure.
- Paint the stem and cap.
- Add small dots or patterns for a whimsical look.
These miniatures can be displayed on shelves, desks, or craft displays.
11. DIY Clay Leaf Decor
Turn natural shapes into decorative clay leaves.
Materials:
- Air-dry clay
- Real leaf with visible texture
- Rolling tool
- Scissors or clay cutter
- Paint
Method:
- Roll the clay into a thin, even sheet.
- Place a clean leaf over the clay.
- Gently press the leaf to transfer its natural texture.
- Remove the leaf carefully.
- Cut around the impression to create the leaf shape.
- Add a small hole if you want to hang it.
- Let the clay dry completely.
- Paint the leaf using natural or vibrant colors.
This creates a simple nature-inspired decoration.
12. DIY Clay Alphabet Magnets
Personalize your kitchen or workspace with handmade clay letters.
Materials:
- Suitable clay
- Alphabet cutters or clay tools
- Paint
- Small magnets
- Suitable adhesive
Method:
- Roll the clay evenly.
- Cut out letters using alphabet cutters.
- Smooth the edges carefully.
- Let the letters dry or cure.
- Paint them in different colors.
- Attach suitable magnets to the back.
- Arrange the letters on a magnetic surface to create names or short words.
This is also a fun personalized craft for gifts.
Tips for Better Clay Crafts
Follow these tips to get cleaner results from your DIY clay projects:
- Work on a clean and flat surface.
- Keep the clay covered when you are not using it.
- Roll clay evenly for a professional appearance.
- Smooth cracks before the clay dries.
- Use small tools for detailed patterns.
- Follow the manufacturer’s drying or baking instructions.
- Do not bake clay unless the product specifically requires baking.
- Use suitable paints and finishes for your clay type.
- Keep finished pieces completely dry before handling or displaying them.
- Store unused clay according to the manufacturer’s recommendations.
How to Personalize DIY Clay Crafts
One of the biggest advantages of DIY crafts clay projects is customization. You can experiment with different shapes, textures, colors, initials, patterns, and decorative details.
For example, a clay trinket dish can be personalized with someone’s initials, while a clay keychain can feature a favorite animal or symbol. Clay plant markers can be customized for different herbs, and clay beads can be arranged in color combinations that match your personal style.
You can also combine several small clay crafts to create a handmade gift set.
Conclusion
DIY crafts clay projects offer an easy and creative way to turn clay into useful decorations, accessories, and personalized gifts. From trinket dishes and plant markers to wall hangings, magnets, photo holders, beads, keychains, and miniature decorations, there are many projects to explore.
Start with a simple clay project and gradually experiment with textures, shapes, and colors. With patience and creativity, even a small piece of clay can become a unique handmade creation.