

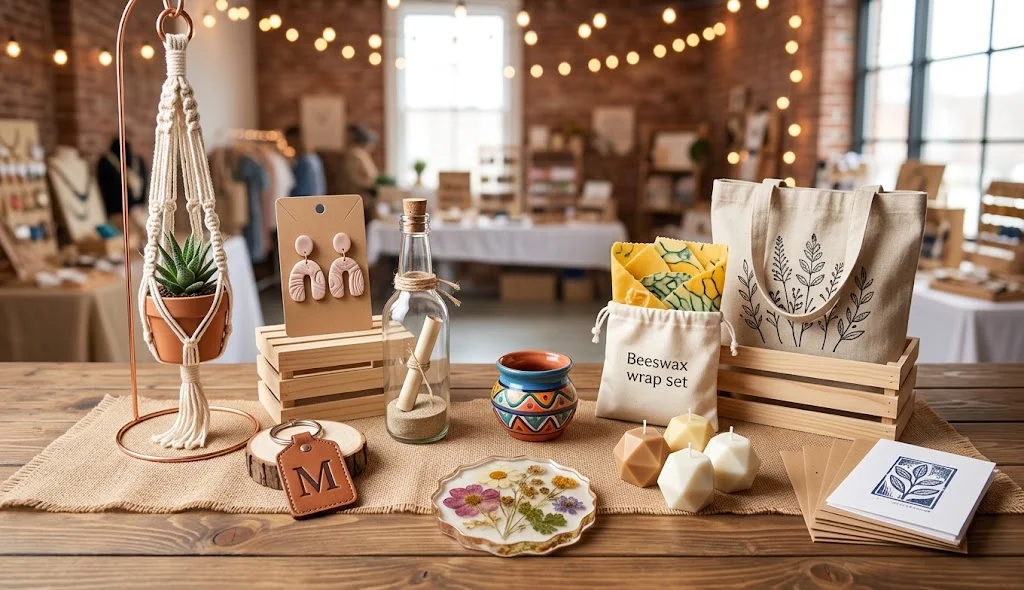
Making handmade products is a creative way to turn your crafting skills into a small business. If you enjoy working with beads, fabric, paper, clay, or other materials, you can transform your ideas into products that people may want to purchase. DIY crafts to sell can include personalized accessories, decorative stationery, gift items, and practical everyday products.
One advantage of starting a handmade craft business is that you can begin with a small collection instead of producing large quantities. You can experiment with different designs, understand what customers prefer, and gradually develop products that reflect your personal style.
In this guide, you will discover 10 DIY crafts to sell, including the materials needed, step-by-step methods, and practical tips for preparing handmade products for potential buyers.
Why Make DIY Crafts to Sell?
Handmade crafts allow you to combine creativity with business opportunities. You can customize products for different occasions, create limited-edition designs, or offer personalized options that are difficult to find in mass-produced items.
Here are some reasons to explore handmade crafts as a business idea:
- Flexible starting point: Begin with a few designs and expand your collection as demand develops.
- Personalized products: Add names, colors, initials, or custom messages to make items more distinctive.
- Creative freedom: Experiment with different materials, patterns, and crafting techniques.
- Gift opportunities: Handmade products can appeal to customers shopping for birthdays, celebrations, and special occasions.
- Small-batch production: Make limited quantities to test customer interest before investing in more supplies.
Remember that a craft’s profitability depends on material costs, production time, packaging, shipping, and customer demand. Not every handmade product will sell equally well, so testing your ideas is important.
10 DIY Crafts to Sell: Easy Handmade Methods
1. Handmade Beaded Phone Charms
Beaded phone charms are small accessories that can be customized with different colors, letters, and decorative beads. Their compact size makes them convenient to package and display in a handmade product collection.
Materials needed:
- Colorful beads
- Strong jewelry cord or suitable beading line
- Letter beads
- Small decorative charms
- Suitable phone-charm connector
- Scissors
Method:
- Choose a color combination for your phone charm.
- Arrange the beads on a flat surface before assembling them.
- Cut an appropriate length of beading cord.
- Thread the beads onto the cord in your selected pattern.
- Add letter beads or a small charm to personalize the design.
- Secure the ends with a reliable finishing technique suitable for your cord.
- Attach the finished strand to a compatible phone-charm connector.
- Check the connections carefully before offering the item for sale.
Selling tip: Create coordinated collections using pastel colors, bold colors, initials, or seasonal themes. Make sure the connector is secure and clearly state that small beads can pose a choking hazard to young children.
2. Personalized Fabric Bookmarks
Fabric bookmarks are a useful craft for readers, students, and people who enjoy journaling. They can be made in different sizes and decorated with embroidery, simple stitching, or fabric patterns.
Materials needed:
- Cotton fabric scraps
- Lightweight interfacing
- Matching thread
- Scissors
- Sewing machine or hand-sewing supplies
- Ribbon, optional
Method:
- Cut two matching fabric rectangles in your preferred bookmark size.
- Cut interfacing to fit between the fabric pieces.
- Place the fabric pieces together with their patterned sides facing inward.
- Stitch around the edges, leaving a small opening.
- Turn the bookmark right side out and press it flat.
- Close the opening with neat stitching.
- Add a ribbon loop or simple embroidered detail.
- Inspect the seams and trim loose threads.
Selling tip: Offer coordinated designs for book lovers, teachers, students, and journal enthusiasts. Consider selling matching sets of two or three bookmarks.
3. Handmade Clay Trinket Dishes
Small clay dishes can hold rings, earrings, coins, and other lightweight objects. Their shapes and finishes can be adapted to different styles, from minimalist designs to colorful decorative patterns.
Materials needed:
- Air-dry clay or another suitable craft clay
- Rolling pin
- Small bowl for shaping
- Clay-safe sculpting tools
- Fine sandpaper, if appropriate for the clay
- Compatible paint and protective finish
Method:
- Knead the clay according to its instructions.
- Roll it into an even sheet.
- Cut a circle or another simple shape.
- Gently place the shape inside a small bowl to create curved edges.
- Smooth the surface and refine the rim.
- Allow the dish to dry or cure according to the manufacturer’s instructions.
- Sand rough areas only if the material permits it.
- Apply compatible paint and finish after the clay has fully dried or cured.
Selling tip: Create matching color collections or personalized designs. Clearly explain that decorative air-dry clay dishes may not be waterproof or food-safe unless the specific materials and finish are certified for that use.
4. Handmade Scrunchies
Fabric scrunchies are practical hair accessories that can be made in a variety of colors, prints, and fabric textures. They are also suitable for coordinating collections with matching accessories.
Materials needed:
- Cotton, satin, or another suitable fabric
- Elastic
- Matching thread
- Scissors
- Safety pin or elastic threader
- Sewing supplies
Method:
- Cut a long fabric rectangle to your preferred dimensions.
- Fold it lengthwise with the patterned side facing inward.
- Stitch along the long edge to form a tube.
- Turn the fabric tube right side out.
- Cut a suitable length of elastic.
- Thread the elastic through the tube using a safety pin or threader.
- Secure the elastic ends firmly.
- Fold the fabric ends inward and stitch the opening closed.
Selling tip: Offer single scrunchies as well as matching sets. Use fabric combinations that suit different preferences, and check that the elastic provides a comfortable hold without being excessively tight.
5. Custom Handmade Greeting Cards
Personalized greeting cards can be created for birthdays, weddings, anniversaries, graduations, and other celebrations. Their designs can be adjusted to suit different occasions without requiring a completely new production process every time.
Materials needed:
- Quality cardstock
- Colored paper
- Paper-cutting tools
- Glue suitable for paper
- Pens or markers
- Decorative stickers or paper embellishments
Method:
- Select a card size and fold a piece of cardstock evenly.
- Plan a simple layout before attaching any decorations.
- Cut paper shapes, borders, or lettering for the front.
- Arrange the pieces until the design looks balanced.
- Attach the decorations with suitable adhesive.
- Write or print a short greeting inside the card.
- Allow all adhesive to dry completely.
- Place the card in a matching envelope and inspect the finished edges.
Selling tip: Develop small collections for specific occasions. Offer optional names or messages, and check spelling carefully before completing custom orders.
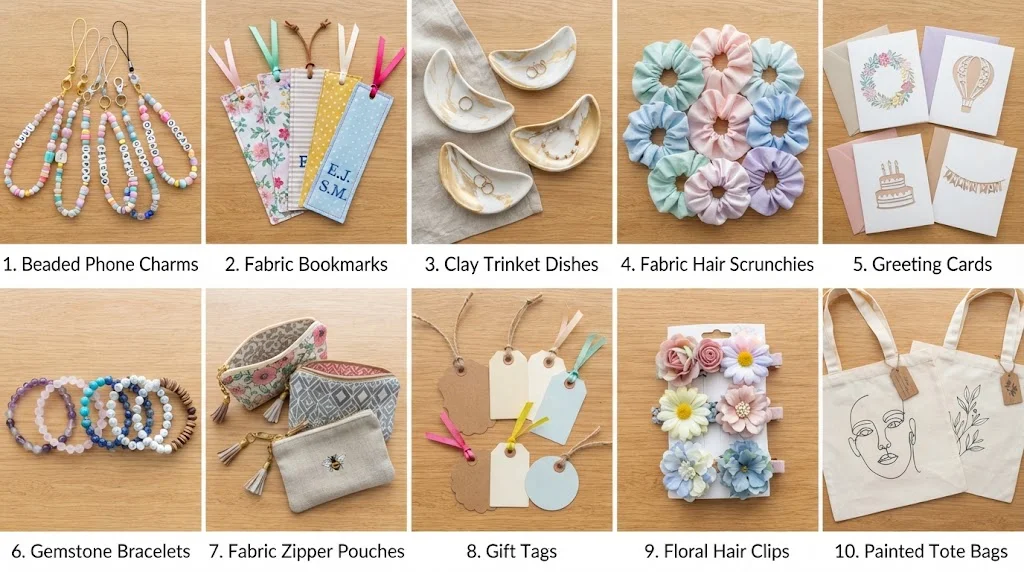
6. Decorative Beaded Bracelets
Beaded bracelets are versatile accessories that can be designed around colors, initials, birth months, or personal interests. You can offer individual bracelets or coordinated sets.
Materials needed:
- Jewelry beads
- Suitable elastic jewelry cord
- Letter beads, optional
- Bead tray
- Scissors
- Measuring tape
Method:
- Measure the intended wrist size.
- Select beads that complement one another in color and shape.
- Arrange the pattern on a bead tray.
- Cut a suitable length of elastic cord, allowing extra length for finishing.
- Thread the beads onto the cord.
- Check the bracelet’s fit before securing the ends.
- Tie a secure knot using a method appropriate for the cord.
- Conceal the knot where possible and gently test the finished bracelet.
Selling tip: Offer different sizes and color combinations. Describe the materials accurately, especially when using plated components or imitation gemstones, and avoid making unsupported claims about their properties.
7. Mini Fabric Zipper Pouches
Small zipper pouches can hold coins, earbuds, stationery, makeup brushes, or other lightweight essentials. They are useful products for people who prefer compact storage accessories.
Materials needed:
- Outer fabric
- Lining fabric
- Matching thread
- Zipper
- Sewing machine or hand-sewing supplies
- Scissors and pins
Method:
- Cut two outer fabric pieces and two lining pieces to the same size.
- Position the zipper between an outer piece and a lining piece, with the correct sides facing each other.
- Stitch along the zipper edge.
- Attach the remaining outer and lining pieces to the other side of the zipper.
- Open the zipper partway before sewing the pouch closed.
- Stitch around the remaining edges, keeping the outer fabric and lining correctly aligned.
- Trim excess fabric from the corners without cutting through the seams.
- Turn the pouch right side out and shape the corners.
Selling tip: Use durable fabric and smooth-working zippers. Offer a few standard sizes and matching patterns so customers can choose between individual pouches and coordinated sets.
8. Handmade Paper Gift Tags
Decorative gift tags are a simple way to add a personal touch to presents, party favors, and handmade packaging. They can be produced in batches using a consistent design.
Materials needed:
- Heavy cardstock
- Ruler
- Pencil
- Scissors or paper trimmer
- Hole punch
- Ribbon or twine
- Markers or decorative paper
Method:
- Draw a tag template with your preferred shape and dimensions.
- Trace the template onto cardstock.
- Cut out several tags carefully.
- Punch a hole near the top of each tag.
- Decorate the fronts with patterns, lettering, or small paper shapes.
- Add blank space for a name or short message.
- Thread a short piece of ribbon or twine through each hole.
- Sort the tags into sets and package them neatly.
Selling tip: Sell tags in coordinated packs for birthdays, weddings, holidays, and small-business packaging. State the number of tags included in each set.
9. Handmade Floral Hair Clips
Floral hair clips can be made using fabric flowers or suitable artificial floral embellishments attached to hair accessories. These crafts are particularly adaptable to seasonal colors and special-event styles.
Materials needed:
- Plain hair clips or barrettes
- Small fabric flowers or suitable artificial flowers
- Craft adhesive compatible with the materials
- Felt pieces
- Scissors
- Decorative centers, optional
Method:
- Select a plain clip with a secure closing mechanism.
- Arrange the flowers before attaching them.
- Cut a small felt backing to fit the decoration.
- Attach the felt backing to the upper surface of the clip using a suitable adhesive.
- Secure the flowers to the backing.
- Add a small decorative center if desired.
- Allow the adhesive to cure fully according to its instructions.
- Test the clip and check that the decorations are firmly attached.
Selling tip: Create coordinated pairs and seasonal collections. Keep small decorative pieces securely attached, and avoid designs that may snag hair or interfere with the clip’s operation.
10. Personalized Handmade Tote Bags
Reusable tote bags provide space for creative designs, initials, short messages, and original artwork. They can be made from purchased blank bags or sewn from suitable fabric.
Materials needed:
- Plain cotton tote bag or sturdy fabric
- Fabric paint or suitable textile markers
- Stencils, optional
- Pencil or washable marking tool
- Cardboard insert
- Iron, if required by the paint or marker instructions
Method:
- Wash and dry the fabric first if required by the material and decoration instructions.
- Place cardboard inside the bag to prevent paint from transferring to the opposite side.
- Plan the design using a light sketch or stencil.
- Apply fabric paint or textile markers according to the product directions.
- Keep the design away from areas that will fold or rub heavily.
- Allow the decoration to dry completely.
- Heat-set the design only if the product instructions require it.
- Check the handles, seams, and decorated surface before packaging.
Selling tip: Offer personalized bags for book lovers, students, shoppers, or special occasions. Use durable materials and explain the recommended washing instructions to customers.
How to Choose the Best Crafts to Sell
Choosing a product is easier when you compare its production requirements with the people you hope to reach. A craft that looks attractive may still be difficult to sell if it takes too long to make or requires expensive materials.
Consider these factors before selecting your first products:
- Material costs: Calculate the cost of every component used in one finished item.
- Production time: Record how long it takes to make, finish, and package each product.
- Repeatability: Choose designs that you can reproduce consistently without sacrificing quality.
- Customization: Decide whether personalization adds enough value to justify the extra time.
- Shipping requirements: Consider the size, weight, and fragility of the finished product.
- Customer interest: Test designs with a small audience before producing a large inventory.
Starting with two or three related products can make it easier to organize supplies, establish a consistent style, and identify which items customers prefer.
How to Price Your Handmade Crafts
Pricing should account for more than the raw materials. Your time, packaging, marketplace fees, shipping arrangements, and other business expenses also affect the amount you earn.
A useful starting formula is:
Selling price = Materials + Labor + Packaging + Allocated expenses + Profit
For example, suppose a handmade pouch uses $3 worth of materials, takes 30 minutes to produce at a labor rate of $8 per hour, and requires $1 for packaging and allocated expenses. Its estimated cost before additional selling fees is $8.
You would then choose a selling price that accounts for your desired profit, any platform fees, and the prices customers are willing to pay for comparable products. This is only an example; your actual costs and currency will vary.
Keep a record of your spending and sales. Reviewing the numbers regularly can help you decide whether to adjust your price, simplify the design, or focus on products that are more efficient to produce.
Where Can You Sell DIY Crafts?
Once you have prepared a small collection, explore sales channels that suit your products and audience.
Online marketplaces
Handmade-focused marketplaces and general e-commerce platforms can help you reach customers beyond your immediate area. Review their current fees, listing rules, shipping requirements, and seller policies before opening a shop.
Social media
Use platforms such as Instagram, Facebook, and Pinterest to share product details, design variations, packaging, and the process behind your work. Clear descriptions and accurate product information can help interested customers understand what you offer.
Local markets and craft fairs
Community markets and craft events let you display products in person and receive direct feedback. Check vendor fees, event rules, and local business requirements before participating.
Personalized orders
Custom orders can help you learn what customers value, especially for gifts and event-related products. Set clear limits on customization, confirm the design before production, and provide realistic completion dates.
Tips for Building a Handmade Craft Business
A successful craft business depends on consistency, presentation, and understanding your customers. These practical habits can help you develop your collection over time.
- Start with a small collection. Test a few carefully finished products before purchasing large quantities of supplies.
- Maintain consistent quality. Inspect seams, knots, edges, finishes, and packaging before shipping an order.
- Photograph products clearly. Use accurate photographs that show the item’s size, colors, texture, and details.
- Write detailed product descriptions. Include dimensions, materials, available options, and care instructions.
- Track every expense. Keep records of materials, labor, packaging, shipping, fees, and sales.
- Offer realistic delivery times. Allow enough time for production, drying, finishing, and dispatch.
- Collect customer feedback. Use genuine feedback to improve your designs and service.
- Protect your original designs. Check relevant intellectual property rules before copying or selling designs that belong to someone else.
Avoid assuming that a popular craft idea guarantees sales. Customer demand, competition, presentation, pricing, and product quality all influence results.
Common Mistakes to Avoid When Selling Handmade Crafts
New sellers sometimes focus on making products without planning the business side. Avoid these common mistakes:
- Setting prices without counting labor and selling fees.
- Buying too many supplies before testing demand.
- Using weak materials or unreliable finishing methods.
- Offering too many variations before establishing a consistent product.
- Writing unclear descriptions that omit dimensions or materials.
- Promising delivery dates that are difficult to meet.
- Using copyrighted characters, logos, or artwork without the necessary permission.
- Ignoring packaging requirements or the rules of the chosen sales platform.
A simple production and pricing record can help you catch problems early and make better decisions as your collection grows.
Conclusion
DIY crafts to sell offer a creative starting point for anyone interested in making personalized products and exploring a small handmade business. From beaded phone charms and fabric bookmarks to clay trinket dishes, zipper pouches, gift tags, and customized tote bags, there are many products you can develop according to your skills and available materials.
The best approach is to choose a few projects, calculate their costs, test the finished products, and gather feedback before expanding your collection. With thoughtful design, reliable quality, fair pricing, and clear product descriptions, you can build a more organized foundation for selling handmade crafts.
Start with one product that you enjoy making, improve it through practice, and let customer interest guide your next steps.