

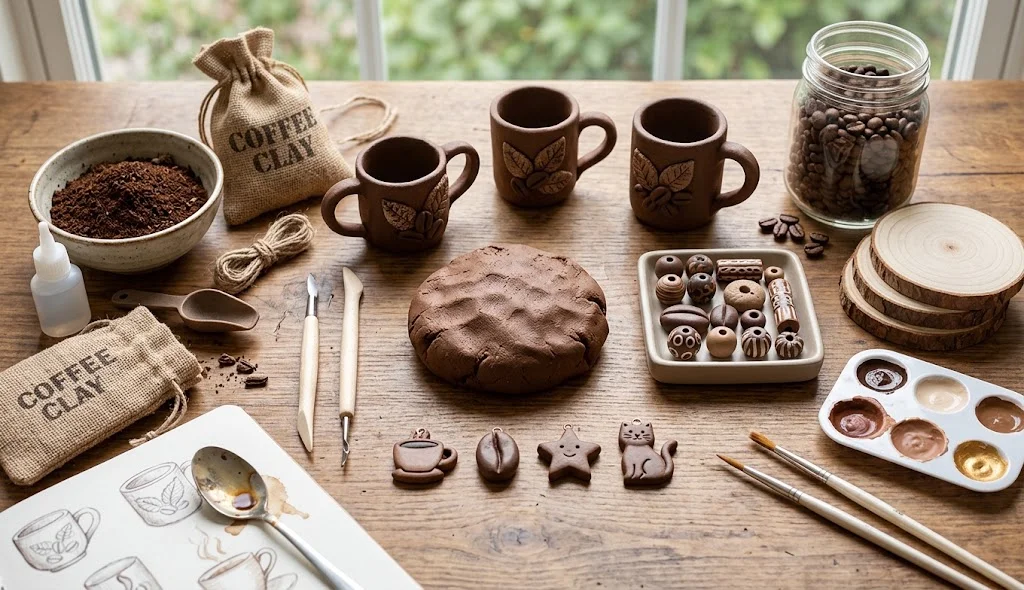
A DIY coffee clay recipe is a creative way to make a coffee-colored modeling material for handmade decorations, miniature designs, ornaments, and rustic craft projects. Coffee adds a warm brown shade and a subtle natural texture, making it a great choice for people who enjoy earthy colors and handmade crafts.
Instead of buying specialty craft materials, you can experiment with simple household ingredients to prepare coffee-inspired craft clay. In this guide, you will discover an easy homemade coffee clay recipe, several creative methods, and practical tips for shaping and drying your finished projects.
What Is DIY Coffee Clay?
DIY coffee clay is a homemade craft material that uses coffee or coffee grounds to create a brown color and textured appearance. Depending on the recipe, it can be made with flour, salt, water, and coffee.
This type of clay is suitable for decorative crafts rather than food preparation. The finished pieces can be used for ornaments, miniature coffee cups, textured shapes, and other small creative projects.
Benefits of Making Coffee Clay at Home
Making coffee clay can be an enjoyable and affordable crafting activity. Some benefits include:
- Budget-friendly materials: Many ingredients may already be available in your kitchen.
- Natural brown color: Coffee creates warm shades suitable for rustic designs.
- Custom textures: Fine coffee grounds can add a speckled appearance.
- Creative flexibility: You can shape the mixture into different decorative objects.
- Beginner-friendly crafting: Simple shapes are easy to experiment with before trying detailed designs.
1. Easy DIY Coffee Clay Recipe
This basic recipe is a good starting point for creating a simple homemade modeling dough with a coffee-inspired color.
Materials Needed
- 1 cup all-purpose flour
- 1/2 cup salt
- 1/2 cup warm water, added gradually
- 2 tablespoons strong brewed coffee, cooled
- 1 teaspoon vegetable oil (optional)
- A mixing bowl
- A spoon
- Baking paper or a clean work surface
Method
- Add the flour and salt to a mixing bowl.
- Pour in the cooled coffee and stir until the mixture begins to combine.
- Add warm water a little at a time while mixing.
- Add the optional oil if you want a slightly smoother dough.
- Knead the mixture until it forms a workable consistency.
- If the dough feels too sticky, add a little flour. If it is too dry, add a few drops of water.
- Shape the mixture into small ornaments, textured pieces, or simple decorative figures.
- Allow the finished shapes to air-dry thoroughly, turning them occasionally for more even drying.
Important: This is a homemade salt dough for decorative crafts, not a true mineral clay. It is not edible, even though it contains kitchen ingredients. Keep it away from children who might put craft materials in their mouths, and wash your hands after crafting.
2. DIY Coffee Grounds Clay for Textured Crafts
If you want a more rustic finish, try adding a small amount of finely ground, used coffee grounds to your dough.
Materials Needed
- 1 cup flour
- 1/2 cup salt
- 1–2 tablespoons used coffee grounds, dried and finely sifted
- Water as needed
- A mixing bowl
- A rolling pin
Method
- Dry the used coffee grounds completely before using them.
- Combine the flour, salt, and coffee grounds in a bowl.
- Add water gradually and mix until a dough forms.
- Knead the mixture until the coffee grounds are distributed evenly.
- Roll the dough into a flat sheet or shape it by hand.
- Press a leaf, fabric texture, or craft stamp gently into the surface.
- Cut out your preferred shapes.
- Let the pieces dry completely before painting or displaying them.
The coffee grounds create a speckled surface that works well for rustic ornaments, miniature stones, and nature-inspired decorations.
3. DIY Coffee Clay Ornaments
Coffee-colored ornaments can add a handmade touch to seasonal decorations or craft displays.
Materials Needed
- Prepared coffee dough
- Rolling pin
- Cookie cutters
- Drinking straw or suitable hole-making tool
- String or ribbon
- Acrylic paint (optional)
Method
- Roll the prepared dough to an even thickness.
- Cut out circles, hearts, stars, leaves, or other shapes.
- Make a small hole near the top of each ornament while the dough is still soft.
- Smooth the edges with your fingers.
- Leave the ornaments to dry completely.
- Decorate them with simple painted lines, dots, or initials if desired.
- Thread string or ribbon through the holes once the pieces are fully dry.
Choose cream, dark brown, or muted green details to complement the natural coffee color.
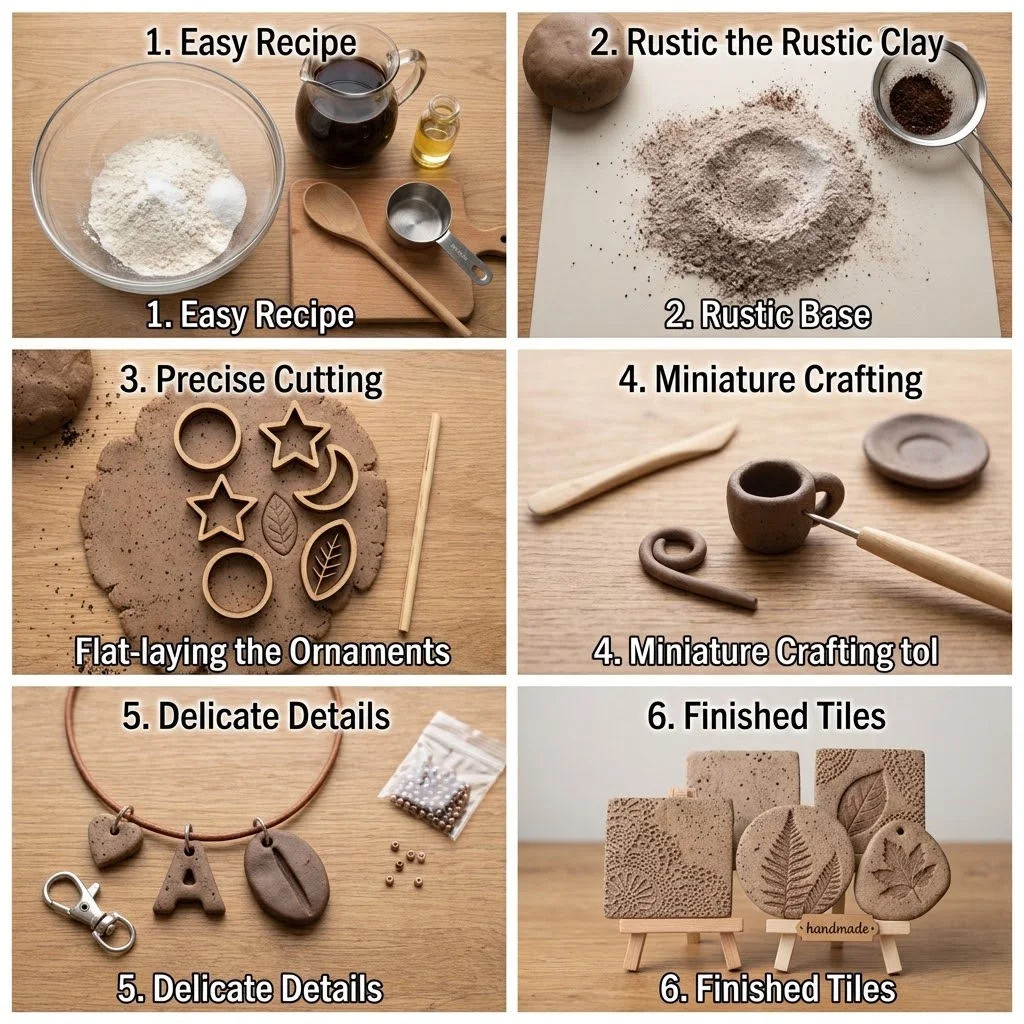
4. DIY Miniature Coffee Cup Decorations
Create tiny coffee-themed decorations inspired by your favorite café drinks. These are intended for display rather than actual beverage use.
Materials Needed
- Prepared coffee dough
- Small shaping tools
- A toothpick for detailing
- Craft paint
- A small amount of suitable craft adhesive, if needed
Method
- Roll a small piece of dough into a ball.
- Shape it into a short cup form using your fingers.
- Gently press the center to create a shallow opening.
- Roll a thin strip of dough to form a handle.
- Attach the handle carefully and smooth the connection.
- Add a small decorative base or saucer if desired.
- Let the miniature dry thoroughly.
- Paint small details after it has completely dried.
These miniature pieces can be displayed on a craft shelf, used in a diorama, or incorporated into a coffee-themed art project.
5. DIY Coffee Clay Pendant or Keychain Charm
A small coffee-colored charm is another way to use homemade craft dough.
Materials Needed
- Prepared coffee dough
- Small shape cutter
- Toothpick
- Keychain hardware or a cord
- Paint for decoration
Method
- Roll the dough into a thin, even sheet.
- Cut out a small circle, heart, coffee bean shape, or initial.
- Use a toothpick to create a hole near the top.
- Add lines or dots to give the charm more character.
- Allow it to dry fully on a flat surface.
- Paint the finished piece if desired.
- Attach the cord or hardware only after the charm is completely dry.
Homemade flour-and-salt dough can be brittle and may not withstand frequent handling. Treat these charms as lightweight decorative pieces rather than durable everyday accessories.
6. DIY Coffee Clay Texture Tiles
Texture tiles are small decorative pieces that let you experiment with patterns and surface details.
Materials Needed
- Prepared coffee dough
- Rolling pin
- Leaf, lace, or fabric textures
- A small cutter
- Craft paint (optional)
Method
- Roll the dough into a sheet of consistent thickness.
- Cut out several small squares or circles.
- Press different textures into each piece.
- Lift the textured material carefully to reveal the pattern.
- Smooth any rough edges.
- Let the tiles dry completely.
- Display them together as a small handmade collection.
Try different patterns to compare how coffee-colored dough looks with smooth, rough, dotted, or leaf-inspired surfaces.
Tips for Getting Better Results With Coffee Clay
A few simple techniques can help you make cleaner and more attractive crafts.
- Use cooled coffee rather than hot coffee when mixing the dough.
- Add water gradually to avoid making the mixture too sticky.
- Use finely sifted coffee grounds to reduce large lumps.
- Keep the dough covered when you are not working with it.
- Make pieces a consistent thickness so they dry more evenly.
- Avoid handling the pieces excessively while they are soft.
- Allow finished crafts to dry completely before decorating them.
- Store leftover dough in a sealed container in the refrigerator for a short period, and discard it if you notice mold or an unusual smell.
- Keep finished pieces away from moisture because flour-and-salt dough is not waterproof.
- Do not use these crafts for food, drinks, or direct contact with flames.
How to Decorate Homemade Coffee Clay
The natural brown shade of coffee dough pairs well with simple, earthy decorations. Once a piece has dried completely, you can experiment with suitable craft paints and finishes.
Try cream-colored dots for a speckled look, dark brown lines for coffee-bean details, or muted green accents for a botanical style. You can also add initials, geometric patterns, or stamped textures before the dough dries.
If you choose to apply a sealant, use one intended for your craft material and follow its instructions. A coating may improve the surface finish, but it does not automatically make homemade dough waterproof or food-safe.
Common DIY Coffee Clay Problems and Solutions
Why Is My Coffee Clay Too Sticky?
Too much liquid can make the dough difficult to shape. Add flour gradually and knead until it becomes easier to handle.
Why Does My Coffee Clay Crack While Drying?
Cracking may happen when pieces are too thick, dry unevenly, or have an inconsistent mixture. Make smaller pieces with an even thickness and let them dry slowly in a well-ventilated area.
Why Is the Color Too Light?
The color depends on the strength of the brewed coffee and the amount of coffee grounds used. You can experiment with a little more cooled coffee, adjusting the flour as needed to maintain the right consistency.
Can I Bake Homemade Coffee Dough?
Do not assume every homemade dough is suitable for baking. Follow a tested recipe specifically designed for oven drying if you choose that method. For this recipe, air-drying is the recommended approach.
Conclusion
A DIY coffee clay recipe offers a creative way to explore homemade craft materials using simple ingredients. With flour, salt, coffee, and a little patience, you can create decorative ornaments, miniature coffee cups, textured tiles, and small rustic designs.
Start with the basic coffee dough recipe, then experiment with finely ground coffee, different shapes, and surface patterns. Remember that homemade coffee dough is intended for decorative use, requires thorough drying, and should be protected from moisture. With thoughtful preparation and creative details, each project can become a unique handmade piece.