

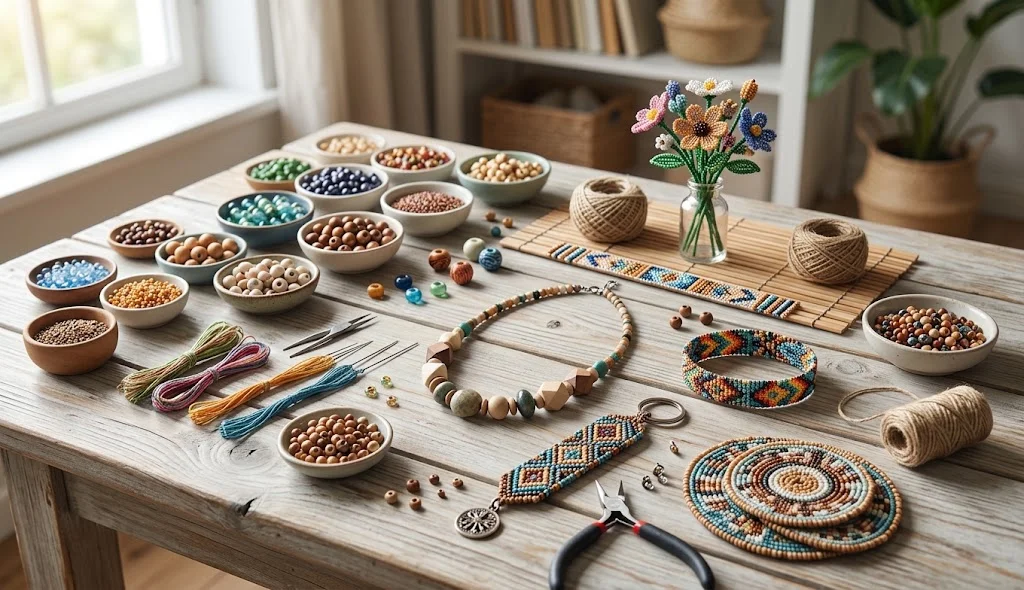
Beads are one of the most versatile materials for handmade crafts. They come in many colors, shapes, sizes, and materials, making them perfect for accessories, decorations, gifts, and creative projects. DIY crafts beads ideas are a simple way to turn basic beads into beautiful handmade creations.
Whether you have leftover beads from an old project or want to start a new craft hobby, these DIY bead crafts can give you plenty of inspiration. From colorful accessories to decorative home projects, there are many ways to use beads creatively.
Why Try DIY Crafts Beads?
Bead crafts are popular because they are easy to customize and can be adapted to many different projects.
Some benefits include:
- Easy to personalize
- Suitable for beginners
- Available in many colors and styles
- Great for handmade gifts
- Useful for accessories and decorations
- Can use leftover beads
- Encourages creativity and patience
- Suitable for small craft projects
1. DIY Beaded Keychain
Create a colorful keychain using beads and a simple keyring.
Materials:
- Assorted beads
- Strong jewelry cord or suitable string
- Keychain ring
- Small connector
- Scissors
- Optional letter beads
Method:
- Choose beads that match your preferred colors.
- Cut a suitable length of cord.
- Thread the beads onto the cord.
- Add letter beads to spell a name or short word if desired.
- Attach the beaded section to the keychain ring.
- Secure the ends with a suitable knot or connector.
- Trim excess cord carefully.
You can make different keychains for bags, backpacks, keys, or handmade gifts.
2. DIY Beaded Phone Charm
Make a decorative charm that can be attached to a suitable phone strap or case attachment.
Materials:
- Small beads
- Jewelry cord
- Letter beads
- Small charm
- Scissors
- Suitable phone charm connector
Method:
- Select a color combination for your charm.
- Arrange the beads before threading them.
- Thread the beads onto the cord.
- Add a letter bead or small decorative charm.
- Secure the ends carefully.
- Attach the finished charm to a suitable phone strap connector.
Choose lightweight beads so the finished charm remains comfortable to use.
3. DIY Beaded Curtain Tieback
Beads can also be used for simple home decoration.
Materials:
- Large decorative beads
- Strong cord
- Two decorative ends or suitable closures
- Scissors
- Optional ribbon
Method:
- Measure the length needed for your curtain tieback.
- Cut a strong piece of cord.
- Thread large beads onto the cord.
- Leave enough space at both ends for securing the tieback.
- Add ribbon or decorative elements if desired.
- Secure both ends properly.
- Wrap the finished tieback around the curtain.
Choose beads that complement the colors of your room.
4. DIY Beaded Bookmark
Create a decorative bookmark with beads at the end of a cord.
Materials:
- Strong cord or ribbon
- Assorted beads
- Large decorative bead
- Scissors
- Optional charm
Method:
- Cut a length of cord suitable for a bookmark.
- Thread several small beads onto one end.
- Add a larger bead or charm as the main decoration.
- Secure the beads so they cannot easily slide off.
- Trim the excess cord.
- Let the finished bookmark sit between the pages of your favorite book.
You can customize the colors for different books or create personalized bookmarks as gifts.
5. DIY Beaded Wall Hanging
Create a simple decorative wall hanging using beads, cord, and a wooden stick.
Materials:
- Wooden dowel or small stick
- Assorted beads
- Several pieces of cord
- Scissors
- Optional fabric or tassels
Method:
- Cut several pieces of cord in different lengths.
- Thread beads onto each cord.
- Secure the beads at selected positions.
- Tie the finished cords to the wooden stick.
- Add fabric strips or tassels if desired.
- Attach a hanging cord to the top.
- Display it on a suitable wall.
Use different bead sizes to create a more interesting pattern.
6. DIY Beaded Hair Clip
Decorate a plain hair clip with small lightweight beads.
Materials:
- Plain hair clip
- Small beads
- Jewelry wire or strong thread
- Suitable adhesive
- Jewelry pliers
Method:
- Select small, lightweight beads.
- Arrange them in your desired pattern.
- Attach the beads to the clip using suitable wire, thread, or adhesive.
- Secure every bead carefully.
- Trim excess material.
- Allow adhesive to dry completely before using the clip.
Avoid adding too much weight so the clip remains comfortable.
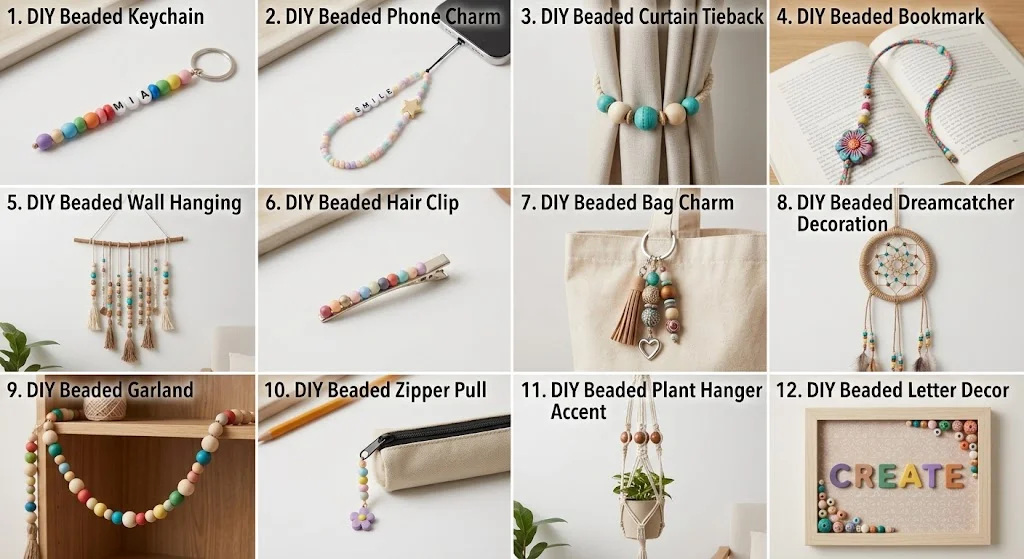
7. DIY Beaded Bag Charm
Make a colorful charm to decorate a handbag, backpack, or tote.
Materials:
- Assorted beads
- Cord
- Small clasp or charm connector
- Keyring
- Optional tassel
Method:
- Choose beads that match your bag.
- Thread them onto strong cord.
- Add a decorative charm or tassel.
- Secure the cord at both ends.
- Connect the beaded section to a keyring or suitable clasp.
- Attach it to your bag.
You can make seasonal charms using different colors and bead shapes.
8. DIY Beaded Dreamcatcher Decoration
Create a decorative dreamcatcher-inspired piece using beads and string.
Materials:
- Small craft hoop
- Cord or thread
- Assorted beads
- Feathers or fabric strips
- Scissors
- Glue if required
Method:
- Wrap the hoop with cord or decorative thread.
- Create a simple string pattern inside the hoop.
- Add beads at selected points.
- Attach several hanging cords to the bottom.
- Thread beads onto the hanging cords.
- Add feathers or fabric strips if desired.
- Attach a hanging loop at the top.
This can become a colorful decoration for a bedroom or creative space.
9. DIY Beaded Garland
A handmade bead garland can be used as a decorative accent for shelves, desks, or seasonal displays.
Materials:
- Wooden or plastic beads
- Strong cord
- Scissors
- Optional tassels
- Optional painted beads
Method:
- Decide how long you want the garland to be.
- Arrange your beads in a repeating pattern.
- Thread the beads onto strong cord.
- Add larger beads at intervals.
- Secure both ends.
- Add tassels to the ends if desired.
- Display the finished garland on a shelf or decorative surface.
Try alternating natural wood beads with colorful beads for contrast.
10. DIY Beaded Zipper Pull
Turn a plain zipper into a personalized accessory.
Materials:
- Small beads
- Jewelry cord
- Small connector ring
- Scissors
- Optional charm
Method:
- Choose several lightweight beads.
- Thread them onto a short piece of cord.
- Add a small charm if desired.
- Secure the beads at the end.
- Attach the finished piece to the zipper pull.
- Check that the attachment is secure before using it.
This works well for backpacks, pencil cases, purses, and jackets.
11. DIY Beaded Plant Hanger Accent
Add beads to a simple plant hanger for a decorative touch.
Materials:
- Suitable plant hanger cord
- Large lightweight beads
- Scissors
- Optional wooden beads
Method:
- Choose large lightweight beads that fit the hanger cord.
- Plan where you want the beads to appear.
- Thread or attach the beads to suitable sections of the hanger.
- Secure each bead so it stays in position.
- Check the hanger’s structure before placing a plant inside.
- Display it in a suitable location.
Use lightweight decorative materials so they do not unnecessarily add stress to the hanger.
12. DIY Beaded Letter Decor
Create a personalized name or word using beads.
Materials:
- Letter beads
- Decorative beads
- Strong cord or wire
- Scissors
- Optional wooden base
Method:
- Choose a short name or word.
- Arrange the required letter beads in order.
- Add decorative beads between the letters.
- Thread everything onto strong cord or wire.
- Secure both ends.
- Mount the finished piece on a small board or display it as a hanging decoration.
This is a simple personalized craft for bedrooms, desks, or handmade gifts.
Tips for Making DIY Bead Crafts
Follow these tips to make your bead projects easier and more attractive:
- Plan your bead pattern before starting.
- Use strong cord for projects that will be handled frequently.
- Choose lightweight beads for wearable accessories.
- Combine different bead sizes for visual interest.
- Use colors that complement each other.
- Keep small beads away from young children.
- Secure knots and connectors carefully.
- Check jewelry pieces before wearing them.
- Store unused beads in separate containers.
- Save leftover beads for future projects.
How to Choose Beads for Different Crafts
Different projects work better with different types of beads. Small lightweight beads are useful for jewelry and hair accessories, while larger wooden or decorative beads can work well for wall hangings and garlands.
For personalized crafts, letter beads are a great choice because they allow you to add names, initials, or short words. Transparent beads can create a delicate look, while wooden beads can give projects a more natural appearance.
Try combining two or three complementary colors instead of using too many colors at once. This can make your finished craft look more coordinated.
DIY Bead Crafts for Gifts
Beaded crafts can also make thoughtful handmade gifts. A personalized keychain, bag charm, bookmark, zipper pull, or decorative garland can be customized according to the recipient’s favorite colors and style.
For a more personal gift, consider using letter beads to add the recipient’s name or initials. You can also create matching bead accessories for friends or family members.
Conclusion
DIY crafts beads are a creative and affordable way to transform simple beads into useful accessories and decorative projects. From beaded keychains and phone charms to bookmarks, wall hangings, bag charms, garlands, zipper pulls, and personalized decorations, there are many possibilities to explore.
Start with a simple project and experiment with different bead shapes, sizes, colors, and patterns. With a little creativity, even a small collection of beads can become a unique handmade creation.