

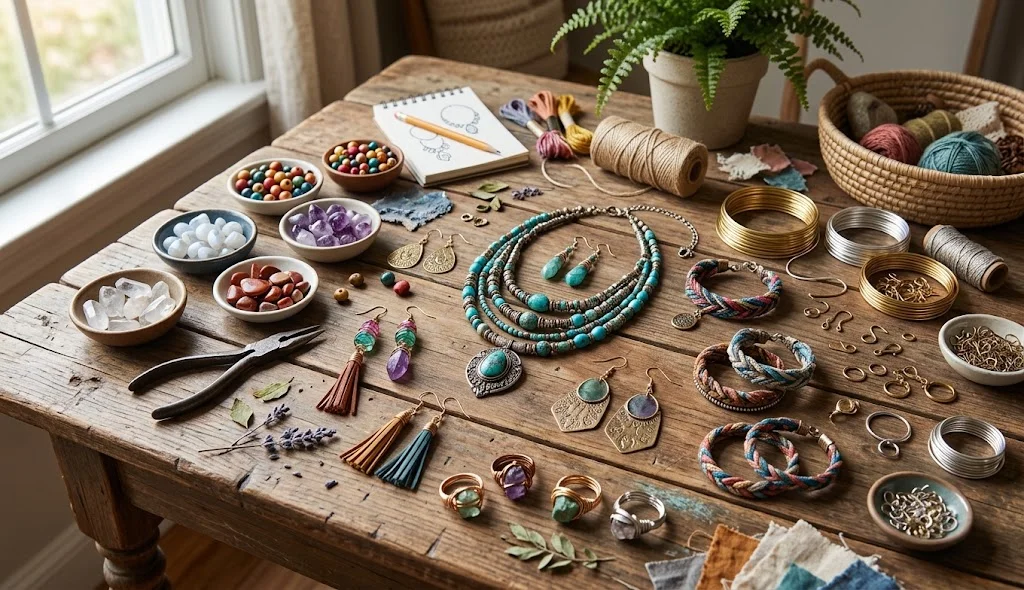
Jewelry is a simple way to express personal style, and making it yourself can make every piece even more special. DIY crafts jewelry projects allow you to create beautiful handmade accessories using beads, wire, fabric, clay, charms, recycled materials, and other affordable supplies.
Whether you want to make a colorful accessory for yourself, a personalized handmade gift, or a unique piece for a special occasion, these DIY jewelry crafts offer plenty of creative possibilities. Most of the projects can be customized with different colors, shapes, charms, and patterns.
Why Try DIY Crafts Jewelry?
Making your own jewelry has several advantages. You can choose exactly how the finished piece looks while experimenting with different materials and techniques.
Some benefits include:
- Affordable compared with many store-bought accessories
- Easy to personalize
- Great for beginners
- Useful for handmade gifts
- Allows you to experiment with colors and designs
- Can turn leftover craft materials into accessories
- Fun creative activity for teens and adults
- Makes unique fashion accessories
1. DIY Clay Bead Bracelet
Create a colorful bracelet using lightweight polymer or air-dry clay beads.
Materials:
- Small clay beads
- Stretch jewelry cord
- Scissors
- Optional letter beads
- Small decorative charms
Method:
- Choose several bead colors that work well together.
- Arrange the beads in your preferred pattern before stringing them.
- Cut a suitable length of stretch cord.
- Thread the beads onto the cord.
- Add letter beads or a small charm if desired.
- Carefully secure the ends with a suitable jewelry knot or finding.
- Trim any excess cord.
You can create different color combinations for casual outfits, parties, or gifts.
2. DIY Wire-Wrapped Ring
A simple wire-wrapped ring can create an elegant handmade accessory.
Materials:
- Jewelry-making wire
- Small bead or decorative stone
- Round-nose pliers
- Jewelry cutters
- Ring mandrel or a smooth cylindrical object of suitable size
Method:
- Cut an appropriate length of jewelry wire.
- Wrap the center of the wire around your chosen bead.
- Position the bead in the center.
- Wrap both wire ends around the base of the bead.
- Shape the remaining wire around the mandrel to form the ring.
- Trim sharp ends carefully.
- Tuck the ends securely so they do not catch on clothing or skin.
Use jewelry-specific wire and appropriate tools for the best results.
3. DIY Fabric Friendship Bracelet
Fabric scraps can be transformed into colorful handmade bracelets.
Materials:
- Narrow fabric strips
- Scissors
- Needle and thread or suitable fabric adhesive
- Small beads or charms
- Ribbon or cord
Method:
- Cut several narrow fabric strips.
- Choose complementary colors.
- Secure the ends together.
- Braid or twist the strips.
- Add beads or charms if desired.
- Finish the ends with a secure knot or suitable closure.
- Trim loose threads.
This is a creative way to use small pieces of leftover fabric.
4. DIY Button Bracelet
Turn colorful buttons into a fun handmade bracelet.
Materials:
- Decorative buttons
- Elastic jewelry cord
- Scissors
- Optional beads
Method:
- Select buttons with suitable holes for your cord.
- Arrange them according to size and color.
- Thread the buttons onto elastic cord.
- Add small beads between selected buttons if desired.
- Check the bracelet size around your wrist.
- Secure the cord carefully.
- Trim the excess material.
Mixing different button shapes can create a playful vintage-inspired look.
5. DIY Tassel Earrings
Tassel earrings are a simple project for adding color and movement to an outfit.
Materials:
- Embroidery thread
- Earring hooks
- Small jump rings
- Scissors
- Beads if desired
- Jewelry pliers
Method:
- Wrap embroidery thread around a small piece of cardboard several times.
- Remove the thread carefully.
- Tie the top securely.
- Cut the bottom loops to create the tassel.
- Trim the ends evenly.
- Attach the tassel to an earring hook using a suitable jump ring.
- Add a small bead above the tassel if desired.
- Repeat for the second earring.
Create several pairs using different thread colors.
6. DIY Charm Anklet
Make a lightweight anklet decorated with small charms.
Materials:
- Jewelry chain or suitable cord
- Small charms
- Jump rings
- Jewelry pliers
- Clasp
Method:
- Measure the chain around your ankle comfortably.
- Cut it to the required length.
- Attach the clasp to one end.
- Add small charms at evenly spaced positions.
- Secure each charm using a suitable jump ring.
- Attach the matching clasp component.
- Check all connections before wearing.
Choose charms that represent hobbies, initials, travel memories, or favorite symbols.
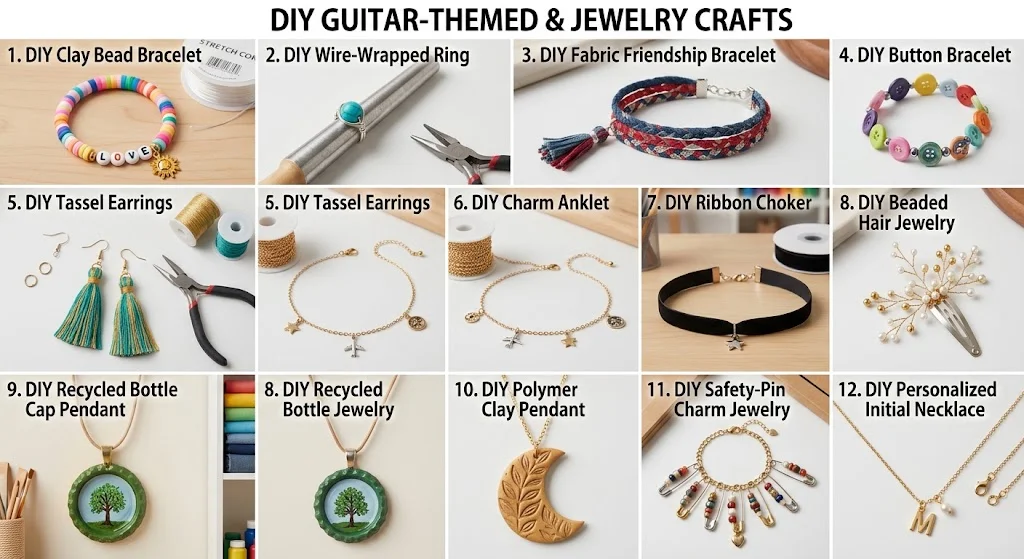
7. DIY Ribbon Choker
A ribbon can be turned into a simple and stylish choker.
Materials:
- Soft ribbon
- Scissors
- Small jewelry clasp
- Jump rings
- Decorative charm
- Jewelry pliers
Method:
- Measure a comfortable length of ribbon around your neck.
- Cut the ribbon slightly longer to allow for the closure.
- Attach suitable jewelry findings to both ends.
- Add a small charm in the center.
- Check that all connections are secure.
- Trim loose ribbon threads.
Choose velvet, satin, or another comfortable ribbon depending on the style you want.
8. DIY Beaded Hair Jewelry
Combine jewelry-making techniques with hair accessories by creating a decorative beaded hair piece.
Materials:
- Small beads
- Jewelry wire
- Hair clip or suitable hair accessory base
- Jewelry pliers
- Wire cutters
Method:
- Select small lightweight beads.
- Thread them onto jewelry wire.
- Create a simple bead pattern.
- Shape the wire into a decorative arrangement.
- Secure the design to a suitable hair clip.
- Trim and secure all wire ends.
- Test the accessory before wearing it.
Lightweight materials are best for comfortable hair accessories.
9. DIY Recycled Bottle Cap Pendant
Give clean bottle caps a new purpose by transforming them into colorful pendants.
Materials:
- Clean bottle caps
- Paint
- Small pendant bail or suitable connector
- Necklace chain or cord
- Glue
- Decorative paper or tiny artwork
Method:
- Clean and dry the bottle caps thoroughly.
- Paint the surface or add a small piece of decorative artwork.
- Allow the design to dry.
- Attach a suitable pendant connector.
- Connect the pendant to a necklace chain or cord.
- Add a protective finish if appropriate for your chosen materials.
This project is a creative way to reuse small household materials.
10. DIY Polymer Clay Pendant
Create a personalized pendant using clay.
Materials:
- Polymer clay
- Rolling tool
- Small shape cutter
- Jewelry connector
- Necklace chain
- Paint or suitable finishing materials
Method:
- Soften the clay according to its instructions.
- Roll it into an even sheet.
- Cut your preferred shape.
- Create a small opening for the jewelry connector.
- Add texture, patterns, or initials.
- Cure or bake the clay according to the manufacturer’s instructions.
- Allow it to cool completely.
- Attach the pendant to a suitable chain.
Always follow the manufacturer’s safety and curing instructions for the clay you use.
11. DIY Safety-Pin Charm Jewelry
Create a quirky accessory using decorative safety pins and lightweight charms.
Materials:
- Decorative safety pins
- Small charms
- Beads
- Jewelry wire
- Pliers
- Bracelet or necklace base
Method:
- Select clean decorative safety pins.
- Add lightweight beads or charms to the pins.
- Secure the decorations carefully.
- Arrange the decorated pins along a suitable jewelry base.
- Check that all sharp points are properly closed.
- Add as many charms as needed for your preferred design.
This works particularly well for colorful, playful jewelry styles.
12. DIY Personalized Initial Necklace
Make a simple necklace featuring the recipient’s initial.
Materials:
- Initial charm or lightweight letter bead
- Necklace chain
- Jump ring
- Jewelry pliers
- Optional small beads
Method:
- Choose the initial you want to feature.
- Select a chain that complements the charm.
- Attach the initial using a suitable jump ring.
- Add one or two small decorative charms if desired.
- Check all connections carefully.
- Wear it alone or layer it with other simple necklaces.
Personalized initial jewelry also makes a thoughtful handmade gift.
Tips for Making DIY Jewelry
Follow these tips to make your handmade jewelry look cleaner and more professional:
- Plan your design before assembling the pieces.
- Choose lightweight materials for earrings and hair accessories.
- Combine colors that complement each other.
- Use jewelry-specific tools whenever possible.
- Smooth or cover sharp wire ends.
- Test clasps and connectors before wearing the jewelry.
- Keep small beads and charms away from young children.
- Avoid materials that may cause skin irritation.
- Store finished jewelry in a dry place.
- Take your time when making small or detailed pieces.
How to Personalize DIY Jewelry
One of the best things about DIY crafts jewelry is that almost every project can be personalized. Try using a person’s favorite colors, initials, birth-month-inspired colors, meaningful charms, or unique patterns.
For gifts, you can create matching bracelets for friends, personalized necklaces for family members, or custom anklets for someone who enjoys handmade fashion accessories.
You can also create jewelry collections around a particular theme, such as nature, travel, music, minimalism, or colorful summer fashion.
Conclusion
DIY crafts jewelry is a fun way to create personalized accessories without needing complicated equipment or expensive supplies. From clay bead bracelets and wire-wrapped rings to tassel earrings, charm anklets, ribbon chokers, recycled pendants, and personalized necklaces, there are many creative projects to explore.
Start with a simple design, choose materials that match your style, and experiment with different colors and patterns. With a little creativity, ordinary craft supplies can become beautiful handmade jewelry that you can wear, share, or give as a thoughtful gift.