

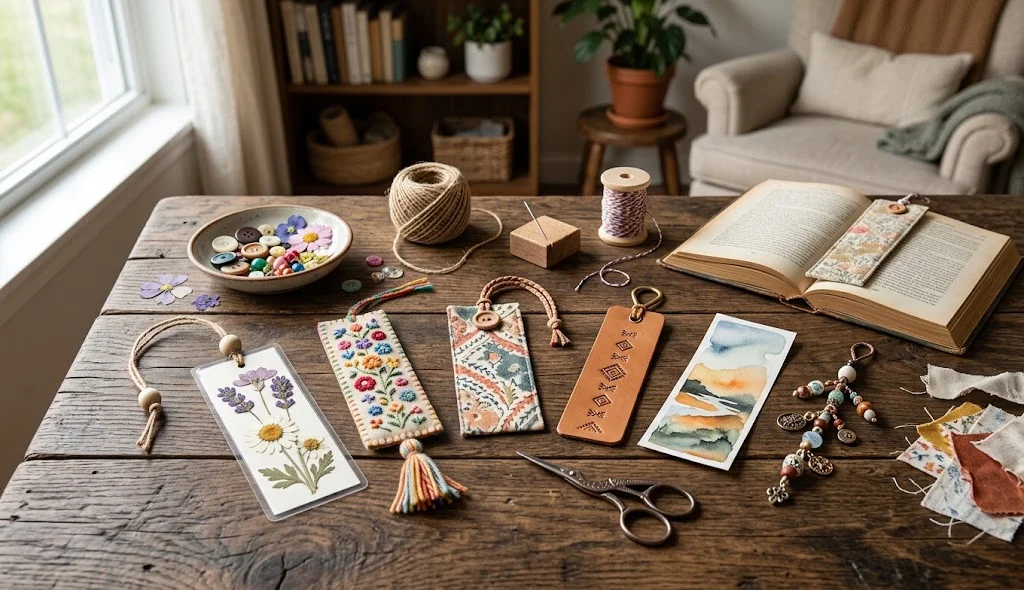
Looking for creative DIY crafts bookmarks that are more interesting than ordinary paper bookmarks? Handmade bookmarks are a fun way to personalize your reading experience while using simple craft materials. You can create bookmarks from fabric, felt, beads, yarn, popsicle sticks, recycled materials, and even dried flowers.
DIY bookmarks are also excellent handmade gifts for readers, students, teachers, and book lovers. Instead of buying a basic bookmark, you can design one that matches your personality, favorite colors, or reading style.
Below are some creative DIY bookmark craft ideas that you can make at home.
1. DIY Fabric Bookmark
A fabric bookmark is durable, colorful, and easy to customize with different patterns.
Materials:
- Cotton fabric
- Scissors
- Needle and thread
- Ribbon
- Decorative buttons
Method:
- Cut two matching rectangular pieces of fabric.
- Place the pieces together with their patterned sides facing outward.
- Sew around the edges, leaving the top open.
- Add a small ribbon loop at the top.
- Stitch the opening closed.
- Decorate the bookmark with a small button or embroidered design.
Choose floral, geometric, or vintage fabric for a unique handmade look.
2. DIY Felt Bookmark
Felt is a great material for creating soft and colorful bookmarks.
Materials:
- Felt sheets
- Scissors
- Craft glue
- Embroidery thread
- Small decorative pieces
Method:
- Cut a long rectangular strip from felt.
- Choose a simple design such as a heart, flower, star, or animal.
- Cut the decorative shapes from different felt colors.
- Glue or stitch the shapes onto the bookmark.
- Add embroidery details around the edges.
- Let the glue dry completely before using it.
3. DIY Beaded Bookmark
Create an elegant bookmark using beads and decorative charms.
Materials:
- Beads
- Jewelry wire or strong cord
- Decorative charm
- Jump ring
- Scissors or jewelry pliers
Method:
- Cut a suitable length of cord or wire.
- Arrange your beads in the order you prefer.
- Thread the beads onto the cord.
- Add a decorative charm at one end.
- Secure the ends tightly.
- Trim any excess material.
You can use initials, favorite colors, birthstone-style beads, or small charms to personalize your bookmark.
4. DIY Yarn Tassel Bookmark
A yarn tassel bookmark is simple, lightweight, and perfect for everyday reading.
Materials:
- Yarn
- Cardboard
- Scissors
- Beads
- Decorative thread
Method:
- Wrap yarn around a small piece of cardboard several times.
- Tie the yarn tightly near the top.
- Remove it from the cardboard.
- Cut through the bottom loops.
- Trim the strands evenly.
- Add a bead or decorative thread to the top.
- Place the tassel inside your book as a page marker.
Try combining two or three yarn colors for a more creative design.
5. DIY Popsicle Stick Bookmark
Turn a simple popsicle stick into a colorful handmade bookmark.
Materials:
- Popsicle sticks
- Acrylic paint
- Paintbrush
- Markers
- Stickers
- Decorative ribbon
Method:
- Paint the popsicle stick in your preferred color.
- Allow the paint to dry.
- Add patterns, flowers, stars, or small illustrations.
- Write a short word or your initials.
- Attach a small ribbon to the top.
- Let all decorations dry before placing it inside a book.
6. DIY Magnetic Bookmark
Magnetic bookmarks are practical because they grip the page without easily falling out.
Materials:
- Decorative cardstock
- Scissors
- Small adhesive magnets
- Glue
- Markers
Method:
- Cut a narrow strip of cardstock.
- Fold it in half.
- Decorate the outside with patterns, illustrations, or lettering.
- Attach one small magnet to each inside end.
- Make sure the magnets align when the bookmark is folded.
- Allow the glue to dry completely.
The magnets will hold the bookmark around the page.
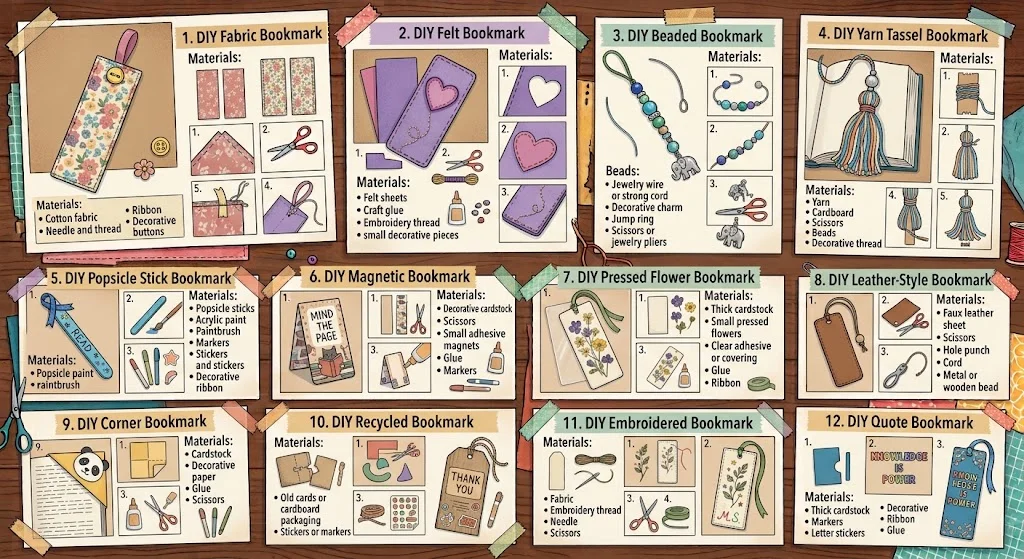
7. DIY Pressed Flower Bookmark
Pressed flowers can turn a simple bookmark into a beautiful nature-inspired craft.
Materials:
- Thick cardstock
- Small pressed flowers
- Clear adhesive or suitable protective covering
- Glue
- Ribbon
Method:
- Cut cardstock into a bookmark shape.
- Arrange small pressed flowers on the surface.
- Carefully glue the flowers in place.
- Add a thin protective covering if desired.
- Punch a hole near the top.
- Attach a ribbon.
Keep the floral arrangement simple so the bookmark remains elegant.
8. DIY Leather-Style Bookmark
Create a minimalist bookmark using faux leather or another suitable flexible material.
Materials:
- Faux leather sheet
- Scissors
- Hole punch
- Cord
- Metal or wooden bead
Method:
- Cut the material into a long rectangular shape.
- Round the corners if desired.
- Punch a small hole near the top.
- Thread cord through the hole.
- Add a decorative bead.
- Tie the cord securely.
This design works well for minimalist, vintage, and classic reading styles.
9. DIY Corner Bookmark
A corner bookmark fits over the corner of a page instead of hanging outside the book.
Materials:
- Cardstock
- Decorative paper
- Glue
- Scissors
- Markers
Method:
- Cut three equal squares from cardstock.
- Arrange them into an L-shaped pattern.
- Fold the two outer squares toward the center.
- Glue one folded section over the other.
- Decorate the front with a character, flower, animal, or geometric pattern.
- Slide the finished bookmark over the page corner.
10. DIY Recycled Bookmark
Turn old greeting cards, packaging, calendars, or magazines into creative bookmarks.
Materials:
- Old cards or cardboard packaging
- Scissors
- Hole punch
- Ribbon
- Stickers or markers
Method:
- Select a clean piece of recycled cardboard or an old card.
- Cut it into a bookmark shape.
- Add drawings, stickers, or decorative paper.
- Punch a hole near the top.
- Add a ribbon or piece of yarn.
- Trim the edges neatly.
This is an easy way to reduce waste while creating something useful.
11. DIY Embroidered Bookmark
If you enjoy sewing, an embroidered bookmark can become a beautiful personalized craft.
Materials:
- Fabric
- Embroidery thread
- Needle
- Scissors
- Ribbon
Method:
- Cut fabric into a long bookmark shape.
- Choose a simple design such as flowers, leaves, stars, or initials.
- Draw the design lightly on the fabric.
- Stitch the design using embroidery thread.
- Finish the edges neatly.
- Add a ribbon to the top.
12. DIY Quote Bookmark
Create a bookmark featuring an inspirational quote or favorite reading message.
Materials:
- Thick cardstock
- Decorative paper
- Markers
- Letter stickers
- Ribbon
- Glue
Method:
- Cut cardstock into a bookmark shape.
- Choose a short quote.
- Write or add the quote using letter stickers.
- Decorate the edges with simple patterns.
- Add a ribbon at the top.
- Allow everything to dry before using it.
How to Choose the Best DIY Bookmark Material
Different materials create different bookmark styles:
For Kids
Try popsicle sticks, felt, cardstock, and colorful stickers.
For Minimalist Designs
Use faux leather, neutral cardstock, or simple fabric.
For Nature Lovers
Pressed flowers, leaves, and botanical designs work beautifully.
For Book Lovers
Add quotes, literary themes, initials, or small book-related charms.
For Gifts
Beaded, embroidered, fabric, and personalized bookmarks make thoughtful handmade gifts.
Benefits of Making DIY Craft Bookmarks
Making your own bookmarks has several advantages:
- Creates personalized reading accessories
- Costs less than many store-bought alternatives
- Lets you experiment with different materials
- Makes thoughtful handmade gifts
- Helps reuse leftover craft supplies
- Encourages creativity
- Provides a relaxing craft activity
- Allows you to create bookmarks for different books and occasions
Tips for Making Better DIY Bookmarks
- Choose durable materials: Thick cardstock, fabric, felt, or faux leather can last longer.
- Keep the bookmark lightweight: Avoid adding too many heavy decorations.
- Secure everything properly: Make sure beads, ribbons, and decorations cannot easily come loose.
- Keep edges smooth: Rough edges can damage or catch on book pages.
- Match the design to the reader: Use colors and themes that suit the person receiving the bookmark.
- Protect delicate designs: Pressed flowers and paper decorations can benefit from a protective covering.
- Personalize your projects: Add initials, names, quotes, favorite colors, or meaningful symbols.
Conclusion
There are many creative DIY crafts bookmarks you can make using fabric, felt, beads, yarn, popsicle sticks, pressed flowers, recycled materials, and other simple supplies. Each method offers a different style, from colorful children’s bookmarks to elegant handmade gifts for book lovers.
The best part of making your own bookmark is the freedom to customize every detail. Choose your favorite material, experiment with colors and patterns, and create a bookmark that makes every reading session a little more personal.