

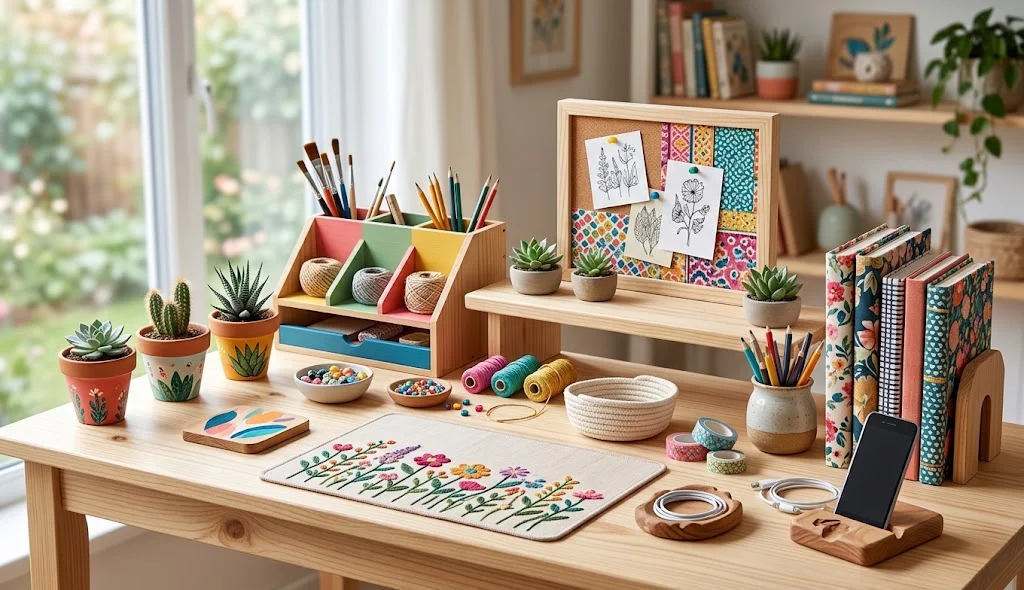
A DIY crafts desk is more than just a place to work on creative projects. It is a personal space where you can explore new ideas, organize your supplies, and create handmade decorations that reflect your style. Whether you enjoy paper crafts, painting, journaling, or small handmade projects, a well-planned craft desk can make your creative time more enjoyable.
You do not need expensive furniture or a large room to create an inspiring crafting area. With simple materials, clever organization, and a few creative touches, you can design a DIY crafts desk that suits your needs and available space.
In this guide, you will discover 10 creative DIY crafts desk methods, including handmade organizers, personalized accessories, storage solutions, and desk decorations. These ideas are suitable for beginners and craft lovers who want to make their workspace more practical and attractive.
What Is a DIY Crafts Desk?
A DIY crafts desk is a dedicated workspace where you can complete handmade projects, arrange crafting tools, and explore different creative activities. It can be a small table, a customized workstation, or a repurposed surface designed for arts and crafts.
A craft desk can include useful features such as:
- Handmade pen and brush holders
- Organized paper storage
- DIY supply containers
- Decorative desk accessories
- Creative planning boards
- Dedicated areas for different craft materials
The goal is to create a workspace that supports your crafting routine while allowing you to personalize its appearance.
10 Creative DIY Crafts Desk Methods
1. DIY Cardboard Craft Supply Organizer
A cardboard supply organizer is an easy way to arrange small crafting materials such as markers, scissors, rulers, and glue sticks. You can customize its size and appearance to fit your desk.
Materials Needed:
- Clean cardboard
- Craft glue
- Ruler
- Pencil
- Scissors
- Decorative paper
- Labels
Method:
- Measure the desk area where you want to place the organizer.
- Cut cardboard pieces to create compartments.
- Assemble the base and dividers using suitable craft glue.
- Cover the outside with decorative paper.
- Add labels to identify different supplies.
- Allow the glue to dry completely.
- Place your crafting tools into their designated sections.
This project helps you use available materials to create a personalized desk accessory.
2. DIY Decorative Pencil and Brush Holder
Create a colorful holder for pencils, paintbrushes, markers, or other suitable crafting tools using a recycled container.
Materials Needed:
- Clean, empty container
- Decorative paper or paint
- Craft glue
- Ribbon or stickers
- Scissors
- Paintbrush
Method:
- Choose a clean container with a stable base.
- Remove any unsuitable labels and prepare the surface.
- Measure decorative paper to fit around the container.
- Attach the paper or apply paint appropriate for the material.
- Add ribbons, stickers, or simple patterns.
- Let the decoration dry.
- Use the finished holder to arrange your desk tools.
Choose a design that matches the colors of your craft workspace.
3. DIY Foldable Craft Desk Mat
A handmade desk mat can define your crafting area and provide a suitable surface for certain activities. You can create a foldable version that is easier to store when not in use.
Materials Needed:
- Thick craft board or suitable mat material
- Measuring tape
- Pencil
- Ruler
- Decorative paper
- Suitable adhesive
Method:
- Measure the available desk surface.
- Select a mat material appropriate for your intended craft activities.
- Mark the desired dimensions.
- Cut the material carefully using suitable tools.
- Add decorative paper if desired.
- Create fold sections only if the material is suitable for folding.
- Place the mat on the desk and check that it sits securely.
Avoid using delicate decorative materials for activities involving sharp tools, wet paint, or heat.
4. DIY Mini Craft Storage Boxes
Small storage boxes are useful for keeping beads, buttons, ribbons, paper scraps, and other lightweight supplies organized.
Materials Needed:
- Small cardboard boxes
- Decorative paper
- Craft glue
- Labels
- Scissors
- Ruler
Method:
- Collect small boxes that are clean and in good condition.
- Measure the outside of each box.
- Cut decorative paper to match the surfaces.
- Attach the paper neatly.
- Add labels for different types of craft supplies.
- Allow the boxes to dry.
- Arrange the boxes in a convenient location on or near your desk.
Use separate boxes for different materials to make it easier to find what you need.
5. DIY Handmade Desk Nameplate
A handmade nameplate can add a personal touch to your crafting workspace. You can create a nameplate using cardboard, wooden craft materials, or another suitable base.
Materials Needed:
- Cardboard or craft board
- Pencil
- Markers or paint
- Ruler
- Decorative stickers
- Craft glue
Method:
- Select a base for your nameplate.
- Measure and cut it into your preferred shape.
- Write your name or a creative workspace title.
- Decorate the background with colors and patterns.
- Add small embellishments if desired.
- Create a stable stand or use an appropriate display method.
- Place the nameplate on your craft desk.
Try lettering styles, simple borders, and colors that reflect your personality.
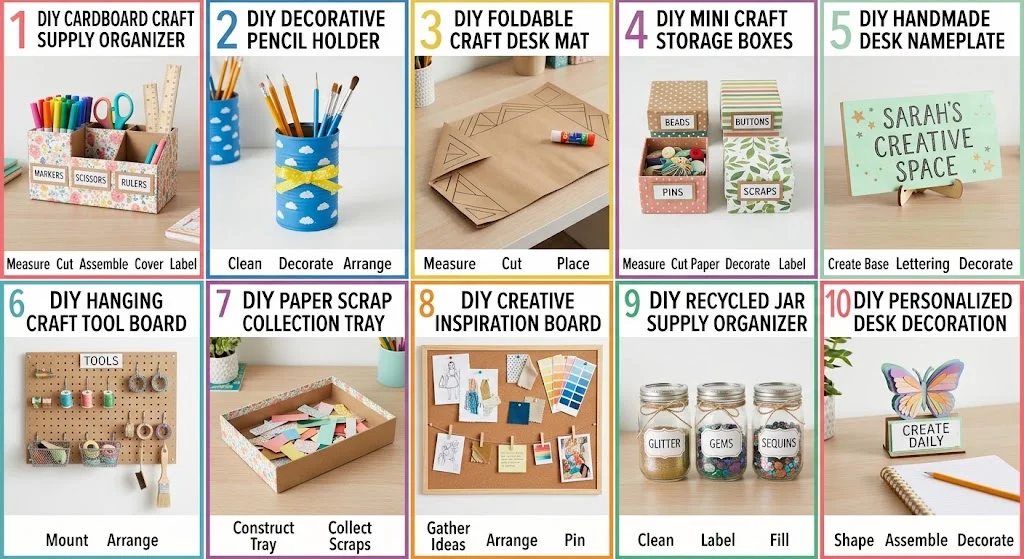
6. DIY Hanging Craft Tool Board
A hanging tool board can help you organize frequently used lightweight tools and supplies. It is particularly useful when you want to keep your desk surface less crowded.
Materials Needed:
- Suitable board
- Hooks or storage attachments designed for the board
- Ruler
- Pencil
- Labels
- Appropriate mounting hardware
Method:
- Choose a suitable board and a secure location.
- Plan where each tool or storage attachment will go.
- Mark the positions with a pencil.
- Attach the hooks or organizers according to their instructions.
- Add labels for different categories.
- Secure the board properly to a suitable surface.
- Arrange lightweight tools so they are easy to reach.
Make sure the mounting method is appropriate for the wall or surface and the weight of the stored items.
7. DIY Paper Scrap Collection Tray
If you regularly work with paper crafts, a scrap collection tray can help keep leftover paper pieces in one place. You can reuse suitable cardboard to make a simple tray.
Materials Needed:
- Flat cardboard
- Ruler
- Pencil
- Scissors
- Craft glue
- Decorative paper
Method:
- Measure the tray size you need.
- Mark the base and side sections on cardboard.
- Cut the pieces carefully.
- Fold or assemble the sides to create a shallow tray.
- Secure the corners with suitable glue.
- Decorate the outside if desired.
- Use the tray to collect clean paper scraps for future projects.
Sort the scraps regularly and discard materials that are damaged or unsuitable for reuse.
8. DIY Creative Inspiration Board
An inspiration board gives you a place to display color combinations, sketches, project ideas, and creative notes. It can be made using a suitable board and simple decorations.
Materials Needed:
- Corkboard or suitable display board
- Paper
- Markers
- Clips or pins appropriate for the board
- Decorative tape
- Small sketches or notes
Method:
- Select a board that fits your available space.
- Decide on a theme, such as art, fashion, paper crafts, or lettering.
- Create small sketches, notes, or color samples.
- Arrange your materials on the board.
- Secure the items using appropriate clips or pins.
- Add decorative borders or labels.
- Update the board whenever you discover new creative ideas.
Keep the layout simple so you can easily add and remove inspiration materials.
9. DIY Recycled Jar Supply Organizer
Recycled jars can be used to store certain craft supplies, including buttons, beads, and other appropriately sized materials. Decorating the outside can give them a coordinated appearance.
Materials Needed:
- Clean jars with suitable lids
- Decorative labels
- Ribbon
- Craft glue
- Markers
- Small craft materials
Method:
- Clean and dry the jars thoroughly.
- Check that they are suitable for the supplies you want to store.
- Create labels for each jar.
- Attach the labels to the outside.
- Add a ribbon or other decoration if desired.
- Arrange the jars in a stable storage location.
- Sort your craft supplies into the labeled containers.
Keep glass containers in a secure position and choose safer alternatives when appropriate for your workspace.
10. DIY Personalized Craft Desk Decoration
A small handmade decoration can make your desk feel more creative without taking up too much space. You can create a mini sign, paper sculpture, decorative stand, or original artwork.
Materials Needed:
- Cardboard or cardstock
- Colored paper
- Markers
- Scissors
- Craft glue
- Decorative materials
Method:
- Choose a small decoration that fits your desk.
- Sketch your idea on paper.
- Select colors that complement your workspace.
- Cut and assemble the main craft pieces.
- Add patterns, lettering, or decorative details.
- Allow any glue or paint to dry fully.
- Place the finished decoration in a stable position on your desk.
Try creating seasonal designs or rotating decorations to keep your workspace fresh.
Best Materials for DIY Crafts Desk Projects
You can start with a basic collection of craft materials and expand it as you explore different projects.
Some useful supplies include:
- Cardboard and cardstock
- Colored paper
- Craft glue
- Scissors
- Ruler and pencil
- Markers and colored pencils
- Decorative tape
- Recycled containers
- Labels and stickers
- Paint and paintbrushes
- Craft board
- Small storage boxes
Choose materials according to the project you plan to make. Always use tools and adhesives in a suitable workspace and follow their safety instructions.
How to Organize Your DIY Crafts Desk
An organized craft desk can make it easier to locate supplies and prepare for new projects. You can use a few simple habits to maintain your workspace.
Separate Supplies by Category
Keep paper, writing tools, adhesives, and decorative items in separate groups. This arrangement can help you find materials without searching through every container.
Keep Frequently Used Tools Nearby
Place the tools you use most often in accessible holders or storage sections. Store less frequently used items in labeled boxes.
Use Vertical Storage When Suitable
Shelves, hanging organizers, and display boards can help you use available wall or vertical space. Make sure all attachments are safely installed.
Leave Room for Your Projects
Avoid filling the entire desk with decorations and storage containers. Reserve enough surface area for drawing, cutting, assembling, or other creative activities.
Clean Your Desk After Crafting
Return supplies to their designated locations after completing a project. Remove scraps and clean suitable surfaces to prepare for your next crafting session.
DIY Crafts Desk Ideas for Small Spaces
You can create a useful crafting area even if you have limited room. The key is to choose a desk setup that fits your available space.
Use a Compact Work Surface: Choose a table or desk that provides enough room for your main crafting activities.
Try Portable Storage: Use boxes, trays, or containers that can be moved when you need additional space.
Create a Foldable Setup: If suitable furniture is available, a foldable work surface can be helpful in shared rooms.
Choose Multi-Purpose Accessories: A storage box that also works as a supply tray can reduce the number of separate items on your desk.
Keep Your Layout Flexible: Arrange tools so that you can move them when starting a new type of craft.
Tips for Creating a Creative Craft Desk
A good crafting workspace should support both creativity and practical use. Consider these tips when planning your DIY crafts desk.
- Choose a Suitable Location: Select an area with enough room for your activities and appropriate lighting.
- Plan Before Decorating: Decide how you want to use the desk before adding storage or decorative items.
- Use Matching Colors: A coordinated color palette can create a consistent visual style.
- Reuse Suitable Materials: Cardboard, containers, and leftover craft supplies may be useful for new projects.
- Keep Tools Organized: Store sharp or specialized tools appropriately and keep them away from unsafe access.
- Avoid Overcrowding: Leave space for your current project and comfortable movement.
- Label Storage Containers: Clear labels make it easier to identify different materials.
- Experiment With Designs: Try different layouts until you find one that works for your crafting habits.
- Protect Your Work Surface: Use appropriate coverings when working with paint, glue, or other messy materials.
- Update Your Workspace: Change decorations and storage arrangements as your craft interests develop.
Benefits of a DIY Crafts Desk
Creating a dedicated craft desk can offer several practical and creative advantages.
- Provides a designated space for handmade projects.
- Makes craft supplies easier to organize.
- Allows you to personalize your creative environment.
- Encourages experimentation with different materials.
- Can help you establish a regular crafting routine.
- Gives you an opportunity to reuse suitable materials.
- Supports different creative hobbies in one workspace.
The usefulness of a craft desk depends on its layout, the materials you use, and how well it fits your needs.
Creative Themes for Your DIY Crafts Desk
You can choose a theme for your craft desk based on your interests and preferred visual style.
Minimal Craft Desk
Use a simple color palette, labeled containers, and limited decorations to create a clean and uncluttered workspace.
Colorful Craft Desk
Combine bright storage boxes, decorative paper, and handmade accessories for a playful creative environment.
Recycled Craft Desk
Use suitable recycled materials to create organizers, trays, and desk decorations while exploring new crafting techniques.
Art-Focused Craft Desk
Arrange sketchbooks, drawing tools, paint supplies, and inspiration boards to support your artistic projects.
Stationery Craft Desk
Focus on notebooks, paper crafts, stickers, pens, and handmade stationery accessories.
Conclusion
A DIY crafts desk can become a creative workspace where you organize supplies, explore handmade projects, and express your personal style. From cardboard organizers and recycled jar storage to personalized nameplates and inspiration boards, there are many ways to improve your desk using simple materials.
You do not need a large budget or an elaborate setup to begin. Start by identifying the supplies you use most, choose a practical desk arrangement, and add handmade accessories that suit your interests.
Whether you enjoy paper crafts, painting, journaling, or other creative hobbies, a thoughtfully arranged DIY crafts desk can make your projects easier to manage and more enjoyable. Choose one method from this guide, gather your materials, and start building a workspace that inspires your creativity.