

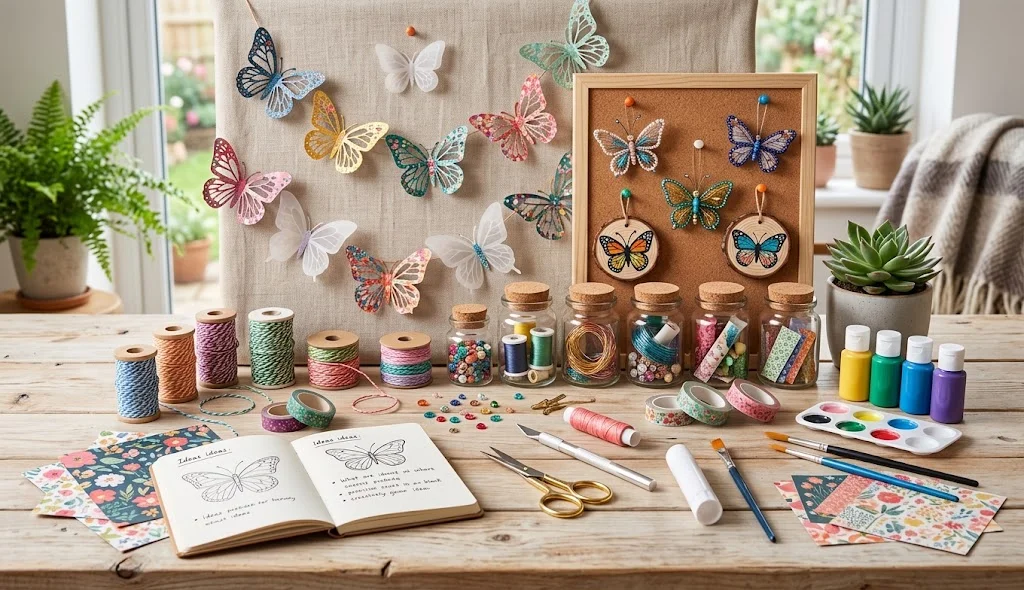
Butterflies are a wonderful source of inspiration for handmade art and creative decorations. Their colorful wings, delicate shapes, and natural beauty make them a popular theme for paper crafts, accessories, artwork, and decorative projects. If you enjoy making things with your hands, DIY crafts butterfly ideas can help you explore different crafting techniques while creating something beautiful.
You can make butterfly crafts using everyday materials such as paper, fabric, cardboard, beads, craft wire, and recycled supplies. Whether you want to decorate a room, create a handmade gift, or enjoy a relaxing art activity, butterfly crafts offer plenty of possibilities for beginners and experienced craft lovers.
In this guide, you will discover 12 creative DIY butterfly craft methods with materials, step-by-step instructions, and customization tips. Each project can be adapted to your preferred colors, patterns, and crafting style.
What Are DIY Crafts Butterfly?
DIY crafts butterfly projects are handmade creations inspired by butterfly shapes, wing patterns, and colorful natural designs. These crafts can include wall decorations, handmade accessories, greeting cards, art pieces, and creative displays.
Butterfly crafts can be made with affordable materials and simple tools. You can choose a realistic butterfly appearance or experiment with abstract shapes, geometric patterns, and imaginative colors.
The main purpose is to enjoy the creative process while turning basic supplies into personalized handmade artwork.
12 DIY Crafts Butterfly Methods
1. DIY Butterfly Window Hanging
Create a lightweight butterfly decoration for a window or a suitable indoor display. This project combines paper cutting, coloring, and simple hanging techniques.
Materials:
- Transparent craft film or lightweight colored paper
- Butterfly outline
- Scissors
- Markers
- String
- Tape or suitable hanging material
Method:
- Choose a butterfly shape with simple wing details.
- Trace the outline onto your selected material.
- Cut the butterfly carefully using appropriate tools.
- Decorate the wings with colorful patterns.
- Attach a short piece of string to the butterfly.
- Secure the hanging arrangement to a suitable indoor surface.
- Make several butterflies in different sizes for a layered display.
Use lightweight materials and secure the hanging pieces appropriately. Avoid obstructing windows or creating a hazard.
2. DIY Butterfly Fabric Brooch
Make a decorative butterfly brooch using fabric scraps and a suitable brooch backing. This project is useful for exploring fabric shapes and personalized accessories.
Materials:
- Fabric scraps
- Butterfly template
- Fabric scissors
- Needle and thread or fabric adhesive
- Felt
- Brooch backing
- Decorative beads (optional)
Method:
- Draw or print a butterfly outline.
- Trace the outline onto the fabric.
- Cut two matching butterfly shapes.
- Layer the pieces together to add thickness.
- Secure the layers with stitching or suitable fabric adhesive.
- Add small decorative details to the wings.
- Attach a brooch backing securely to the rear of the design.
Check that the brooch backing is securely attached before wearing it. Keep sharp components covered and away from skin.
3. DIY Butterfly Paper Fan Decoration
Create a dimensional butterfly decoration using folded paper. The fan-fold technique produces a textured wing effect without requiring complicated equipment.
Materials:
- Colored paper
- Scissors
- Glue
- Thin cardstock
- Markers
- String (optional)
Method:
- Select two sheets of paper in coordinating colors.
- Fold each sheet into an accordion pattern.
- Join the folded sections to create wing shapes.
- Secure the center with glue or a suitable fastener.
- Cut a small body shape from cardstock.
- Attach the body to the center of the wings.
- Add antennae and decorative patterns.
Experiment with different paper widths to create butterflies of various sizes.
4. DIY Butterfly Rock Painting
Turn smooth, clean stones into colorful butterfly-inspired artwork. This project is ideal for practicing patterns and painted designs.
Materials:
- Clean, smooth stones
- Acrylic paint
- Paintbrushes
- Pencil
- Fine detail brush
- Suitable protective finish (optional)
Method:
- Choose smooth stones with stable surfaces.
- Wash and dry the stones.
- Sketch a simple butterfly shape.
- Paint the wings using two or more colors.
- Add symmetrical dots, lines, and patterns.
- Paint the body and antennae.
- Allow the artwork to dry completely.
Use stones from appropriate sources and follow local rules when collecting natural materials. Do not place painted stones in natural areas where coatings could harm wildlife.
5. DIY Butterfly Hair Accessory
Create a butterfly-inspired hair accessory using a lightweight decorative shape and a suitable hair clip or headband.
Materials:
- Felt, foam, or fabric
- Butterfly template
- Scissors
- Craft glue or needle and thread
- Plain hair clip or headband
- Decorative beads (optional)
Method:
- Trace a butterfly shape onto your chosen material.
- Cut out the shape carefully.
- Create additional wing layers if desired.
- Decorate the wings with small patterns.
- Attach the butterfly to the hair clip or headband.
- Allow the adhesive to dry fully.
- Check the attachment before using the accessory.
Make sure the decoration is lightweight and that all components are secured safely.
6. DIY Butterfly Gift Tag
Design a handmade butterfly gift tag for birthdays, celebrations, or small presents. You can personalize the tag with names, short messages, and decorative details.
Materials:
- Cardstock
- Butterfly stencil or template
- Scissors
- Hole punch
- Ribbon
- Markers
- Decorative stickers
Method:
- Draw a butterfly shape on cardstock.
- Cut around the outline.
- Add a decorative border.
- Write a name or short message.
- Punch a small hole at the top.
- Thread ribbon through the hole.
- Attach the finished tag to suitable gift packaging.
Use different colors and lettering styles to match the occasion.
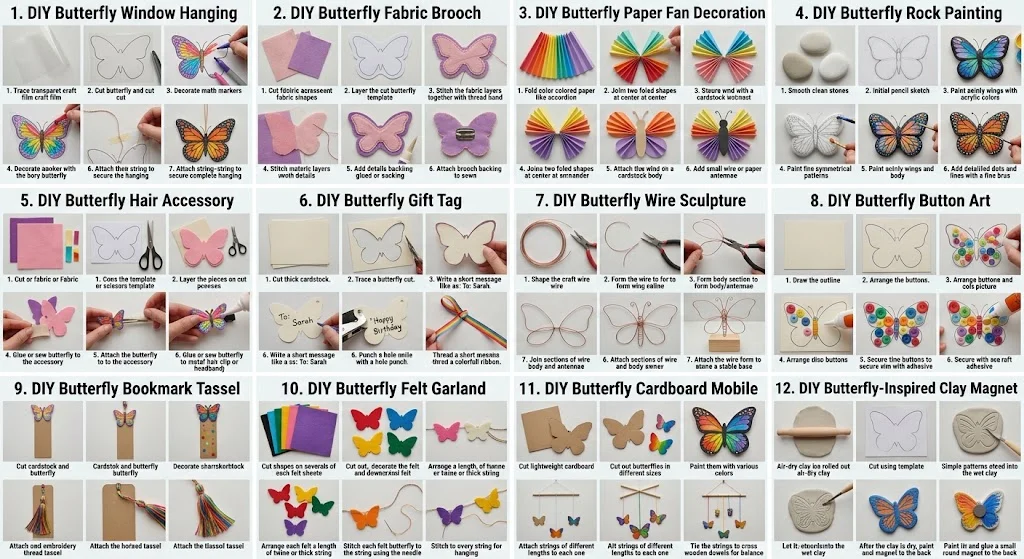
7. DIY Butterfly Wire Sculpture
Create a simple three-dimensional butterfly sculpture using craft wire and a stable display base. This project is suitable for people who enjoy shaping materials.
Materials:
- Craft wire
- Pliers suitable for craft use
- Wooden or cardboard base
- Decorative beads (optional)
- Paint or embellishments
Method:
- Sketch a butterfly design on paper.
- Use craft wire to shape the outer wing outlines.
- Form the body and antennae from additional wire.
- Join the sections securely.
- Attach the butterfly to a stable base.
- Add suitable decorative details.
- Adjust the wing shape to create a balanced display.
Use wire carefully because its ends can be sharp. Cover exposed ends and supervise children around tools and small components.
8. DIY Butterfly Button Art
Make a colorful butterfly picture by arranging buttons on a cardstock background. This craft offers a creative way to experiment with textures and patterns.
Materials:
- Cardstock or canvas board
- Buttons
- Pencil
- Craft glue
- Markers
- Decorative paper
Method:
- Draw a butterfly outline on the background.
- Choose buttons in different sizes and colors.
- Arrange the buttons inside the wing shapes.
- Test the arrangement before applying glue.
- Secure the buttons with suitable adhesive.
- Add paper or marker details around the wings.
- Let the artwork dry completely.
Keep small buttons away from young children who may put them in their mouths.
9. DIY Butterfly Bookmark Tassel
Create a decorative bookmark featuring a butterfly-shaped top and a colorful tassel. This craft can be used as a handmade reading accessory.
Materials:
- Thick cardstock
- Colored paper
- Scissors
- Hole punch
- Embroidery thread
- Glue
- Markers
Method:
- Cut a rectangular bookmark from cardstock.
- Draw and cut a small butterfly shape.
- Decorate the butterfly with patterns.
- Attach it to the top of the bookmark.
- Punch a hole near the upper edge.
- Make a tassel using embroidery thread.
- Attach the tassel securely.
Choose sturdy materials so the bookmark can withstand regular use.
10. DIY Butterfly Felt Garland
Create a soft decorative garland using felt butterflies and a string. This project can be adapted for celebrations, creative displays, and themed decorations.
Materials:
- Felt sheets
- Butterfly template
- Fabric scissors
- String
- Needle and thread or suitable glue
- Decorative beads (optional)
Method:
- Trace several butterfly shapes onto felt.
- Cut out the shapes carefully.
- Create different wing sizes if desired.
- Add small decorative details.
- Arrange the butterflies along the string.
- Secure each butterfly with stitching or suitable adhesive.
- Hang the garland on an appropriate indoor surface.
Use sturdy attachment points and avoid hanging the garland where it could become tangled.
11. DIY Butterfly Cardboard Mobile
Make a hanging mobile using lightweight cardboard butterflies. This craft combines cutting, coloring, and simple balance experiments.
Materials:
- Lightweight cardboard
- Butterfly templates
- Paint or markers
- String
- Wooden dowels or a suitable frame
- Glue
Method:
- Trace butterflies onto lightweight cardboard.
- Cut out several butterflies in different sizes.
- Decorate each shape with patterns and colors.
- Attach string to the butterflies.
- Prepare a stable hanging frame.
- Tie the butterfly strings at different lengths.
- Balance the mobile before displaying it.
Keep the mobile out of reach of young children and away from areas where it may interfere with movement.
12. DIY Butterfly-Inspired Clay Magnet
Create a butterfly-shaped clay decoration that can be converted into a fridge magnet using a suitable magnet and adhesive.
Materials:
- Air-dry clay
- Butterfly template or sketch
- Sculpting tools
- Acrylic paint
- Small suitable magnet
- Adhesive appropriate for the magnet and clay
Method:
- Roll the clay into an even thickness.
- Shape a butterfly using a template or by hand.
- Add simple wing patterns with sculpting tools.
- Allow the clay to dry according to the product instructions.
- Paint the butterfly with your preferred colors.
- Let the paint dry fully.
- Attach a suitable magnet securely to the back.
Check the magnet attachment before using the craft. Keep magnets away from young children and individuals who may accidentally swallow them.
Materials You Need for DIY Crafts Butterfly
Many butterfly craft projects can be created using basic art supplies. You can begin with a small craft collection and add materials as you explore new techniques.
Here are some useful supplies:
- Colored paper and cardstock
- Felt and fabric scraps
- Craft glue
- Scissors
- Markers and colored pencils
- Acrylic paint
- Paintbrushes
- Cardboard
- Embroidery thread
- Craft wire
- Buttons and beads
- Air-dry clay
- Ribbon and string
- Butterfly templates
- Decorative stickers
Choose materials according to the specific craft method. Read the product instructions for paints, adhesives, and other crafting supplies.
How to Choose Butterfly Craft Designs
Selecting a suitable design before starting can make your project more enjoyable. Consider the purpose of the craft, the materials you have available, and the amount of time you want to spend.
Choose a Simple Shape
Beginners can start with a basic butterfly outline that has large wings and limited details.
Select a Color Theme
Try pastel colors for a soft appearance, bright shades for a cheerful display, or contrasting colors for a bold artistic design.
Consider the Final Use
A paper butterfly may work well for a card or wall decoration, while felt or clay designs may be suitable for certain accessories or displays.
Plan the Size
Small butterfly designs are useful for gift tags and cards. Larger designs may be better suited to wall art or decorative displays.
Tips for Making Beautiful Butterfly Crafts
1. Use Symmetrical Patterns
Butterfly wings often have a balanced appearance. Try repeating similar shapes and colors on both sides of the design.
2. Experiment With Textures
Combine paper, felt, fabric, buttons, or clay to create different surfaces and visual effects.
3. Try Different Wing Shapes
You can create rounded wings, pointed wings, layered wings, or abstract shapes to develop your own style.
4. Reuse Craft Materials
Paper scraps, leftover fabric, cardboard, and old decorations can be used in butterfly projects.
5. Work Carefully on Small Details
Use appropriate tools and take your time when adding dots, lines, borders, and other decorative elements.
6. Allow Crafts to Dry
Paint and adhesive need time to dry. Follow product instructions before handling or displaying the finished craft.
DIY Crafts Butterfly for Different Occasions
Butterfly-themed projects can be adapted for different creative activities and events.
Birthday Decorations
Make butterfly gift tags, garlands, cards, or table decorations using bright colors and festive patterns.
Spring-Themed Crafts
Explore floral colors, nature-inspired designs, and lightweight butterfly displays.
Handmade Gifts
Create butterfly bookmarks, painted stones, personalized cards, or decorative accessories for friends and family.
School Projects
Paper butterflies, painted artwork, and cardboard mobiles can be used for suitable school art activities.
Room Decorations
Use butterfly wall art, hanging decorations, or garlands to create a colorful display.
Benefits of DIY Crafts Butterfly Projects
Butterfly crafts can provide opportunities to practice artistic skills and explore creative ideas.
Some potential benefits include:
- Encouraging imagination
- Practicing cutting and drawing techniques
- Exploring colors and patterns
- Creating personalized handmade gifts
- Reusing leftover materials
- Developing patience and attention to detail
- Enjoying creative activities during free time
You can adapt each project to your skill level and available materials.
How to Make Your Butterfly Crafts Unique
Adding personal details can help your handmade projects stand out. You can create original butterfly designs rather than following a single pattern.
Try these creative ideas:
- Use a custom color palette.
- Add your initials or a short message.
- Combine butterfly shapes with flowers or stars.
- Create a collection of butterflies in different sizes.
- Experiment with layered materials.
- Design your own wing patterns.
- Add textures using fabric, buttons, or paper.
Small changes can give a familiar craft a completely different appearance.
Conclusion
DIY crafts butterfly projects are a creative way to explore handmade art using paper, fabric, cardboard, clay, wire, and other accessible materials. From window hangings and fabric brooches to painted stones, gift tags, garlands, and clay magnets, there are many ways to turn butterfly-inspired designs into unique creations.
You do not need expensive equipment or advanced skills to begin. Choose a simple method, prepare your materials, and experiment with colors and patterns that reflect your personality.
Start your next DIY butterfly craft project today and enjoy creating beautiful handmade artwork that you can display, share, or give as a thoughtful gift.