

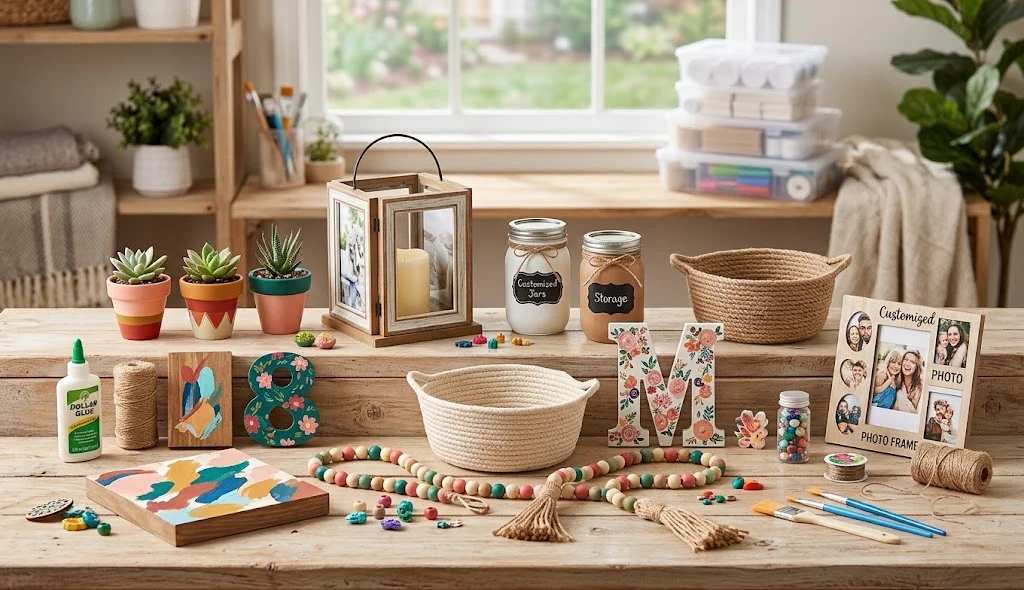
Creating beautiful handmade projects does not always require expensive supplies. DIY Crafts Dollar Tree ideas make it possible to explore your creativity with affordable materials and simple crafting techniques. With items such as craft sticks, glass containers, ribbons, foam sheets, baskets, faux flowers, and decorative accessories, you can create projects for many different purposes.
Dollar Tree-inspired crafts are especially useful for beginners because you can experiment with colors, textures, and designs without investing heavily in materials. A simple item from a discount store can often become a personalized decoration, organizer, gift, or creative display with a few additional supplies.
In this guide, you will find 15 DIY Crafts Dollar Tree methods that can inspire your next budget-friendly project.
What Are DIY Crafts Dollar Tree?
DIY Crafts Dollar Tree projects are handmade creations that use inexpensive craft and household supplies commonly available from Dollar Tree or similar discount stores. The goal is to combine affordable materials with creativity to produce something useful or decorative.
These projects can range from seasonal decorations and storage solutions to handmade gifts and colorful room accessories. You can also replace individual materials with similar items that you already have at home.
The best part is that you can customize almost every project according to your preferred colors, patterns, and crafting style.
15 DIY Crafts Dollar Tree Methods
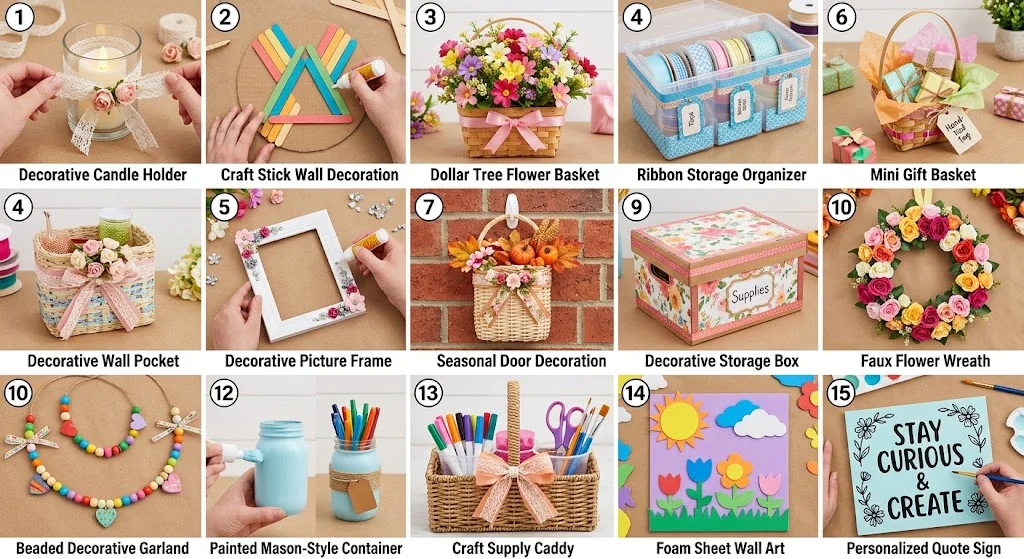
1. DIY Decorative Candle Holder
Create an attractive decorative candle holder using inexpensive glass containers and craft decorations.
Materials:
- Small glass container
- Decorative ribbon
- Craft glue
- Faux flowers or embellishments
- Battery-operated LED candle
Method:
- Clean and dry the glass container.
- Decide where you want to place the decorative materials.
- Wrap ribbon around the outside.
- Secure the ribbon with suitable craft glue.
- Add small decorative flowers or embellishments.
- Allow the adhesive to dry completely.
- Place a battery-operated LED candle inside.
Using an LED candle provides a simple decorative effect without an open flame.
2. DIY Craft Stick Wall Decoration
Craft sticks can be arranged into geometric patterns to create a simple wall decoration.
Materials:
- Wooden craft sticks
- Craft glue
- Acrylic paint
- Cardboard backing
- Decorative elements
Method:
- Arrange the craft sticks into a pattern.
- Test the arrangement before gluing.
- Paint the sticks in your chosen colors.
- Allow them to dry.
- Glue the sticks onto a firm backing.
- Add small decorative elements.
- Display the finished design on a suitable surface.
Try triangles, diamonds, stars, or layered geometric patterns.
3. DIY Dollar Tree Flower Basket
Transform an inexpensive basket into a colorful decorative flower arrangement.
Materials:
- Small basket
- Faux flowers
- Floral foam
- Decorative ribbon
- Craft scissors
Method:
- Place floral foam inside the basket.
- Trim the artificial flowers to different lengths.
- Arrange the taller flowers toward the center or back.
- Add shorter flowers around the edges.
- Fill empty spaces with greenery.
- Tie a ribbon around the basket.
- Adjust the arrangement until it looks balanced.
This craft can be customized for different seasons and occasions.
4. DIY Ribbon Storage Organizer
Turn a simple container into an organizer for ribbons, craft cords, or other lightweight supplies.
Materials:
- Plastic container
- Decorative paper
- Glue
- Labels
- Ribbon
Method:
- Clean the container.
- Measure decorative paper for the outside.
- Attach the paper with craft glue.
- Add a label to identify the contents.
- Decorate the edges with ribbon.
- Let everything dry.
- Use the organizer to store crafting materials.
You can make several matching organizers for a more organized craft area.
5. DIY Decorative Picture Frame
Give a basic picture frame a new appearance with inexpensive craft decorations.
Materials:
- Plain picture frame
- Paint
- Faux flowers or small embellishments
- Craft glue
- Decorative ribbon
Method:
- Remove the glass and picture if necessary.
- Paint the frame.
- Let the paint dry completely.
- Arrange decorative elements around selected corners.
- Glue the decorations into place.
- Add a small ribbon detail if desired.
- Insert your preferred photograph or artwork.
Keep decorations away from areas that interfere with the frame’s opening and closing.
6. DIY Mini Gift Basket
Create a personalized gift basket using inexpensive containers and decorative supplies.
Materials:
- Small basket or container
- Tissue paper
- Ribbon
- Gift tag
- Suitable small gifts
Method:
- Select a basket that matches the size of your gifts.
- Add tissue paper to the bottom.
- Arrange the gifts inside.
- Fill empty spaces with additional tissue paper.
- Tie a ribbon around the basket.
- Create a personalized gift tag.
- Attach the tag to the handle.
You can customize the basket for birthdays, celebrations, teachers, or friends.
7. DIY Decorative Wall Pocket
Create a simple wall pocket for lightweight items using an inexpensive basket or suitable container.
Materials:
- Small basket
- Ribbon
- Decorative flowers
- Craft glue
- Wall-safe hanging hardware
Method:
- Select a lightweight basket.
- Decorate the front with ribbon or faux flowers.
- Secure the decorations using suitable adhesive.
- Allow everything to dry.
- Attach appropriate wall-safe hardware.
- Hang the basket securely.
- Use it for lightweight decorative or organizational items.
Check the weight limit of the hanging hardware before adding anything to the pocket.
8. DIY Seasonal Door Decoration
Create a seasonal door decoration from inexpensive craft supplies.
Materials:
- Foam or cardboard base
- Ribbon
- Faux flowers
- Decorative shapes
- Craft glue
- Paint
Method:
- Choose a seasonal theme.
- Prepare a circular or decorative base.
- Paint the base if desired.
- Arrange flowers, ribbons, and other decorations.
- Glue the pieces into position.
- Add a hanging ribbon.
- Allow the project to dry before displaying it.
Change the colors and decorations to create different designs throughout the year.
9. DIY Decorative Storage Box
Give a plain storage box a personalized appearance using paper, ribbon, and labels.
Materials:
- Storage box
- Decorative paper
- Glue
- Ribbon
- Labels
- Scissors
Method:
- Measure the sides of the box.
- Cut decorative paper to fit.
- Apply glue evenly.
- Attach the paper and smooth out wrinkles.
- Decorate the edges with ribbon.
- Add a label to the front.
- Allow the box to dry before using it.
These boxes can be used to organize lightweight craft supplies, stationery, or accessories.
10. DIY Beaded Decorative Garland
Make a simple decorative garland with beads, string, and lightweight embellishments.
Materials:
- Craft beads
- String
- Ribbon
- Lightweight decorative shapes
- Scissors
Method:
- Choose two or three coordinating colors.
- Cut the string to your desired length.
- Arrange beads in a repeating pattern.
- Add lightweight decorative shapes.
- Tie secure knots at the ends.
- Add ribbon sections if desired.
- Display the garland in an appropriate location.
Experiment with different bead patterns to create multiple designs.
11. DIY Faux Flower Wreath
Use affordable artificial flowers to create a colorful wreath for a door or interior display.
Materials:
- Foam or suitable wreath base
- Faux flowers
- Greenery
- Ribbon
- Craft glue
Method:
- Prepare the wreath base.
- Separate the flowers and greenery.
- Plan the arrangement around the base.
- Place larger flowers first.
- Fill spaces with greenery and smaller flowers.
- Secure the pieces with suitable adhesive.
- Add a ribbon for hanging.
Choose a limited color palette to give the wreath a coordinated appearance.
12. DIY Painted Mason-Style Container
Decorate a simple glass container with paint and craft details to create a colorful display container.
Materials:
- Glass container
- Glass-appropriate paint
- Paintbrush
- Ribbon
- Decorative label
Method:
- Clean and dry the container.
- Apply paint suitable for the glass surface.
- Allow each layer to dry according to the paint instructions.
- Add a simple design or pattern.
- Attach a decorative label.
- Wrap ribbon around the top.
- Use the finished container for suitable decorative purposes.
If the container will hold food or beverages, only use materials specifically rated for that purpose.
13. DIY Craft Supply Caddy
Create a portable organizer for brushes, markers, scissors, and other craft supplies.
Materials:
- Plastic containers
- Small basket
- Decorative paper
- Labels
- Glue
- Ribbon
Method:
- Choose several containers that fit inside the basket.
- Decorate the containers with paper or labels.
- Sort your supplies by type.
- Place each group into a separate container.
- Arrange the containers inside the basket.
- Add a handle decoration with ribbon.
- Label each section for easy identification.
This project is especially useful when you frequently move your crafting supplies between work areas.
14. DIY Foam Sheet Wall Art
Use colorful foam sheets to create layered decorative artwork.
Materials:
- Foam sheets
- Cardboard
- Scissors
- Craft glue
- Pencil
- Ruler
Method:
- Choose a simple design.
- Sketch the shapes on foam sheets.
- Carefully cut the shapes.
- Arrange them on cardboard.
- Create layers by placing smaller shapes over larger ones.
- Glue the pieces into place.
- Let the artwork dry before displaying it.
Try flowers, abstract shapes, letters, stars, or other original designs.
15. DIY Personalized Quote Sign
Create a handmade sign featuring a short inspirational phrase or personalized message.
Materials:
- Wooden board or cardboard
- Paint
- Markers
- Decorative ribbon
- Stencils
- Craft glue
Method:
- Prepare the board or cardboard surface.
- Paint the background.
- Let it dry completely.
- Sketch your chosen lettering.
- Trace the letters using markers or paint.
- Add a simple decorative border.
- Finish with ribbon or other lightweight embellishments.
A personalized sign can make an inexpensive craft feel more meaningful.
Best Supplies for DIY Crafts Dollar Tree
You do not need a large collection of materials to get started. Consider keeping a basic craft box containing:
- Wooden craft sticks
- Cardboard
- Foam sheets
- Acrylic paint
- Paintbrushes
- Craft glue
- Ribbons
- Twine
- Beads
- Faux flowers
- Decorative paper
- Small baskets
- Glass or plastic containers
- Stickers
- Markers
- Labels
Many of these supplies can be mixed and matched across multiple projects.
Tips for Making Budget-Friendly Crafts
Plan Before You Buy
Make a list of the materials required for your project before shopping. This can help prevent buying supplies that you will not use.
Reuse Materials
Save clean cardboard, containers, ribbons, and packaging materials from previous projects. These items can become useful craft components.
Keep Designs Simple
A simple design can often look just as attractive as a complicated one. Focus on a good color combination and neat finishing.
Combine Textures
Mix smooth paper with wood, fabric, ribbon, or faux flowers to give your craft more visual interest.
Customize Store-Bought Items
Instead of building every project from scratch, start with an inexpensive ready-made item and personalize it with paint, ribbon, labels, or decorations.
How to Make Dollar Tree Crafts Look More Professional
The finishing details can make a significant difference in the appearance of an inexpensive DIY project.
First, keep your color palette consistent. Using too many unrelated colors can make a craft appear visually busy. Next, measure materials before cutting them and take your time when attaching decorations.
Clean edges, evenly placed decorations, and properly dried paint can also improve the finished appearance. If you are creating several pieces for the same space, repeat one or two colors throughout the projects to create a coordinated look.
Most importantly, allow each layer of paint or adhesive to dry properly before adding another material.
DIY Crafts Dollar Tree for Different Occasions
Dollar Tree-inspired crafts can be adapted for many occasions.
Birthdays
Create gift baskets, personalized signs, decorative garlands, and simple party decorations.
Holidays
Use seasonal colors and inexpensive decorative materials to create wreaths, ornaments, and displays.
Weddings
Craft simple table decorations, favor packaging, signs, and floral displays using suitable materials.
Back-to-School
Create pencil holders, supply organizers, notebook decorations, and desk accessories.
Handmade Gifts
Personalized containers, decorative frames, baskets, and signs can become thoughtful handmade presents.
Benefits of DIY Crafts Dollar Tree
Affordable crafting projects can provide more than just attractive decorations. They can also encourage creativity and help you develop practical crafting skills.
Some benefits include:
- Low-cost experimentation
- Creative self-expression
- Opportunities to reuse materials
- Personalized home and gift projects
- Practice with painting and design
- Fun activities for craft enthusiasts
- Flexible projects for different skill levels
You can start with one simple project and gradually experiment with more complicated techniques.
Conclusion
DIY Crafts Dollar Tree projects are a practical way to explore creativity while keeping material costs manageable. With simple supplies such as craft sticks, ribbons, faux flowers, containers, foam sheets, and decorative paper, you can create personalized decorations, organizers, gifts, and art projects.
The key is not the price of the materials but how you combine them. Try different colors, textures, patterns, and arrangements until you discover a style that feels right for your project.
Choose one of these 15 Dollar Tree DIY craft ideas, gather your supplies, and start creating something unique from affordable materials.