

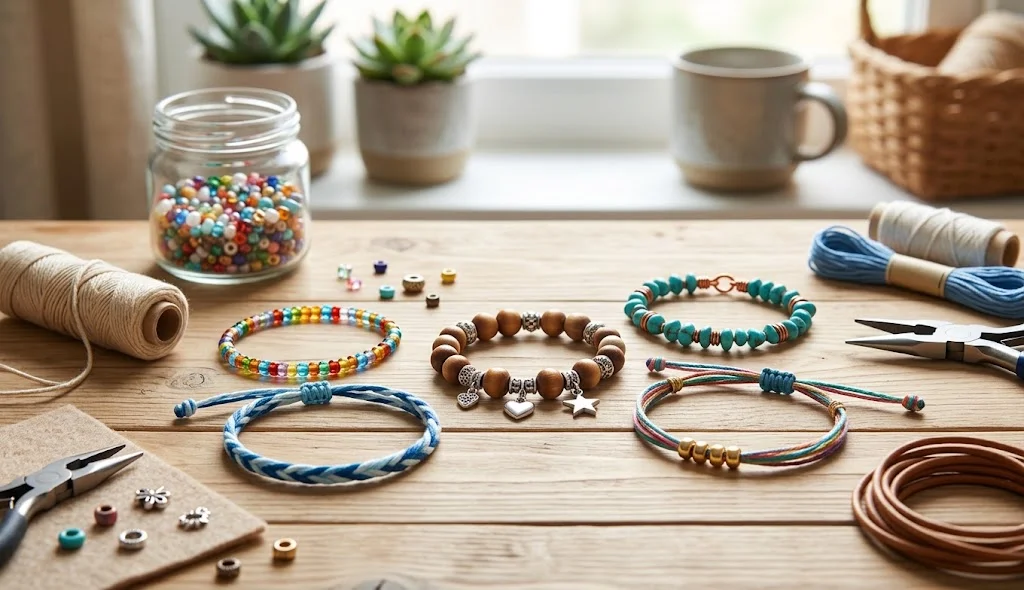
Handmade bracelets are one of the easiest ways to start making your own jewelry. You can create beautiful accessories with simple materials such as thread, ribbon, buttons, fabric, wire, charms, and recycled items.
DIY crafts jewelry bracelets easy projects are especially useful for beginners because most designs require only a few materials and basic techniques. You can also customize the colors, patterns, and decorations to create bracelets that match your personal style.
In this guide, you will discover simple DIY jewelry bracelet methods that are creative, affordable, and easy to make at home.
What Are DIY Crafts Jewelry Bracelets Easy?
DIY crafts jewelry bracelets easy are simple handmade bracelet projects designed for people who want to create their own accessories without complicated jewelry-making equipment.
These projects can use everyday craft materials along with basic jewelry supplies. Some bracelets can be finished in just a few steps, making them suitable for beginners, students, and anyone looking for a quick creative activity.
DIY Crafts Jewelry Bracelets Easy Methods
1. DIY Ribbon Wrap Bracelet
Create a colorful bracelet using ribbon and a simple fastening technique.
Materials:
- Wide ribbon
- Thin cord
- Scissors
- Small button
- Needle and thread
Method:
- Measure the ribbon around your wrist.
- Add a little extra length for fastening.
- Cut the ribbon to size.
- Fold the ends neatly and stitch them.
- Sew a small button near one end.
- Create a loop at the opposite end.
- Wrap the bracelet around your wrist and secure it with the button.
Use different ribbon patterns to create multiple styles.
2. DIY Button Stack Bracelet
Turn colorful buttons into a playful handmade bracelet.
Materials:
- Small buttons
- Stretch cord
- Scissors
- Large-eye needle
Method:
- Choose buttons in colors that work well together.
- Cut a piece of stretch cord slightly longer than your wrist.
- Thread the buttons onto the cord.
- Arrange different button sizes throughout the bracelet.
- Check the fit around your wrist.
- Tie the cord securely with several knots.
- Trim excess cord.
This is a simple way to reuse spare buttons from old craft supplies.
3. DIY Fabric Strip Bracelet
Use leftover fabric to make a soft braided bracelet.
Materials:
- Fabric scraps
- Scissors
- Thread
- Small decorative bead
Method:
- Cut three long, narrow fabric strips.
- Tie the strips together at one end.
- Braid them evenly.
- Add a decorative bead near the center if desired.
- Continue braiding until the bracelet reaches the desired length.
- Tie the ends securely.
- Trim loose fabric threads.
Choose contrasting fabric colors for a more noticeable design.
4. DIY Chain and Ribbon Bracelet
Combine a small chain with ribbon for a simple decorative accessory.
Materials:
- Lightweight jewelry chain
- Ribbon
- Jump rings
- Jewelry pliers
- Scissors
- Clasp
Method:
- Measure the chain around your wrist.
- Cut it to the appropriate length.
- Thread a narrow ribbon through selected chain sections.
- Tie or secure the ribbon ends neatly.
- Attach a clasp using jump rings.
- Check all connections before wearing the bracelet.
Try satin ribbon for a softer appearance or textured ribbon for a more casual look.
5. DIY Yarn Friendship Bracelet
Make a colorful bracelet using several strands of yarn.
Materials:
- Three or more yarn colors
- Scissors
- Tape
Method:
- Cut several equal-length strands.
- Tie them together at one end.
- Secure the knot to a table with tape.
- Separate the strands by color.
- Braid or twist them together.
- Continue until the bracelet reaches your desired length.
- Tie the final knot securely.
Use different color combinations to make personalized friendship bracelets.
6. DIY Leather-Style Cord Bracelet
Create a simple bracelet using decorative cord.
Materials:
- Faux leather cord or craft cord
- Decorative bead
- Button
- Thread
- Scissors
Method:
- Measure the cord around your wrist.
- Add extra length for the fastening.
- Fold one end into a small loop.
- Secure the loop with thread.
- Attach a button to the opposite side.
- Add a decorative bead to the center.
- Close the bracelet using the button and loop.
This creates a minimal bracelet with a handmade appearance.
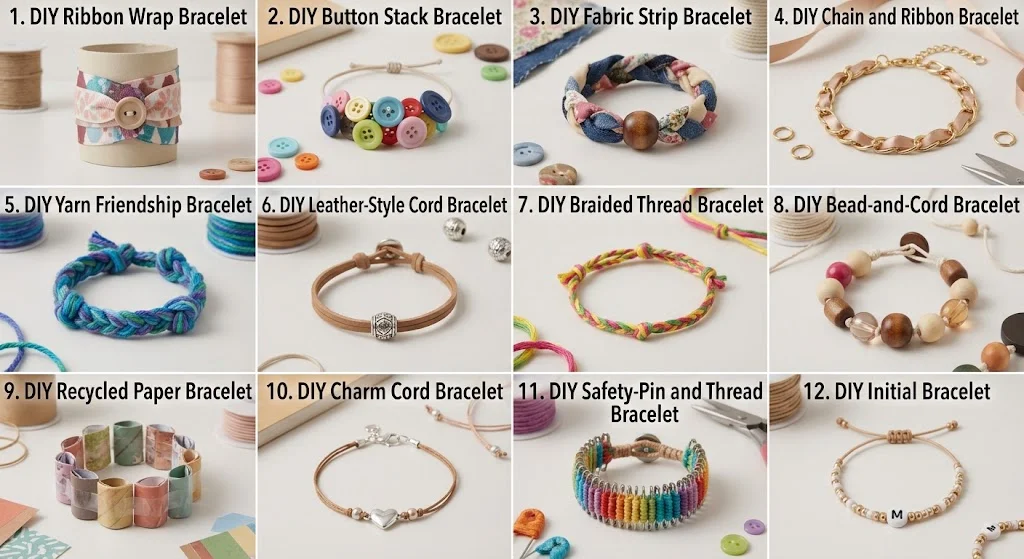
7. DIY Braided Thread Bracelet
Make a lightweight bracelet from colorful embroidery thread.
Materials:
- Embroidery thread
- Scissors
- Tape
Method:
- Cut several strands of thread.
- Tie all strands together.
- Separate them into three groups.
- Braid the groups evenly.
- Add a small knot or decorative bead near the end.
- Tie the bracelet around your wrist.
Experiment with two-color and three-color combinations.
8. DIY Bead-and-Cord Bracelet
Create a simple bracelet using larger beads and cotton cord.
Materials:
- Decorative beads
- Cotton cord
- Scissors
- Small clasp or button
Method:
- Cut two pieces of cord.
- Tie them together at one end.
- Thread beads onto selected sections.
- Leave small gaps between bead groups.
- Continue until you reach the desired length.
- Attach a clasp or button fastening.
- Trim the extra cord.
Use wooden, acrylic, or lightweight decorative beads depending on the look you want.
9. DIY Recycled Paper Bracelet
Turn colorful paper into lightweight bracelet decorations.
Materials:
- Decorative paper
- Glue
- Scissors
- Clear protective tape
- Elastic cord
Method:
- Cut paper into narrow strips.
- Roll or fold the strips into small decorative shapes.
- Secure each shape with glue.
- Cover the pieces with clear protective tape.
- Thread them onto elastic cord.
- Tie the cord securely.
This project is particularly useful for using leftover scrapbook paper.
10. DIY Charm Cord Bracelet
Create a personalized bracelet with a single decorative charm.
Materials:
- Waxed cord
- Decorative charm
- Two small beads
- Scissors
- Clasp
Method:
- Cut two equal lengths of cord.
- Thread the charm onto the center.
- Add one bead to each side.
- Tie small knots to keep the beads in position.
- Adjust the length around your wrist.
- Attach the fastening.
- Secure all knots before wearing.
Choose a charm that represents a favorite hobby, initial, symbol, or interest.
11. DIY Safety-Pin and Thread Bracelet
Create a textured bracelet by combining craft-safe safety pins with colorful thread.
Materials:
- Small craft-safe safety pins
- Embroidery thread
- Strong cord
- Scissors
- Button or clasp
Method:
- Cut two pieces of strong cord.
- Arrange the safety pins along the cords.
- Wrap colored thread around selected sections.
- Secure the thread with small knots.
- Connect the ends using a button or suitable clasp.
- Check that all components are firmly attached.
Keep the pins securely closed and avoid sharp exposed points.
12. DIY Initial Bracelet
Make a personalized bracelet featuring an initial.
Materials:
- Elastic cord
- Letter bead
- Small decorative beads
- Scissors
Method:
- Choose the letter bead for your bracelet.
- Select several small beads that complement it.
- Cut elastic cord to the required length.
- Place the initial bead in the center.
- Add matching beads on both sides.
- Check the fit around your wrist.
- Tie several secure knots and trim the excess.
This makes a simple personalized accessory or handmade gift.
Tips for Making Easy DIY Jewelry Bracelets
- Measure your wrist before cutting any cord or ribbon.
- Leave a little extra material for knots and fasteners.
- Use lightweight materials for comfortable bracelets.
- Choose two or three complementary colors instead of overcrowding the design.
- Secure knots tightly before wearing the bracelet.
- Test decorative pieces to make sure they are firmly attached.
- Keep small beads and jewelry components away from young children.
- Store finished bracelets separately to prevent tangling.
- Mix textures such as ribbon, cord, beads, and fabric for more interesting designs.
Best Materials for Easy Bracelet Crafts
You can keep a small collection of basic materials for creating different DIY crafts jewelry bracelets easy projects:
- Embroidery thread
- Stretch cord
- Ribbon
- Fabric scraps
- Wooden beads
- Acrylic beads
- Buttons
- Decorative charms
- Faux leather cord
- Cotton cord
- Jewelry chain
- Letter beads
- Craft-safe safety pins
How to Customize Your DIY Bracelets
One of the biggest advantages of making bracelets yourself is that you can change almost every part of the design.
For a minimal bracelet, use one color and a single charm. For a colorful bracelet, combine several shades of thread or beads. If you prefer a personalized accessory, add an initial, meaningful symbol, or favorite color.
You can also create matching bracelets for friends by using the same pattern with different color combinations.
Easy Bracelet Ideas for Different Occasions
For everyday wear:
Try a simple cord, ribbon, or braided thread bracelet.
For friendship gifts:
Make matching yarn or braided bracelets using different colors.
For personalized gifts:
Use initial beads, charms, or meaningful colors.
For creative activities:
Experiment with buttons, fabric strips, recycled paper, and leftover craft materials.
Why Make DIY Jewelry Bracelets?
Making your own bracelets is an inexpensive way to explore jewelry design. You can experiment with colors, textures, patterns, and fastening techniques without needing a large collection of specialized tools.
DIY bracelets can also be personalized more easily than many ready-made accessories. A simple cord bracelet can become unique simply by adding a special charm or letter bead.
Final Thoughts
DIY crafts jewelry bracelets easy projects are perfect for beginners who want to make attractive handmade accessories with simple materials. From ribbon wraps and button bracelets to braided thread designs, charm bracelets, fabric creations, and personalized initial bracelets, there are many easy techniques to explore.
Start with a simple design and gradually experiment with different materials and patterns. With a little creativity, everyday craft supplies can become unique bracelets that match your personal style.