

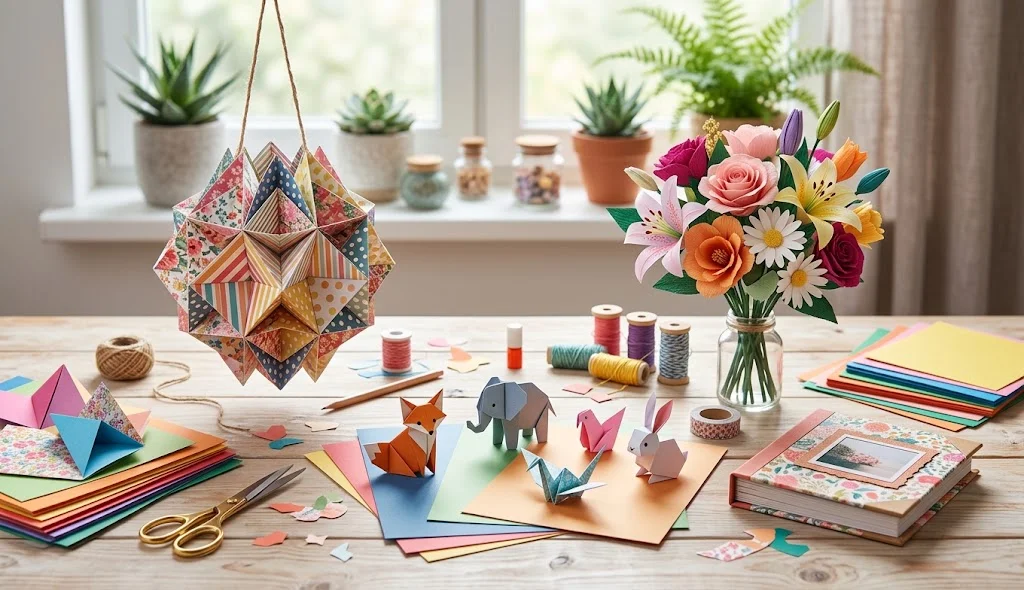
Paper is one of the most versatile materials for handmade projects. With a few basic supplies, you can create beautiful decorations, useful accessories, creative gifts, and fun activities. DIY Crafts z Papieru, which means DIY paper crafts, is a great topic for anyone who enjoys making unique projects at home.
Paper crafts are affordable, beginner-friendly, and suitable for different age groups. You can use colored paper, newspapers, cardstock, recycled paper, and old magazines to create attractive handmade items. In this guide, you will discover creative DIY Crafts z Papieru methods that are different from common paper flower, paper bookmark, paper gift box, and paper doll projects.
What Are DIY Crafts z Papieru?
DIY Crafts z Papieru refers to handmade projects created primarily with paper. The phrase is commonly associated with Polish paper crafts, while the English equivalent is DIY paper crafts.
These projects can include decorative artwork, paper accessories, creative displays, educational crafts, and handmade organizers. Paper is easy to cut, fold, roll, and decorate, making it suitable for both simple and advanced crafting.
12 DIY Crafts z Papieru Methods
1. DIY Paper Quilling Wall Art
Create attractive wall artwork using thin paper strips and quilling techniques.
Materials:
- Colored paper strips
- Cardstock
- Glue
- Scissors
- Pencil
- Quilling tool or toothpick
Method:
- Cut colored paper into thin, even strips.
- Roll the strips into circles using a quilling tool or toothpick.
- Shape the paper coils into leaves, spirals, teardrops, and other forms.
- Arrange the shapes on a cardstock background.
- Glue the pieces into a floral, geometric, or abstract design.
- Allow the artwork to dry.
- Place it inside a frame or display it on a wall.
Paper quilling is an excellent project for a video tutorial because each shape can be demonstrated through close-up shots.
2. DIY Paper Woven Placemat
Make a decorative paper placemat using a simple weaving technique.
Materials:
- Two or more colors of paper
- Ruler
- Pencil
- Scissors
- Glue
Method:
- Cut a rectangular sheet of paper for the base.
- Draw evenly spaced lines along the base.
- Cut along the lines while leaving a border at the top and bottom.
- Cut additional paper strips in another color.
- Weave the strips over and under the base sections.
- Alternate the weaving pattern in each row.
- Secure the edges with glue.
- Trim the sides for a neat finish.
Use thicker paper or cardstock for a stronger decorative placemat.
3. DIY Paper Accordion Fan
Create a colorful folding fan for decoration or a craft activity.
Materials:
- Colored paper
- Ruler
- Pencil
- Glue
- Scissors
- Decorative stickers
Method:
- Choose a rectangular piece of paper.
- Fold the paper back and forth into equal sections.
- Press each fold carefully to create an accordion shape.
- Fold the accordion in half.
- Glue the lower sections together to form a fan.
- Decorate the surface with stickers or drawings.
- Make several fans in different colors and sizes.
You can join multiple fans together to create a larger wall decoration.
4. DIY Paper Bead Necklace
Turn colorful paper strips into lightweight decorative beads.
Materials:
- Magazine pages or colored paper
- Scissors
- Glue
- String
- Pencil or thin stick
Method:
- Cut paper into long triangular strips.
- Begin rolling a strip around a pencil or thin stick.
- Apply a small amount of glue near the end.
- Remove the finished bead carefully.
- Create beads in different colors and lengths.
- Allow the glue to dry.
- Thread the beads onto string to create a decorative necklace.
For wearable items, use suitable paper and secure all components carefully. This project is intended as a lightweight craft accessory.
5. DIY Paper Tube Pencil Holder
Reuse paper tubes to create a decorative desk accessory.
Materials:
- Paper tubes
- Cardboard
- Colored paper
- Glue
- Scissors
- Decorative tape
Method:
- Collect clean paper tubes of similar sizes.
- Cut them to different heights if desired.
- Create a sturdy cardboard base.
- Glue the tubes upright onto the base.
- Cover the tubes with colored or patterned paper.
- Add decorative tape around the edges.
- Use the compartments to store pencils, markers, and other lightweight supplies.
Make sure the base is strong enough to support the items you plan to store.
6. DIY Paper Shadow Box
Create layered paper artwork inside a box frame.
Materials:
- Cardstock
- Small box frame
- Craft knife
- Cutting mat
- Glue
- Pencil
Method:
- Choose a simple design such as mountains, trees, stars, or a city skyline.
- Draw the design on several cardstock sheets.
- Carefully cut the shapes using appropriate cutting tools.
- Add spacers between the paper layers.
- Arrange the layers inside the box frame.
- Secure the pieces with glue.
- Display the completed shadow box in a well-lit area.
Safety tip: Craft knives should only be used by adults or under close adult supervision.
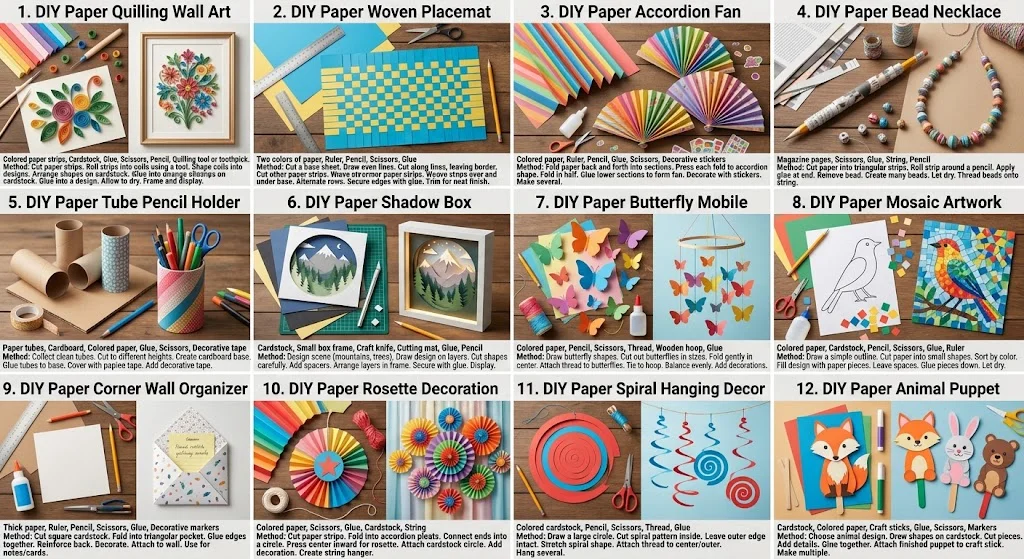
7. DIY Paper Butterfly Mobile
Make a hanging mobile with paper butterflies.
Materials:
- Colored paper
- Pencil
- Scissors
- Thread
- Wooden stick or embroidery hoop
- Glue
Method:
- Draw butterfly shapes on colored paper.
- Cut out several butterflies in different sizes.
- Fold each butterfly gently along the center.
- Attach thread to the butterflies.
- Tie the threads to a wooden stick or hoop.
- Balance the pieces so they hang evenly.
- Add small paper shapes for additional decoration.
This project is suitable for decorating a study area, creative corner, or party space.
8. DIY Paper Mosaic Artwork
Create a colorful mosaic picture from small paper pieces.
Materials:
- Colored paper
- Cardstock
- Pencil
- Scissors
- Glue
- Ruler
Method:
- Draw a simple outline on cardstock.
- Cut colored paper into small squares, triangles, or irregular shapes.
- Sort the pieces by color.
- Fill the outlined design with the paper pieces.
- Leave small spaces between some pieces for a mosaic effect.
- Glue the pieces down carefully.
- Let the artwork dry before displaying it.
Try creating abstract designs, landscapes, geometric patterns, or simple animals.
9. DIY Paper Corner Wall Organizer
Create a lightweight corner organizer for notes and small paper items.
Materials:
- Thick paper or cardstock
- Ruler
- Pencil
- Scissors
- Glue
- Decorative markers
Method:
- Cut a square sheet of cardstock.
- Fold it into a triangular pocket.
- Glue the appropriate edges together.
- Reinforce the back with an additional paper layer.
- Decorate the front with patterns or lettering.
- Attach the organizer to a suitable wall surface.
- Use it to hold lightweight notes, reminders, or cards.
Do not overload the organizer, and use removable mounting materials when appropriate.
10. DIY Paper Rosette Decoration
Make decorative paper rosettes for parties and wall displays.
Materials:
- Colored paper
- Scissors
- Glue
- Cardstock
- String
Method:
- Cut paper into long rectangular strips.
- Fold the strips into accordion pleats.
- Connect the ends to form a circular shape.
- Press the center inward to create a rosette.
- Attach a cardstock circle to the center for support.
- Add a decorative symbol, letter, or pattern.
- Attach string to the back if you want to hang the rosette.
Create rosettes in different sizes to produce a layered decoration.
11. DIY Paper Spiral Hanging Decor
Create a simple hanging decoration using curved paper spirals.
Materials:
- Colored cardstock
- Pencil
- Scissors
- Thread
- Glue
Method:
- Draw a large circle on cardstock.
- Cut the circle into a spiral pattern.
- Leave the outer section intact as you cut inward.
- Slowly stretch the spiral to create a hanging shape.
- Attach thread to the center or outer section.
- Add several spirals in different colors.
- Hang them from a ceiling hook or suitable display structure.
Keep the decoration lightweight and away from fans or other moving objects.
12. DIY Paper Animal Puppet
Create a paper puppet for storytelling and creative play.
Materials:
- Cardstock
- Colored paper
- Craft sticks
- Glue
- Scissors
- Markers
Method:
- Choose an animal design such as a fox, cat, bird, or rabbit.
- Draw the head and body shapes on cardstock.
- Cut out the pieces.
- Add ears, eyes, facial details, and patterns.
- Glue the pieces together.
- Attach the finished character to a craft stick.
- Create multiple puppets for a short storytelling activity.
Use age-appropriate materials and supervise young children during cutting and gluing.
Tips for Making Creative DIY Crafts z Papieru
Choose the Right Paper
Use thin paper for folding and lightweight decorations. Cardstock is more suitable for structures that need additional strength.
Measure Before Cutting
Using a ruler and pencil can help you create clean shapes and even folds.
Combine Different Textures
Mix smooth paper, patterned magazine pages, and textured cardstock to create more interesting results.
Use Recycled Paper
Old newspapers, magazines, paper packaging, and unused sheets can be repurposed into new crafts.
Experiment With Colors
Try complementary colors, monochromatic designs, or bright color combinations depending on the project.
Let Glue and Paint Dry
Allow each layer to dry before adding more pieces. This helps prevent movement and damage to the finished craft.
Benefits of DIY Crafts z Papieru
Paper crafts can be useful for both creativity and learning. Some benefits include:
- Encouraging imagination and artistic expression.
- Developing hand coordination and cutting skills.
- Providing affordable crafting activities.
- Offering opportunities to reuse paper materials.
- Creating handmade decorations for events.
- Supporting creative activities for children and adults.
- Helping beginners learn basic folding, cutting, and assembly techniques.
Paper Craft Ideas for Different Occasions
For Home Decoration
Paper quilling artwork, accordion fans, rosettes, and shadow boxes can be used as decorative displays.
For School Projects
Paper mosaics, animal puppets, and paper weaving projects can support creative assignments.
For Parties
Paper rosettes, butterfly mobiles, and spiral decorations can be customized to match a party theme.
For Handmade Gifts
Paper bead accessories, personalized artwork, and handmade paper decorations can be prepared as thoughtful gifts.
Safety Tips for Paper Crafts
- Use scissors carefully and choose age-appropriate tools.
- Adults should supervise children when using craft knives.
- Use glue and paints according to their product instructions.
- Keep small craft pieces away from young children who may swallow them.
- Maintain a clean crafting surface.
- Allow finished projects to dry before handling them.
- Avoid placing paper decorations near open flames or heat sources.
Conclusion
DIY Crafts z Papieru offers many creative opportunities for people who enjoy handmade projects. From paper quilling wall art and woven placemats to paper beads, shadow boxes, mosaics, and animal puppets, paper can be transformed into decorative and useful creations.
You can begin with basic materials and gradually experiment with new techniques, patterns, and designs. Whether you are crafting for a school project, a party, home decoration, or personal enjoyment, these DIY paper craft methods can help you create something unique.