

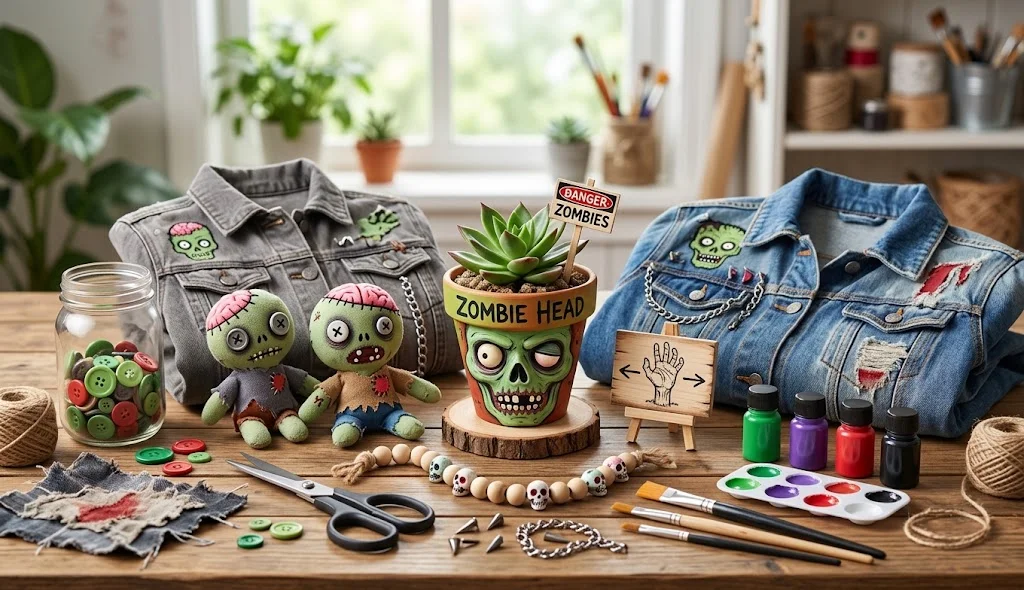
Looking for spooky, creative, and fun projects for Halloween? Zombie DIY crafts are a great way to create creepy decorations, party accessories, costume details, and imaginative handmade projects using simple craft supplies.
Zombie-themed crafts can be made with materials such as cardboard, paper, fabric, clay, plastic containers, paint, and recycled objects. Whether you are preparing a Halloween party, decorating a room, creating a costume, or simply looking for a fun weekend activity, these zombie DIY crafts can give your creativity a spooky twist.
What Are Zombie DIY Crafts?
Zombie DIY crafts are handmade projects inspired by the classic spooky zombie theme. They can include decorations, accessories, Halloween displays, costume additions, and creepy-looking handmade objects.
The best part is that you do not need expensive supplies. With some imagination, ordinary craft materials can be transformed into spooky zombie-inspired creations.
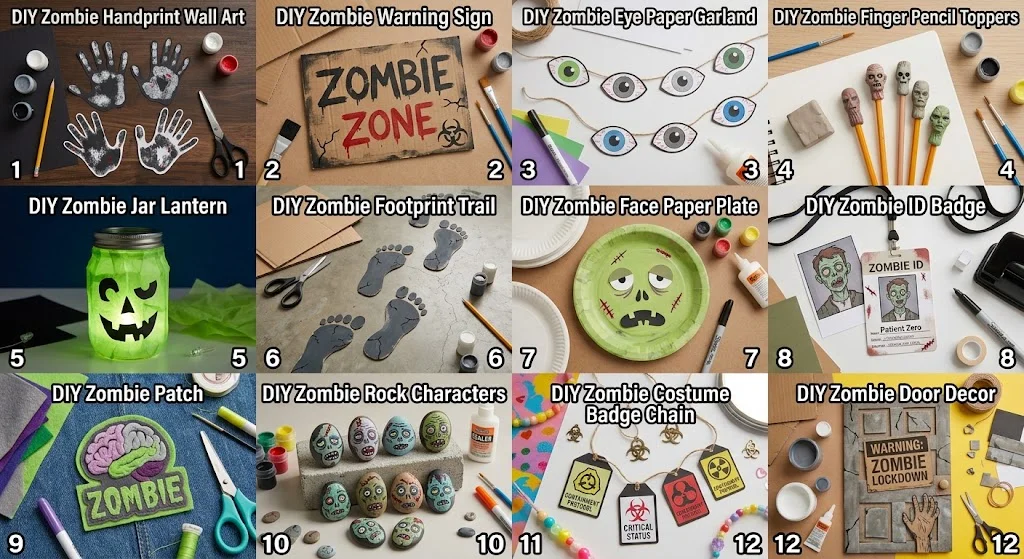
12 Zombie DIY Crafts Methods
1. DIY Zombie Handprint Wall Art
Create creepy zombie handprints that can be used as Halloween wall decorations.
Materials:
- Black or dark-colored paper
- White craft paint
- Red and gray paint
- Pencil
- Scissors
- Glue
Method:
- Trace your hand on dark-colored paper.
- Cut around the hand shape carefully.
- Add white or gray details to create a spooky appearance.
- Add small red paint details for a Halloween-inspired effect.
- Create several handprints in different sizes.
- Arrange them across a wall or poster board.
- Secure the pieces with removable adhesive.
2. DIY Zombie Warning Sign
Make a spooky warning sign for a Halloween party or themed room.
Materials:
- Cardboard
- Black paint
- White paint
- Red paint
- Paintbrush
- String
Method:
- Cut cardboard into a rectangular sign.
- Paint the background a dark color.
- Write a spooky message such as “Zombie Zone.”
- Add cracks, scratches, and distressed details.
- Paint a simple zombie-themed symbol on the sign.
- Let everything dry completely.
- Attach string to the top so the sign can be displayed.
3. DIY Zombie Eye Paper Garland
Create a creepy hanging garland using handmade zombie-style eyes.
Materials:
- White cardstock
- Green, gray, or blue paper
- Black marker
- String
- Glue
- Scissors
Method:
- Cut several oval shapes from white cardstock.
- Create colored circles for the irises.
- Add dark pupils and simple vein details.
- Make several different eye designs.
- Attach each eye to a long piece of string.
- Space the eyes evenly.
- Hang the finished garland across a wall, doorway, or party table.
4. DIY Zombie Finger Pencil Toppers
Turn ordinary pencils into fun zombie-themed accessories.
Materials:
- Air-dry clay
- Pencils
- Acrylic paint
- Small paintbrush
- Black marker
Method:
- Shape small pieces of air-dry clay into spooky finger-like forms.
- Create simple nail and wrinkle details.
- Make a small opening at the bottom for the pencil.
- Allow the clay to dry according to its product instructions.
- Paint the finished shapes.
- Add small details with a black marker.
- Place the topper onto the pencil once completely dry.
5. DIY Zombie Jar Lantern
Create a spooky decorative lantern using a clean glass jar and battery-operated lighting.
Materials:
- Clean glass jar
- Translucent tissue paper
- Craft glue
- Black paper
- Battery-operated LED light
- Scissors
Method:
- Clean and dry the jar.
- Cover the outside with translucent tissue paper.
- Cut simple zombie facial features from black paper.
- Attach the features to the jar.
- Place a battery-operated LED light inside.
- Turn the light on to reveal the spooky face.
- Display it as part of your Halloween decoration.
6. DIY Zombie Footprint Trail
Create a spooky trail leading to a Halloween party area.
Materials:
- Cardboard
- Pencil
- Scissors
- Gray or black paint
- White paint
Method:
- Draw large zombie-style footprints on cardboard.
- Cut each footprint out.
- Paint the shapes in a dark gray or black shade.
- Add scratches and uneven details.
- Create several footprints.
- Place them in a trail across the floor or walkway.
- Use removable materials where appropriate to protect surfaces.
7. DIY Zombie Face Paper Plate
Make a creepy zombie face using a paper plate.
Materials:
- Paper plate
- Green or gray paint
- Black paint
- White paper
- Glue
- Marker
Method:
- Paint the paper plate with a greenish or grayish base.
- Allow it to dry.
- Cut simple eyes, eyebrows, and mouth shapes from paper.
- Glue the features onto the plate.
- Add cracks and facial details with a marker.
- Create different expressions for several zombie faces.
- Hang them together as Halloween decorations.
8. DIY Zombie ID Badge
Create a fictional zombie-themed identification badge for a Halloween costume.
Materials:
- Cardstock
- Marker
- Small photograph or drawing
- Clear tape
- Hole punch
- String or lanyard
Method:
- Cut cardstock into a badge-sized rectangle.
- Add a fictional zombie character name.
- Draw or attach a spooky character portrait.
- Add decorative marks and Halloween details.
- Cover the front with clear tape for protection.
- Punch a hole at the top.
- Attach string or a lanyard.
9. DIY Zombie Patch
Create a handmade zombie-themed patch for a jacket, bag, or costume.
Materials:
- Felt
- Fabric scissors
- Fabric glue or sewing supplies
- Fabric marker
- Thread
Method:
- Draw a zombie-inspired symbol on felt.
- Cut the design carefully.
- Add details using fabric markers.
- Layer different felt colors for extra dimension.
- Secure the layers together.
- Attach the finished patch to suitable fabric.
- Allow adhesives to cure fully before using the item.
10. DIY Zombie Rock Characters
Turn small rocks into tiny zombie characters.
Materials:
- Smooth clean rocks
- Acrylic paint
- Paintbrushes
- Black marker
- Clear craft sealer
Method:
- Wash and completely dry the rocks.
- Paint each rock with a spooky base color.
- Add eyes, mouths, scars, and hair.
- Create different zombie expressions.
- Allow the paint to dry.
- Add a suitable protective finish.
- Arrange the zombie rocks as a Halloween display.
11. DIY Zombie Costume Badge Chain
Create a spooky accessory for a zombie-inspired Halloween costume.
Materials:
- Cardstock
- Hole punch
- Decorative string
- Markers
- Small craft charms
Method:
- Cut several small badge shapes from cardstock.
- Decorate them with zombie-themed symbols.
- Punch small holes at the top.
- Connect the pieces using decorative string.
- Add lightweight craft charms.
- Adjust the length to suit the costume.
- Wear it as a decorative costume accessory.
12. DIY Zombie Door Decor
Create a spooky zombie-inspired decoration for a bedroom or Halloween party entrance.
Materials:
- Large cardboard sheet
- Gray, black, and green paint
- White paper
- Glue
- Scissors
- String
Method:
- Measure the door area where the decoration will be placed.
- Cut cardboard into a large decorative shape.
- Paint a zombie-inspired background.
- Add eyes, cracks, warning symbols, or spooky lettering.
- Add paper details for extra dimension.
- Attach string or removable hanging material.
- Display it on the door without damaging the surface.
Materials for Zombie DIY Crafts
Many zombie crafts can be made with affordable supplies you may already have at home:
- Cardboard
- Cardstock
- Paper plates
- Felt
- Air-dry clay
- Clean glass jars
- Small rocks
- Acrylic paint
- Markers
- Glue
- Scissors
- String
- Tissue paper
- Battery-operated LED lights
- Fabric scraps
- Decorative accessories
Using recycled materials can also make your zombie crafts more affordable and creative.
How to Make Zombie Crafts Look More Spooky
Use Uneven Details
Perfectly clean shapes can look less spooky. Try adding cracks, rough edges, scratches, and irregular patterns.
Choose a Spooky Color Palette
Gray, black, white, dark green, and muted red can create a strong zombie-inspired appearance.
Add Different Expressions
For face-based crafts, create different eyes and mouths instead of making every character look identical.
Layer Materials
Combining paper, felt, cardboard, paint, and fabric can give crafts more depth.
Create a Theme
Instead of making one isolated decoration, create several related pieces such as zombie eyes, warning signs, footprints, and door decorations.
Zombie DIY Crafts for Halloween Parties
These projects can be useful for creating a Halloween atmosphere. You can combine zombie warning signs with footprint trails, zombie face decorations, handmade badges, and spooky garlands.
For a children’s activity, choose simple paper-based crafts and supervise the use of scissors, adhesives, paint, and other craft materials.
Safety Tips for Zombie DIY Crafts
- Use scissors and other sharp tools carefully.
- Children should have adult supervision when using craft tools.
- Use battery-operated LED lights rather than open flames for decorative lantern projects.
- Work in a well-ventilated area when using paints or adhesives that require ventilation.
- Allow paints and adhesives to dry completely before handling finished crafts.
- Avoid placing decorations where they can create a tripping hazard.
Why Try Zombie DIY Crafts?
Zombie-themed crafts are a fun way to experiment with unusual colors, spooky characters, and Halloween decorations. They can help you:
- Explore creative crafting techniques.
- Make personalized Halloween decorations.
- Create themed party accessories.
- Reuse simple household materials.
- Develop drawing and painting skills.
- Create decorations without expensive supplies.
- Add a unique handmade style to Halloween celebrations.
Conclusion
Zombie DIY crafts are a fun way to bring spooky creativity into Halloween decorations, costumes, parties, and craft activities. From zombie handprint wall art and paper garlands to rock characters, costume badges, patches, and door decorations, there are many ways to create a unique zombie theme with simple materials.
You do not need complicated supplies to get started. Choose a few materials, create your own zombie-inspired designs, and experiment with different colors, expressions, textures, and decorations. The goal is to have fun while creating something that reflects your own spooky style.