

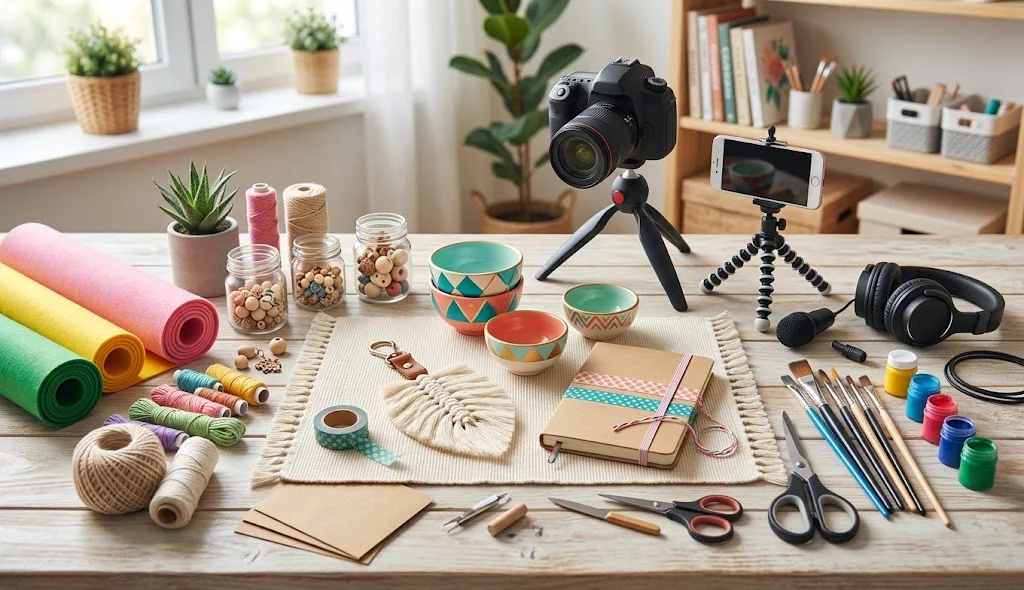
If you enjoy making handmade projects and want to create engaging content, DIY crafts YouTube ideas can help you turn your creativity into interesting video tutorials. You can record simple projects, explain the materials, demonstrate each step, and show the finished result in a way that viewers can easily follow.
YouTube is especially useful for DIY crafts because viewers can watch the complete process instead of relying only on written instructions. From handmade organizers and decorative projects to creative accessories and recycled crafts, there are many projects that can become entertaining YouTube content.
What Are DIY Crafts YouTube Projects?
DIY crafts YouTube projects are handmade creations that are suitable for demonstrating through YouTube videos. These crafts can be designed around easy materials, visually interesting techniques, and clear step-by-step instructions.
A good YouTube craft project should have a noticeable transformation. Showing how ordinary materials become a finished handmade item can make the video more interesting and satisfying to watch.
12 DIY Crafts YouTube Methods
1. DIY Denim Pocket Organizer
Turn an old pair of jeans into a useful hanging organizer.
Materials:
- Old denim jeans
- Scissors
- Fabric glue or needle and thread
- Wooden stick
- Rope
- Decorative buttons
Method:
- Cut several usable pockets from old jeans.
- Clean and arrange the pockets on a denim backing piece.
- Attach the pockets using fabric glue or stitching.
- Add buttons or fabric details for decoration.
- Attach the backing to a wooden stick.
- Add rope to create a hanging loop.
- Record the transformation from old denim to finished organizer.
This project works well for a YouTube video because the recycling process is easy to demonstrate.
2. DIY Magazine Page Bowl
Create a decorative bowl by recycling colorful magazine pages.
Materials:
- Old magazines
- Glue
- Scissors
- Cardboard
- Clear craft sealer
Method:
- Tear or cut magazine pages into long strips.
- Roll each strip tightly into paper coils.
- Create a flat circular base from the coils.
- Continue adding coils around the edges.
- Gradually build the sides of the bowl.
- Secure the final layers with glue.
- Apply a suitable craft sealer after the bowl dries.
Show the bowl-building process closely in the YouTube video so viewers can see how the shape develops.
3. DIY Cork Photo Display
Turn unused corks into a creative photo display.
Materials:
- Wine or craft corks
- Strong craft glue
- Small wooden board
- Mini clips
- Paint
Method:
- Arrange the corks in a pattern.
- Paint selected corks if desired.
- Glue the corks onto a wooden board.
- Attach small clips between the corks.
- Add a hanging mechanism to the back.
- Place photographs or small notes into the clips.
- Film the finished display from different angles.
4. DIY Cardboard Desk Mail Holder
Make a simple desktop holder for letters, notes, and small papers.
Materials:
- Thick cardboard
- Ruler
- Pencil
- Scissors
- Glue
- Decorative paper
Method:
- Measure and cut several cardboard panels.
- Create a wide back panel and smaller side pieces.
- Assemble the pieces into an open-front holder.
- Reinforce the corners with additional cardboard.
- Cover the surface with decorative paper.
- Add labels or patterns.
- Show how the completed holder can organize papers on a desk.
5. DIY Button Magnet Set
Transform colorful buttons into small decorative magnets.
Materials:
- Assorted buttons
- Small craft magnets
- Strong adhesive
- Paint markers
- Decorative paper
Method:
- Select buttons with different shapes and sizes.
- Clean the buttons before decorating.
- Add small patterns, initials, or simple designs.
- Allow the decoration to dry.
- Attach a magnet to the back of each button.
- Test the magnets on a suitable metal surface.
- Arrange the finished set for the final YouTube shot.
6. DIY Fabric Book Cover
Give a plain notebook a personalized fabric cover.
Materials:
- Fabric
- Notebook
- Scissors
- Fabric glue
- Ribbon
- Decorative patches
Method:
- Place the notebook over the fabric.
- Measure enough fabric to cover the front and back.
- Cut the fabric with extra space around the edges.
- Fold and glue the edges neatly.
- Add ribbon or decorative patches.
- Allow the cover to dry completely.
- Place the notebook inside and show the finished result.
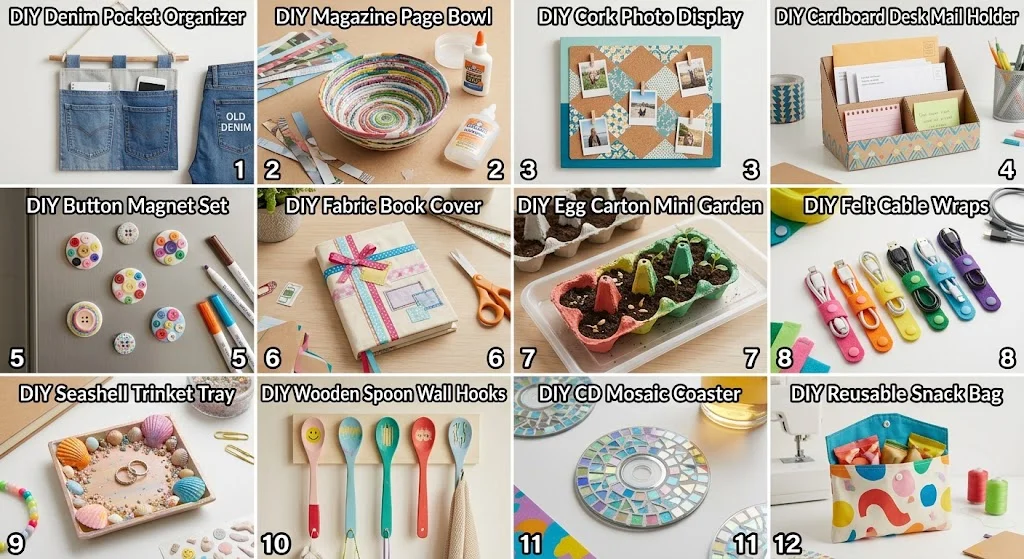
7. DIY Egg Carton Mini Garden
Reuse an empty egg carton to create a small decorative planting tray.
Materials:
- Clean cardboard egg carton
- Small amount of soil
- Seeds
- Paint
- Paintbrush
- Waterproof tray
Method:
- Cut the egg carton into a manageable section.
- Paint the outside with a decorative design.
- Let the paint dry completely.
- Place the carton inside a waterproof tray.
- Add a small amount of soil to each section.
- Add suitable seeds.
- Water carefully and record the progress for a YouTube series.
This idea can also become a before-and-after gardening craft video.
8. DIY Felt Cable Wraps
Make colorful reusable wraps for organizing charging cables.
Materials:
- Felt sheets
- Scissors
- Snap buttons or hook-and-loop strips
- Fabric glue
- Ruler
Method:
- Cut felt into narrow rectangular strips.
- Round the ends for a cleaner appearance.
- Attach a snap button or suitable fastening system.
- Add small felt shapes for decoration.
- Wrap the finished piece around a cable.
- Demonstrate several color combinations on camera.
9. DIY Seashell Trinket Tray
Create a decorative tray using clean seashells.
Materials:
- Clean seashells
- Small plain tray
- Craft adhesive
- Paint
- Decorative filler
Method:
- Clean and completely dry the shells.
- Plan a shell arrangement around the tray.
- Paint selected shells if desired.
- Glue the shells around the edges.
- Fill small gaps with suitable decorative material.
- Let everything dry thoroughly.
- Show the finished tray with small items placed inside.
10. DIY Wooden Spoon Wall Hooks
Turn unused wooden craft spoons into decorative wall hooks.
Materials:
- Wooden spoons
- Small wooden board
- Hooks
- Paint
- Glue or suitable mounting hardware
Method:
- Clean and prepare the wooden spoons.
- Paint them in your chosen colors.
- Decorate the handles with simple patterns.
- Attach the spoons to the wooden board.
- Install suitable hooks.
- Secure the board appropriately.
- Demonstrate how the finished piece can hold lightweight items.
11. DIY CD Mosaic Coaster
Give old CDs a creative second life by turning them into shiny mosaic coasters.
Materials:
- Old CDs
- Scissors suitable for craft use
- Plain coaster base
- Strong craft adhesive
- Grout or suitable filler
Method:
- Clean the CDs thoroughly.
- Carefully cut them into small decorative pieces using appropriate safety precautions.
- Arrange the pieces across the coaster base.
- Glue the pieces into place.
- Fill visible gaps with suitable craft filler.
- Clean the surface once the project has set.
- Film the reflective finished design under good lighting.
12. DIY Reusable Snack Bag
Create a washable fabric pouch for carrying dry snacks.
Materials:
- Food-safe suitable fabric
- Fabric scissors
- Sewing thread
- Sewing machine or needle
- Snap button or suitable closure
Method:
- Cut two matching fabric pieces.
- Place the pieces together with their finished sides facing appropriately.
- Stitch around the edges while leaving an opening.
- Turn the pouch right-side out.
- Finish the opening neatly.
- Add a secure closure.
- Demonstrate the completed pouch in your YouTube video.
How to Make DIY Crafts YouTube Videos More Interesting
Creating the craft is only one part of making a good DIY YouTube video. The presentation can also make a major difference.
Start With the Finished Craft
Show the completed project near the beginning of the video. This gives viewers a reason to continue watching.
Display Your Materials
Place all required supplies in front of the camera before beginning. This makes the tutorial easier to understand.
Record Close-Up Shots
Use close-up footage when cutting, stitching, gluing, painting, or assembling small pieces.
Keep Instructions Simple
Explain one step at a time rather than showing too many actions together.
Add Before-and-After Shots
For recycled crafts, showing the original material followed by the finished project can make the transformation more visually appealing.
Create Clear Thumbnails
Use a bright image of the finished craft with a simple visual layout. The final result should be easy to recognize at a glance.
Benefits of DIY Crafts YouTube Content
Creating DIY craft videos can offer several advantages:
- Encourages creativity and experimentation.
- Helps viewers learn handmade techniques visually.
- Gives creators a way to showcase their crafting skills.
- Makes recycling and repurposing ideas more engaging.
- Provides content that can be adapted into short or long videos.
- Allows different craft styles and materials to be explored.
- Helps build a collection of useful craft tutorials.
Materials for DIY Crafts YouTube Projects
You can create many YouTube craft projects using affordable supplies such as:
- Cardboard
- Denim
- Fabric
- Felt
- Wooden pieces
- Buttons
- Corks
- Egg cartons
- Old CDs
- Magazine pages
- Paint
- Glue
- Scissors
- Thread
- Decorative accessories
Before recording, prepare all materials and make sure your workspace is clean, bright, and safe.
Tips for Recording DIY Craft Tutorials
- Use a stable camera or phone setup.
- Keep your hands and materials visible.
- Record important steps from a close angle.
- Use clear and simple explanations.
- Avoid unnecessary background clutter.
- Show the finished project at the end.
- Use different shots to keep the video visually interesting.
- Add your own creative style instead of copying other creators.
Conclusion
DIY crafts YouTube projects are a creative way to combine handmade crafting with video content. From denim pocket organizers and magazine bowls to cork photo displays, fabric cable wraps, CD mosaic coasters, and reusable snack bags, there are many unique projects that can be demonstrated through YouTube tutorials.
The best craft videos do not always require expensive materials. A simple project can become engaging content when the transformation, process, and final result are presented clearly. Choose a craft that interests you, prepare your materials, record each important step, and let your creativity make the tutorial your own.