

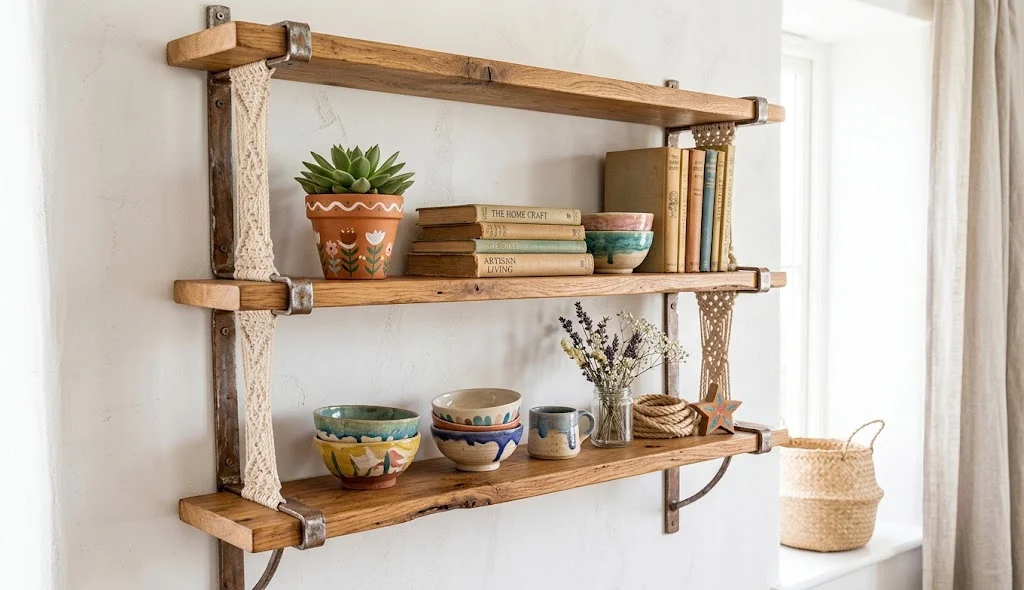
If you want to organize your space while adding a creative handmade touch, DIY crafts shelf projects are a great option. With simple materials such as wooden boards, rope, cardboard, recycled containers, and craft sticks, you can create useful shelves without spending a lot of money.
DIY shelves can be customized for bedrooms, study areas, living rooms, craft corners, and small spaces. You can also paint, decorate, or personalize them to match your room style.
What Are DIY Crafts Shelf Projects?
DIY crafts shelf projects are handmade shelving ideas created using simple materials and basic crafting techniques. Instead of buying ready-made shelves, you can design a shelf according to your available space, storage needs, and preferred style.
From small decorative shelves to practical organizers, there are many creative ways to make a handmade shelf at home.
12 Easy DIY Crafts Shelf Methods
1. DIY Rope Hanging Shelf
Create a simple hanging shelf using a wooden board and strong decorative rope.
Materials:
- Wooden board
- Strong rope
- Drill
- Sandpaper
- Paint or wood stain
Method:
- Sand the wooden board until the surface is smooth.
- Paint or stain it if desired.
- Make two pairs of holes near the board’s edges.
- Thread rope through the holes.
- Tie secure knots underneath the board.
- Hang the shelf from a strong wall or ceiling support.
This shelf works well for lightweight decorations and small plants.
2. DIY Cardboard Mini Shelf
Make a lightweight shelf for small craft supplies using thick cardboard.
Method:
- Cut cardboard pieces for the shelf, sides, and back.
- Assemble the pieces using strong glue.
- Reinforce the corners with additional cardboard strips.
- Cover the surface with decorative paper.
- Add labels or patterns for a personalized look.
- Use it for lightweight items such as stationery and craft materials.
3. DIY Popsicle Stick Display Shelf
Turn craft sticks into a small decorative shelf for tiny objects.
Method:
- Arrange popsicle sticks into a rectangular frame.
- Glue the corners carefully.
- Add additional sticks underneath to create the shelf surface.
- Build small side supports.
- Let the glue dry completely.
- Paint the finished shelf in your preferred color.
It is ideal for displaying miniature decorations or collectibles.
4. DIY Wooden Crate Shelf
Old wooden crates can be transformed into attractive wall storage.
Method:
- Clean and sand the crate.
- Repair any loose wooden sections.
- Paint or stain the crate.
- Add decorative paper or fabric to the inside if desired.
- Attach secure wall hardware.
- Mount the crate horizontally or vertically.
You can combine several crates to create a larger storage arrangement.
5. DIY Fabric Pocket Shelf
Create a soft storage shelf by combining a simple frame with fabric pockets.
Method:
- Prepare a lightweight wooden frame.
- Cut strong fabric into several pocket sections.
- Sew or securely attach the pockets to the fabric panel.
- Attach the panel to the frame.
- Add hooks or wall hardware.
- Use the pockets for lightweight accessories and craft supplies.
6. DIY Corner Shelf
Make use of an empty corner with a simple triangular wooden shelf.
Method:
- Measure the corner where the shelf will be installed.
- Cut a wooden board into a suitable triangular shape.
- Smooth all edges with sandpaper.
- Paint or stain the board.
- Install sturdy brackets underneath.
- Place lightweight decorations or organizers on the shelf.
This is especially useful in small rooms where wall space is limited.
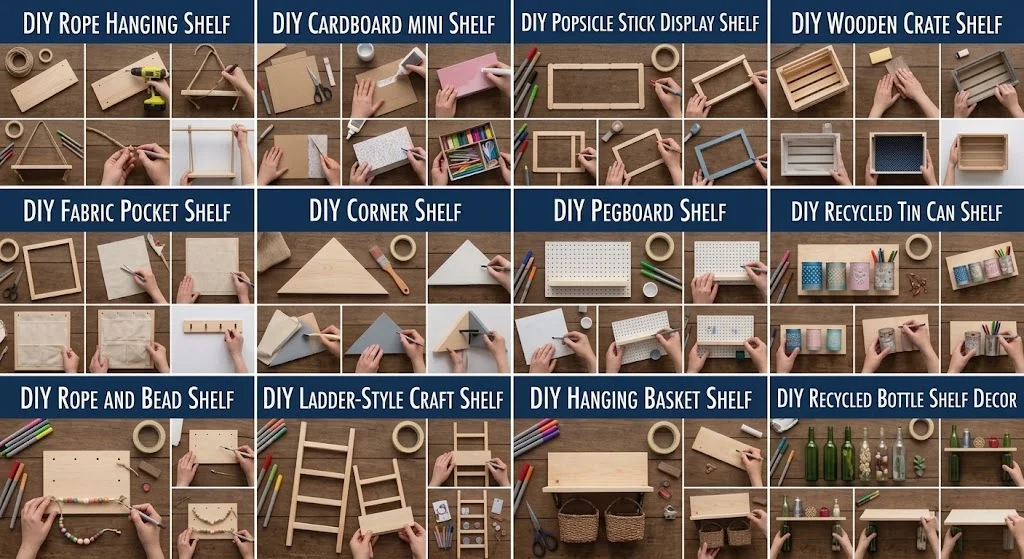
7. DIY Pegboard Shelf
Combine a pegboard with a small shelf to create flexible storage.
Method:
- Prepare a small pegboard panel.
- Paint the board if you want a customized appearance.
- Install wall supports.
- Attach a narrow shelf to the lower section.
- Add hooks and small containers to the pegboard.
- Organize craft tools, stationery, or accessories.
The adjustable layout makes this idea practical for creative workspaces.
8. DIY Recycled Tin Can Shelf
Use cleaned tin cans as small storage compartments attached to a shelf board.
Method:
- Wash and dry empty cans completely.
- Remove or safely cover any sharp edges.
- Decorate the cans with paint, paper, or fabric.
- Prepare a wooden backing board.
- Secure the cans to the board using suitable hardware.
- Mount the finished organizer securely.
Use it to store pens, brushes, ribbons, or other small supplies.
9. DIY Rope and Bead Shelf
Add decorative beads to a rope-supported shelf for a more artistic appearance.
Method:
- Prepare a smooth wooden board.
- Drill holes for the rope.
- Thread decorative beads onto the rope.
- Secure the rope underneath the board.
- Adjust both sides so the shelf remains level.
- Hang it securely and decorate with lightweight items.
The beads can give a basic shelf a handmade decorative appearance.
10. DIY Ladder-Style Craft Shelf
Turn a small wooden ladder into a creative multi-level shelf.
Method:
- Find a stable small wooden ladder.
- Clean and sand the surface.
- Paint or stain the ladder.
- Place wooden boards across selected steps.
- Secure the boards so they do not move.
- Use each level for books, baskets, plants, or decorations.
This design works particularly well as a freestanding storage piece.
11. DIY Hanging Basket Shelf
Combine a wall shelf with small baskets for organized storage.
Method:
- Prepare a wooden shelf board.
- Sand and finish the wood.
- Install strong wall brackets.
- Add small baskets underneath or beside the shelf.
- Secure the baskets with hooks or suitable fasteners.
- Organize small household or craft items inside them.
12. DIY Recycled Bottle Shelf Decor
Turn sturdy recycled bottles into decorative supports for a lightweight shelf.
Method:
- Clean and dry suitable bottles.
- Remove labels and decorate the bottles if desired.
- Prepare two matching bottles for support.
- Position them carefully beneath a lightweight board.
- Secure the arrangement so it cannot easily tip.
- Use the finished setup for lightweight decorative objects.
For safety, avoid placing heavy objects on this type of shelf.
Tips for Making DIY Crafts Shelf Projects
- Always measure your available wall or floor space before building.
- Sand wooden surfaces to remove rough edges.
- Choose strong materials for shelves that will hold heavier objects.
- Use suitable wall anchors and brackets.
- Keep decorative shelves lightly loaded.
- Paint or stain wooden parts before final assembly when possible.
- Reinforce cardboard shelves if they will hold craft supplies.
- Make sure hanging shelves are securely attached before use.
- Match the shelf’s colors with your existing room decor.
- Avoid placing heavy objects on materials designed only for decoration.
Benefits of DIY Crafts Shelf Ideas
DIY crafts shelf projects can provide several practical benefits:
- Affordable: Many projects can use inexpensive or recycled materials.
- Customizable: You can choose the size, shape, color, and finish.
- Space-saving: Hanging and corner shelves can make better use of small areas.
- Creative: Handmade shelves add personality to your room.
- Organized: Shelves provide useful places for decorations and everyday items.
- Eco-friendly: Reusing crates, cardboard, fabric, and other materials can reduce waste.
Where to Use DIY Crafts Shelf Projects
You can use handmade shelves in many areas, including:
- Bedroom
- Study room
- Craft room
- Living room
- Home office
- Kids’ room
- Entryway
- Small apartment spaces
- Creative workspace
- Display corners
Conclusion
DIY crafts shelf projects are a simple way to combine organization with creativity. From rope hanging shelves and cardboard mini shelves to crate displays and corner storage, you can create many useful designs with basic materials.
Choose a project that matches your available space and the weight of the items you want to store. With a little creativity and careful construction, a handmade shelf can become both a practical organizer and an attractive part of your room decor.