

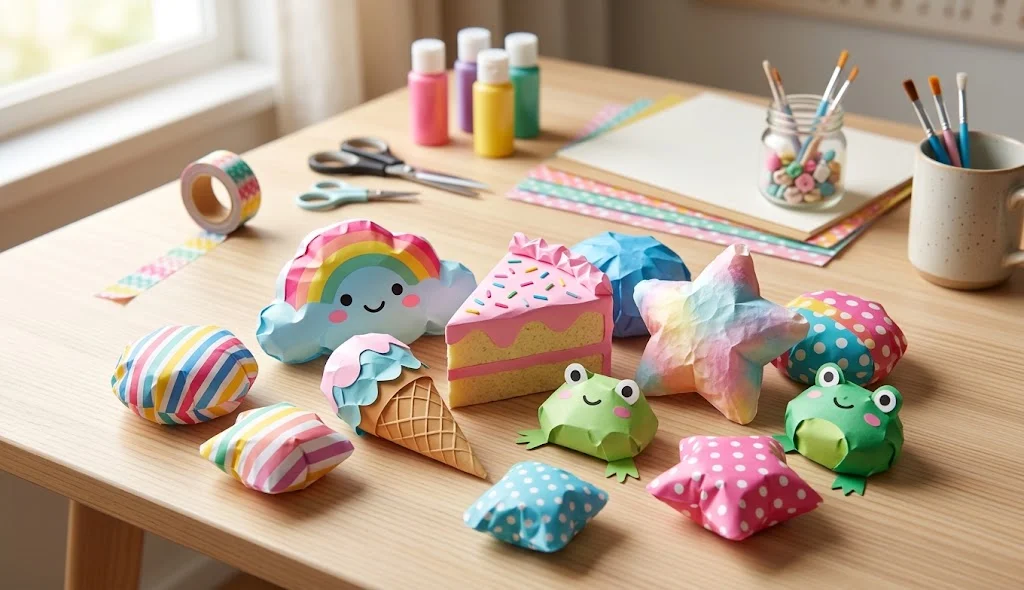
If you enjoy making cute handmade crafts, DIY crafts squishy paper projects are a fun way to turn ordinary paper into soft-looking, colorful creations. Paper squishies are lightweight handmade toys and decorations that can be customized into food, animals, emojis, stationery, and other fun shapes.
You can make many paper squishies with inexpensive materials such as paper, markers, tape, scissors, and soft filling. These projects are especially enjoyable for beginners because you can experiment with different shapes, colors, and expressions.
In this guide, you will discover easy DIY crafts squishy paper methods that you can make at home with simple craft supplies.
What Are DIY Crafts Squishy Paper?
DIY crafts squishy paper projects are handmade paper crafts designed to have a soft, squeezable appearance. A typical paper squishy is created by making a decorated paper shape, sealing its edges, and adding a soft filling inside.
You can create almost any design you like. Cute food, animals, stars, clouds, stationery, and colorful characters can all become paper squishy crafts.
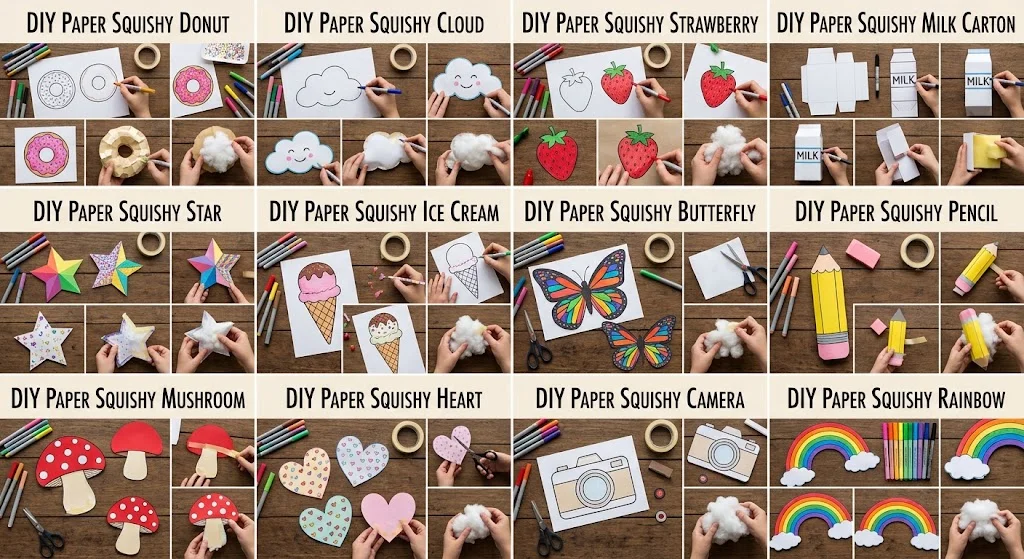
DIY Crafts Squishy Paper Methods
1. DIY Paper Squishy Donut
Create a colorful donut-shaped paper squishy.
Materials:
- White paper or cardstock
- Colored markers
- Scissors
- Clear tape
- Soft stuffing or clean sponge pieces
- Pencil
Method:
- Draw two matching donut shapes on paper.
- Cut both shapes carefully.
- Decorate them with frosting and colorful sprinkles.
- Cover the decorated surfaces with clear tape.
- Place the two pieces together.
- Seal most of the edges with tape.
- Add small pieces of soft filling through the remaining opening.
- Finish sealing the opening.
Do not overfill the squishy because some flexibility is needed.
2. DIY Paper Squishy Cloud
Make a soft-looking cloud with a cheerful design.
Materials:
- White paper
- Blue and gray markers
- Scissors
- Clear tape
- Soft filling
Method:
- Draw a cloud outline on two sheets of paper.
- Cut out both shapes.
- Add a face and small decorative details.
- Cover the paper with clear tape.
- Match the two cloud shapes.
- Seal the edges while leaving a small opening.
- Add a small amount of soft filling.
- Close the remaining opening.
Add tiny stars or raindrops to create different cloud themes.
3. DIY Paper Squishy Strawberry
Turn a simple fruit drawing into a cute paper squishy.
Materials:
- White paper
- Red, green, and black markers
- Scissors
- Clear tape
- Soft filling
Method:
- Draw two strawberry shapes.
- Color the berries red.
- Add small black seeds.
- Draw green leaves near the top.
- Cut out both shapes.
- Cover the surfaces with tape.
- Seal the edges and add soft filling.
- Close the final opening securely.
You can create several fruit designs as a matching collection.
4. DIY Paper Squishy Milk Carton
Make a miniature milk-carton-shaped squishy.
Materials:
- Cardstock
- Pencil
- Ruler
- Markers
- Clear tape
- Soft sponge pieces
Method:
- Draw a simple carton template on cardstock.
- Add the front, back, and side sections.
- Decorate the carton with your own label and patterns.
- Cut out the template.
- Fold the sections into shape.
- Secure the edges with clear tape.
- Leave a small opening for the filling.
- Add soft material and seal the opening.
Create different flavors by changing the colors and designs.
5. DIY Paper Squishy Star
Create a simple star-shaped squishy that can also be used as a decoration.
Materials:
- Colored paper
- Pencil
- Scissors
- Markers
- Clear tape
- Soft filling
Method:
- Draw two matching stars.
- Cut them out carefully.
- Decorate both sides with patterns.
- Cover them with clear tape.
- Match the shapes together.
- Tape around the edges.
- Add soft filling through a small opening.
- Seal the remaining section.
Try making stars in different sizes and colors.
6. DIY Paper Squishy Ice Cream
Make a cute ice-cream-shaped paper craft.
Materials:
- Cardstock
- Colored markers
- Scissors
- Clear tape
- Soft filling
Method:
- Draw two matching ice-cream shapes.
- Design the cone and ice-cream topping.
- Color both sides.
- Cover the pieces with clear tape.
- Align the shapes.
- Seal the edges.
- Add soft filling.
- Close the final opening.
Add sprinkles, chocolate patterns, or fruit-inspired decorations.
7. DIY Paper Squishy Butterfly
Create a colorful butterfly paper squishy.
Materials:
- Paper
- Colored pencils or markers
- Scissors
- Clear tape
- Soft filling
Method:
- Draw two matching butterfly outlines.
- Decorate the wings with symmetrical patterns.
- Add a simple body and facial details.
- Cut out both shapes.
- Cover them with clear tape.
- Seal most of the edges.
- Add a small amount of soft filling.
- Finish sealing the butterfly.
Use different wing patterns to create a complete butterfly collection.
8. DIY Paper Squishy Pencil
Turn a school supply into a fun miniature squishy.
Materials:
- Yellow cardstock
- Pink paper
- Gray paper
- Black marker
- Scissors
- Clear tape
- Soft filling
Method:
- Draw two long pencil shapes.
- Add a yellow body and pink eraser section.
- Draw the pencil tip with gray and black details.
- Cut out the shapes.
- Cover them with clear tape.
- Join the pieces around the edges.
- Add soft filling.
- Seal the remaining opening.
This is a fun project for a school-themed paper craft collection.
9. DIY Paper Squishy Mushroom
Make a cute mushroom-inspired squishy.
Materials:
- White cardstock
- Red or purple paper
- Markers
- Scissors
- Clear tape
- Soft filling
Method:
- Draw two mushroom shapes.
- Decorate the cap with dots or simple patterns.
- Add details to the stem.
- Cut out both shapes.
- Cover the surfaces with tape.
- Seal the edges.
- Add soft filling.
- Close the opening.
Experiment with fantasy-inspired mushroom colors.
10. DIY Paper Squishy Heart
Create a simple heart-shaped paper squishy.
Materials:
- Colored paper
- Pencil
- Scissors
- Markers
- Clear tape
- Soft filling
Method:
- Draw two matching hearts.
- Add patterns, initials, or small decorative shapes.
- Cut both hearts out.
- Cover the surfaces with clear tape.
- Match and seal the edges.
- Leave a small opening.
- Add soft filling.
- Seal the final section.
Make several hearts using different colors and designs.
11. DIY Paper Squishy Camera
Create a miniature camera-shaped craft with a fun design.
Materials:
- Cardstock
- Black and gray markers
- Colored paper
- Scissors
- Clear tape
- Soft filling
Method:
- Draw two simple camera shapes.
- Add a lens, buttons, and screen details.
- Cut out both pieces.
- Cover them with clear tape.
- Align and seal the edges.
- Add soft filling.
- Finish sealing the opening.
This can be a fun decoration for a craft desk or creative room.
12. DIY Paper Squishy Rainbow
Create a colorful rainbow-shaped paper squishy.
Materials:
- White paper
- Colored markers
- Pencil
- Scissors
- Clear tape
- Soft filling
Method:
- Draw two matching rainbow shapes.
- Add several curved color sections.
- Decorate the ends with small cloud details.
- Cut out both shapes.
- Cover the pieces with clear tape.
- Seal the edges while leaving a small opening.
- Add soft filling.
- Seal the remaining opening.
Use different color combinations to create unique rainbow designs.
Tips for Making DIY Paper Squishies
- Use thicker paper or cardstock for a more durable craft.
- Cover the decorated paper carefully with tape to protect the design.
- Do not put too much filling inside.
- Leave enough space for the paper shape to compress slightly.
- Make sure the edges are securely sealed.
- Use clean, dry filling materials.
- Experiment with different shapes before choosing your favorite design.
- Use markers that dry completely before applying tape.
- Keep small craft materials away from young children.
Best Filling Materials for Paper Squishies
Depending on the type of project, you can experiment with soft materials such as:
- Clean sponge pieces
- Soft foam scraps
- Small pieces of clean craft foam
- Soft stuffing material
The filling should be clean and dry. Avoid using materials that can leak, crumble excessively, or create sharp edges inside the paper craft.
How to Make Paper Squishies More Creative
The easiest way to personalize DIY crafts squishy paper is through decoration. You can add cute faces, patterns, food details, colorful toppings, tiny stars, hearts, or original characters.
Try creating collections around a theme. For example, you could make a fruit collection with strawberries, oranges, watermelons, and cherries. Another collection could feature school supplies such as pencils, notebooks, erasers, and rulers.
You can also experiment with different paper colors and decorative styles to make each squishy unique.
Easy Paper Squishy Themes
Food theme:
Donuts, ice cream, strawberries, cupcakes, fruit, and drinks.
Nature theme:
Clouds, rainbows, butterflies, stars, flowers, and mushrooms.
School theme:
Pencils, notebooks, erasers, rulers, and school bags.
Cute character theme:
Hearts, stars, animals, simple faces, and original characters.
Why Make DIY Crafts Squishy Paper?
Paper squishies are inexpensive, customizable, and enjoyable to make. They can also help beginners practice drawing, cutting, decorating, and basic craft construction.
Another benefit is that you can create designs that are difficult to find in stores. A handmade paper squishy can feature your favorite colors, original characters, personalized expressions, or unique shapes.
Final Thoughts
DIY crafts squishy paper projects are a fun way to transform ordinary paper into colorful handmade creations. From donuts and strawberries to clouds, rainbows, pencils, butterflies, and hearts, there are countless designs you can experiment with.
Start with a simple shape and focus on clean cutting, colorful decoration, and secure edges. Once you understand the basic technique, you can design your own paper squishies and build an entire collection of creative handmade crafts.