

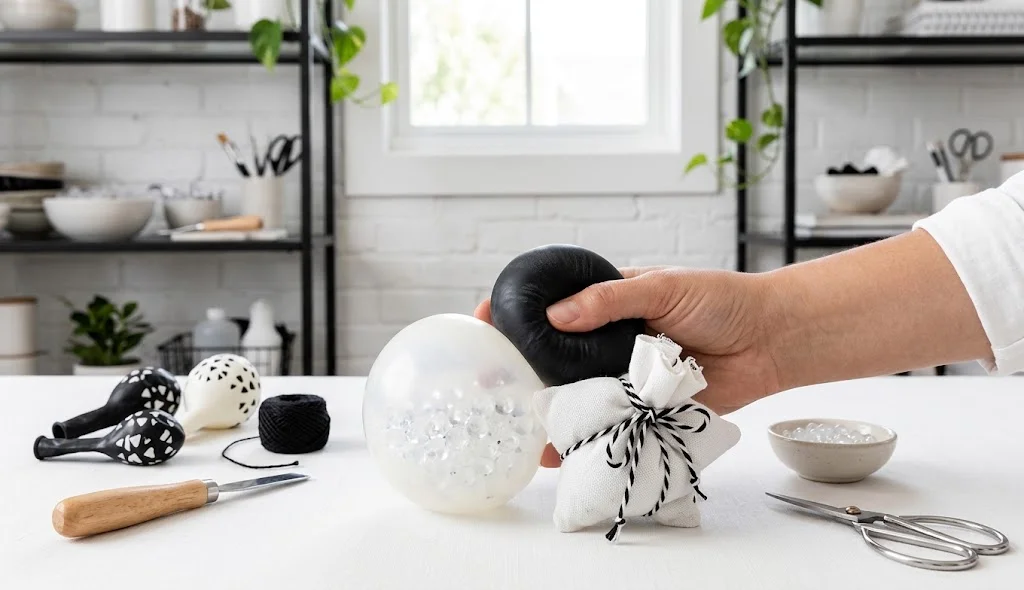
DIY Needoh crafts are a fun way to make soft, stretchy, and squishy sensory toys at home. NeeDoh-style toys are popular because they can be squeezed, stretched, and manipulated for a satisfying sensory experience. With simple materials such as balloons, soft fillings, and household craft supplies, you can create your own homemade squishy toys in different colors and shapes.
If you enjoy DIY Needoh ideas, homemade squishies can also be a fun activity for kids and adults. You can experiment with different colors, textures, and sizes to create personalized sensory toys.
What Is a DIY Needoh?
A DIY Needoh is a homemade squishy toy inspired by the soft, squeezable feel of NeeDoh-style sensory toys. Instead of purchasing a ready-made toy, you can make a simple version using a flexible outer layer and a soft filling.
Homemade squishies can be customized with different colors and shapes, making them an enjoyable craft project.
Why Try DIY Needoh Crafts?
There are several reasons to make your own squishy toys:
- Affordable: Use inexpensive craft and household materials.
- Customizable: Choose your favorite colors and designs.
- Creative: Experiment with different fillings and shapes.
- Fun: Squeezing and stretching can make the finished toy enjoyable to handle.
- Easy: Simple versions require only a few materials.
- Gift idea: Homemade squishies can be fun additions to craft gift sets.
10 Easy DIY Needoh Methods
1. DIY Balloon Needoh
One of the simplest methods uses a sturdy balloon as the outer layer. Fill it with a soft, non-sharp filling, remove excess air, and tie it securely.
Choose bright balloons to make colorful homemade squishies.
Best for: Simple beginner sensory crafts.
2. DIY Flour Needoh
Fill a strong balloon with flour to create a soft, moldable squishy texture. Use a funnel to make filling easier and avoid overfilling the balloon.
Double-layer the outer balloon for additional protection and inspect it regularly for damage.
Best for: Soft and inexpensive homemade squishies.
3. DIY Cornstarch Needoh
Cornstarch can be combined with a suitable liquid to create a soft sensory filling. Place the mixture inside a sturdy flexible container or appropriately sealed craft pouch.
Make sure the outer layer is securely closed and check for leaks before use.
Best for: Experimenting with different squishy textures.
4. DIY Water Bead Needoh
Use hydrated water beads inside a strong, transparent outer pouch to create a textured sensory toy.
Water beads can be dangerous if swallowed, so this version should only be made and used with appropriate supervision and should not be given to young children.
Best for: Supervised sensory experiments.
5. DIY Glitter Needoh
Add a small amount of suitable decorative glitter to a compatible squishy filling for a colorful sensory toy.
Keep the glitter fully enclosed inside the outer layer and avoid using loose glitter where it could escape.
Best for: Colorful craft projects and decorative squishies.
6. DIY Rainbow Needoh
Create a rainbow-inspired squishy by using several colors in separate sections or by decorating the outer layer with colorful patterns.
This is a fun project for anyone who enjoys bright and playful sensory crafts.
Best for: Kids’ craft activities with adult supervision.
7. DIY Emoji Needoh
Make a simple round squishy and decorate the outside with an emoji-style expression using suitable markers or decorations.
Try happy, sleepy, surprised, or laughing faces to create a collection of homemade sensory toys.
Best for: Personalized squishy toys.
8. DIY Mini Needoh
Create a smaller version using a small but durable outer layer and an appropriate soft filling. Keep the design simple and make sure the toy is securely sealed.
Best for: Small sensory toys and craft collections.
9. DIY Animal Needoh
Create an animal-inspired squishy by decorating the outer layer with simple features such as ears, spots, or facial expressions.
Avoid adding small detachable pieces that could become choking hazards.
Best for: Animal-themed craft projects.
10. DIY Glow Needoh
Create a glow-inspired squishy using a suitable light-colored outer layer and safe decorative elements. If you want an actual glowing effect, use an external light source rather than putting unsafe electrical components inside the squishy.
Best for: Creative sensory decorations.
Basic Materials for DIY Needoh
Depending on your chosen method, you may need:
- Strong latex or suitable flexible balloons
- Flour
- Cornstarch
- Water
- Funnel
- Measuring spoon
- Non-toxic markers
- Decorative materials
- Small container for mixing
- Optional double-layer outer covering
Choose materials carefully and make sure the finished toy is securely sealed.
How to Make a Simple DIY Needoh
A basic balloon squishy is a straightforward project.
Step 1: Prepare the Balloon
Choose a strong, flexible balloon without visible damage. Stretch it gently before filling.
Step 2: Add the Filling
Place a funnel into the balloon opening and slowly add your chosen soft filling. Avoid overfilling because excessive pressure can cause the balloon to break.
Step 3: Remove Excess Air
Gently press around the balloon to move excess air toward the opening.
Step 4: Seal It
Tie the balloon securely. For additional protection, place another suitable balloon over the first one and secure it carefully.
Step 5: Decorate
Use appropriate non-toxic markers to add simple designs, faces, or patterns to the outer layer.
Step 6: Test the Squishy
Gently squeeze the finished toy and check for leaks, weak spots, or damage before regular use.
DIY Needoh Safety Tips
Safety is especially important with homemade squishy toys.
- Use a strong outer material designed to withstand squeezing.
- Do not overfill balloons.
- Inspect the toy regularly for tears or leaks.
- Throw away the toy if the outer layer becomes damaged.
- Keep homemade squishies away from pets and young children who may bite or swallow them.
- Avoid small detachable decorations.
- Do not use toxic, sharp, or irritating materials as fillings.
- Wash hands after handling homemade sensory fillings.
- Water beads should not be used around children who could swallow them.
- Homemade sensory toys are not a substitute for commercially tested children’s toys.
How to Make Your DIY Needoh More Creative
The easiest way to personalize a homemade squishy is through color and decoration. Try creating pastel, rainbow, animal, fruit, or emoji-inspired designs.
You can also make several small squishies with different textures and compare how they feel. Keep the construction simple and prioritize a secure outer layer.
DIY Needoh Ideas for Kids
DIY squishy crafts can be enjoyable family activities. Children can help choose colors, draw designs, and organize materials while adults handle steps involving balloons, cutting, sealing, or potentially messy fillings.
Some fun themes include:
- Rainbow squishies
- Emoji squishies
- Animal squishies
- Fruit-inspired squishies
- Mini colorful squishies
- Galaxy-inspired designs
Always choose materials and activities appropriate for the child’s age.
Final Thoughts
DIY Needoh projects are a creative way to make homemade squishy sensory toys using simple materials. From basic balloon squishies to rainbow, emoji, animal, and glitter-inspired designs, there are many ways to personalize your creations.
Start with a simple design, avoid overfilling the outer layer, and inspect homemade squishies regularly for damage. With careful preparation and safe materials, you can enjoy making colorful DIY Needoh-inspired squishy toys at home.