

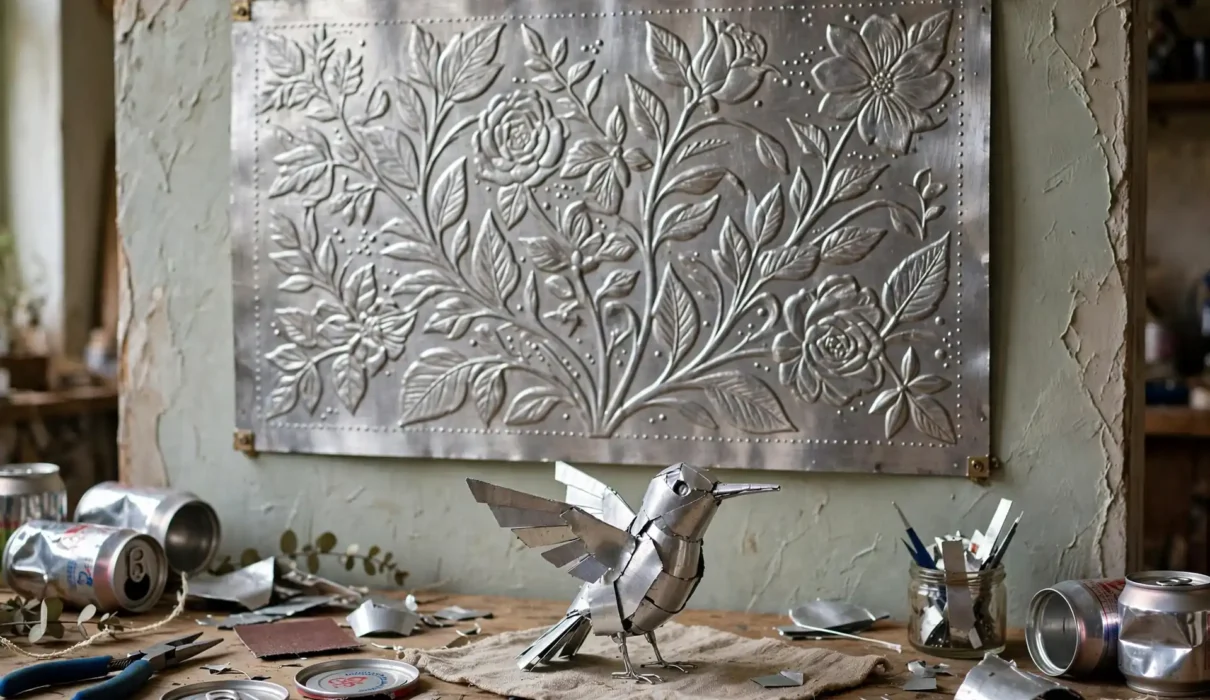
An empty soda can looks like trash. In the hands of an artist, it becomes a shining sheet of metal — ready to be cut, embossed, folded, and shaped into sculpture, jewelry, and wall art. Cool can art is one of the most surprising forms of recycled art, because the material is free, colorful, and endlessly available. This guide introduces aluminum can art: how to prepare cans safely, the main techniques, and projects ranging from beginner embossing to advanced sculpture. Whether you want wall decor, garden art, or handmade gifts, a bag of empty cans is all you need to start.
Why Aluminum Cans Make Great Art
Aluminum cans are thin, lightweight, and easy to cut with ordinary scissors. The printed side offers bold colors and graphics, while the silver inside gives a clean metallic finish. Cans are also free and abundant, which makes can art one of the most affordable art forms. Every piece you make also keeps metal out of the recycling bin — a small win for the planet.
Safety First: Preparing Cans for Art
Safety matters when working with cut metal. Always wear gloves when cutting cans — the edges are razor sharp. Wash cans with soap and water, let them dry, then cut off the top and bottom with sturdy scissors or tin snips. Cut down one side and flatten the sheet. Sand the edges lightly with fine sandpaper to remove sharp burrs. Work slowly and keep fingers away from cut edges. For projects with children, adults should handle all cutting. Kids can paint, emboss with blunt tools, and assemble pre-cut pieces safely.

Technique 1: Embossed Can Art
Embossing is the most popular can art technique. You press a design into the metal from the back, creating a raised relief on the front.
How to Emboss a Can
Cut and flatten a can, silver side up. Place a printed design underneath or draw your design on the metal with a ballpoint pen. Flip the sheet and trace the design from the back with a blunt stylus or an empty pen, pressing firmly. Flip it again and add details from the front. The raised lines catch the light beautifully.
Embossed Art Projects
Embossed flowers, animals, mandalas, and landscapes all work well. Frame embossed sheets in simple frames for wall art, or glue them onto wooden boxes, notebooks, and greeting cards. Embossed can art looks like hammered metal — far more expensive than it is.
Technique 2: Can Sculpture
Can sculpture uses folded, rolled, and layered metal to build three-dimensional forms.
How to Build a Can Sculpture
Cut the can into strips, petals, or scales. Curl strips around a pencil for tendrils. Layer petal shapes into flowers, or overlap scale shapes into fish, birds, and dragons. Join pieces with small rivets, wire, or strong glue. Sculptures can be freestanding or mounted on wood.
Sculpture Ideas
Metal roses are a classic can sculpture — layered petals around a wire stem. Butterflies, dragonflies, and fish are also popular. Larger sculptures, like garden flowers and wind spinners, use multiple cans and a sturdy base.
Technique 3: Cut Metal Wall Art
Cut metal wall art uses the printed side of cans for color. Cut shapes — leaves, feathers, stars, hearts — and arrange them on a backing board or canvas.
How to Make Cut Metal Wall Art
Choose cans in colors that match your design. Cut simple shapes with scissors, punch holes for hanging, and glue or pin them to a painted board. Layer shapes for depth. A wall hanging of layered can leaves, in greens and golds, looks like stained glass when it catches the light.
Technique 4: Can Jewelry
Can metal is perfect for lightweight jewelry. Cut small shapes — earrings, pendants, bracelets — punch holes, and add jump rings and hooks. Seal painted pieces with clear varnish. Can earrings are feather-light and endlessly customizable.
Cool Can Art Projects to Try
Metal Flowers
Cut petal shapes from several cans, layer them around a center, and attach to a wire stem. Metal flowers never wilt and make striking bouquets and garden decor.
Wall Mandalas
Cut concentric circles and patterns from cans, layer them on a board, and hang as a mandala. Mandalas use symmetry, so they look polished even for beginners.
Can Lanterns
Punch patterns of holes into a whole can, place an LED candle inside, and watch the light shine through the pattern. Can lanterns are magical on patios and at parties.
Garden Art
Make metal butterflies, flowers, and wind spinners for the garden. Aluminum withstands rain and sun, so can art thrives outdoors.
Gift Tags and Ornaments
Cut small shapes from cans, emboss a design, and add ribbon. Can ornaments and tags are unique, durable, and practically free.
Tips for Beautiful Can Art
Work with clean, dry cans. Use sharp scissors and change blades often. Plan your design on paper first — metal is less forgiving than paper. Sand every edge, and wear gloves until pieces are finished. Mix printed and silver sides for contrast, and seal painted pieces with varnish for outdoor use.
Frequently Asked Questions
Is aluminum can art safe?
Yes, with precautions. Wear gloves when cutting, sand sharp edges, and supervise children. Finished pieces with sanded edges are safe to handle and display.
What tools do I need for can art?
Sturdy scissors or tin snips, gloves, sandpaper, a ballpoint pen or stylus, glue, and wire cover most can art projects. A hole punch and pliers help for jewelry and sculpture.
Can I sell aluminum can art?
Yes. Embossed wall art, metal flowers, jewelry, and garden sculptures sell well at craft fairs and online. Price your work to reflect the time and skill involved, not just the free materials.
How do I keep can art from looking like trash?
Clean preparation, neat edges, and thoughtful design make the difference. A finished, framed, and sanded piece reads as art — not recycling.
Start Cutting Today
Save your next few cans, wash them, and try one embossed piece tonight. You will be amazed at what a free material can become. Share your can art in the comments, and explore more recycled craft ideas on Hommiest.