

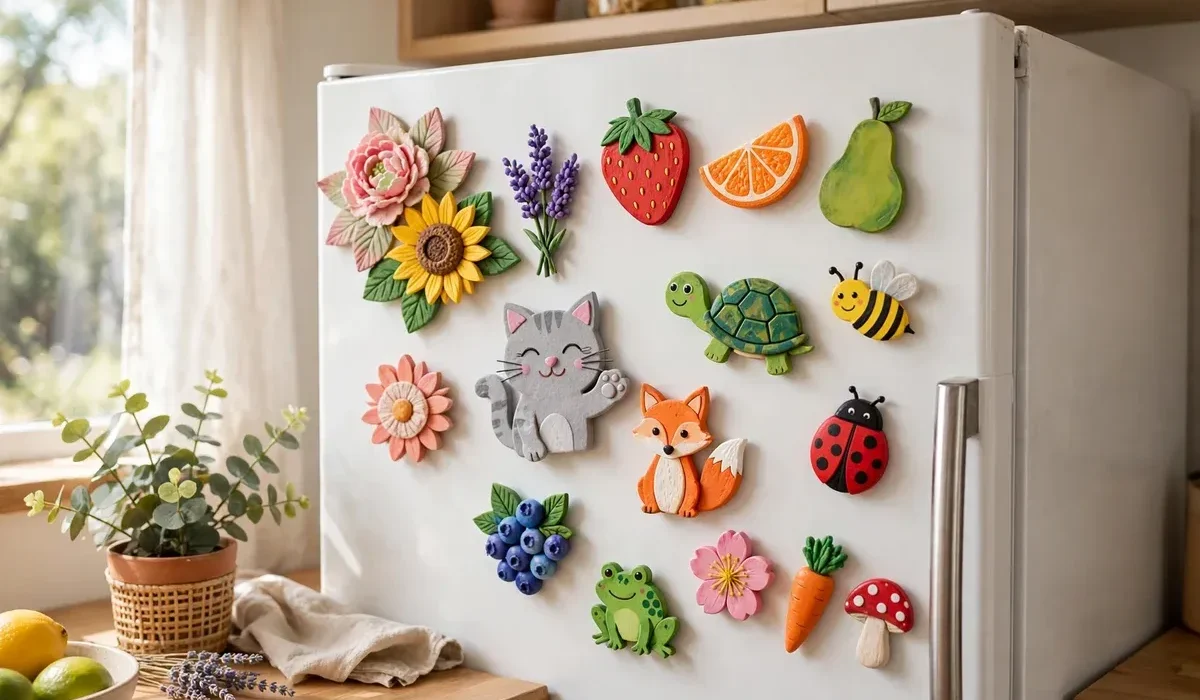
DIY Magnets: 12 Fun Ideas to Make at Home
A diy magnets project turns small scraps into cheerful art for your fridge and boards. Also, a simple magnet has held notes and photos in kitchens for many years. In this guide, you will find twelve diy magnets ideas to make at home. Also, most of these magnets use clay, resin, and fabric from one craft trip. In addition, a handmade magnet should not need a big budget. Then, pick a style that matches your home. Next, make a set over a weekend, and enjoy magnets that feel truly yours.
What You Need to Make DIY Magnets
Most handmade magnets start with small magnet discs, glue, and a base material like clay, resin, or felt. Useful extras include paint, glitter, buttons, and small photos. Also, keep a craft knife and a cutting mat close, because neat edges make the magnets look polished. In addition, choose strong magnets, because a weak magnet will slide down the fridge. With those supplies ready, you can make most of these diy magnets in one afternoon.
How to Make DIY Magnets
Shape or cut your magnet base first, then let it dry or set fully. Next, paint or decorate the front, and add any tiny details. Then, glue a magnet disc to the back, and press it flat while it dries. After that, seal the front with clear varnish, and test it on the fridge. Finally, make a few extras, because a handmade diy magnets set also makes a sweet gift.
12 Magnet Ideas
1. Clay Flower Magnets for DIY Magnets
Roll air dry clay into small flowers, then press a petal pattern with a toothpick. Also, paint each flower in a bright color, and seal it with varnish. These diy magnets brighten any fridge, and they are easy enough for kids to help with.
2. Photo Magnets
Print small photos, then glue them onto wooden discs or bottle caps. Next, seal the front with clear resin or varnish, and glue a magnet to the back. These magnets turn family memories into daily decor, and they make a thoughtful gift.
3. Felt Animal Magnets
Cut felt into simple animal shapes, then stitch or glue the pieces together. Then, add tiny button eyes, and glue a magnet disc behind each one. These soft magnets suit a kids room, and they are gentle on fridge doors.
4. Resin Glitter Magnets for DIY Magnets
Pour colored resin into small silicone molds, then sprinkle in glitter and tiny charms. In addition, let the resin cure overnight, and pop each piece out of its mold. These diy magnets sparkle in the light, and they look like tiny jewels on the fridge.

5. Button Magnets
Pick pretty buttons from a craft box, then glue a magnet disc to the back of each one. Next, arrange them by color on a board or a fridge. This is the quickest magnet project, and it uses up spare buttons beautifully.
6. Bottle Cap Magnets
Clean old bottle caps, then fill them with a tiny photo, a bead, or a paper design. Also, seal the front with clear resin, and glue a magnet behind each cap. These magnets give old caps a second life, and they look charming in a row.
7. Painted Rock Magnets for DIY Magnets
Choose smooth flat stones, then paint them with flowers, faces, or simple patterns. Then, seal them with varnish, and glue a strong magnet to the back. These diy magnets bring a touch of nature indoors, and each one is unique.
8. Scrabble Tile Magnets
Pick letter tiles to spell words or names, then glue a magnet disc behind each tile. Next, arrange the words on the fridge as a daily message board. This playful set suits a family kitchen, and it invites everyone to join in.

9. Fabric Covered Magnets
Wrap small wooden discs in bright fabric scraps, then glue the edges neatly at the back. Also, add a button or a bead on the front for detail. These soft magnets add color and texture, and they use up leftover fabric well.
10. Mini Plant Magnets for DIY Magnets
Glue a tiny air plant or a faux succulent into a small cork or shell, then attach a strong magnet behind it. In addition, mist the plant now and then, and keep it out of harsh sun. These diy magnets bring a little green to the kitchen, and they always draw a smile.
11. Alphabet Magnets for Kids
Cut foam or wood into letters, then paint each one in a bright color. Next, glue magnets to the backs, and store them in a small tin. This set helps kids learn letters while they play, and it keeps the fridge fun.
12. Photo Booth Magnets for DIY Magnets
Print fun photo booth strips, then cut them into small squares and glue them to card discs. Finally, seal each one, and add a magnet to the back. These diy magnets keep party memories on show, and they make a sweet gift for guests.
Tips for Great Magnets
Choose strong magnet discs before you start, because a weak magnet will not hold paper or photos. Next, always let paint and resin dry fully, so the front stays smooth and clean. Also, seal every magnet with varnish, because a sealed surface lasts much longer. Then, test each magnet on the fridge, because a quick test saves you from remaking pieces. Finally, store spare magnets in a small tin, because a tidy box keeps them safe for gifts.
Frequently Asked Questions
What is the easiest diy magnets project to make?
Button magnets. They need only buttons and magnet discs, and you can finish a whole set in under an hour.
What glue works best for magnets?
A strong craft glue or a hot glue gun works well. Then, let the glue dry fully before you test the magnet on the fridge.
Can kids make diy magnets safely?
Yes, as long as an adult handles the glue gun and small parts. Then, let kids paint and decorate the fronts themselves.
How do I make magnets strong enough to hold photos?
Use neodymium magnet discs, because they are small yet very strong. Then, test each one with a photo before you finish the set.
Do handmade magnets damage the fridge?
No, when you use smooth backs and clean magnets. Then, wipe the fridge now and then so no grit scratches the surface.
Final Thoughts
Handmade magnets prove that small crafts need no big budget to bring joy to a kitchen. With a little clay, resin, and fabric, you can make flowers, photos, or tiny plants. Also, a cheerful fridge holds the whole room together beautifully. Finally, pick your favorite idea from this list, and gather your supplies. Then, enjoy making diy magnets that fit your home perfectly.
Call to Action: Start with button magnets this week. Then, finish your handmade magnet set over the weekend so you can enjoy it right away. Explore more handmade home ideas on Hommiest for your next project.