


Small, colourful, endlessly collectible, polymer clay charms one of most satisfying crafts you can make at home. Each charm only couple centimetres tall, takes minutes to shape, bakes hard in regular home oven. Whether want food charms for keychain, animal charms for earrings, or miniatures to sell at market, polymer clay perfect material to start with. Guide covers supplies, basic techniques, step-by-step ideas for food charms, animal charms, keychains, jewelry.
What Is Polymer Clay?
Polymer clay soft oven-bake modelling material staying soft until bake it, so can fix mistakes, rebuild charm as many times as like. Once baked, becomes firm, lightweight, durable. Do not need kiln or studio. Air-dry clay, by contrast, shrinks as dries, can crack, more fragile, so for charms getting handled every day, polymer clay better choice.
Supplies You Need
For first charms, need polymer clay in few colours (white, black, red, yellow, blue, green, pink, brown, cream), smooth work surface such as ceramic tile, craft knife, needle tool or toothpick, eye pins, parchment paper, baking tray. Optional extras include small roller, ball styluses. Sculpey Premo and Fimo Professional popular because hold fine detail, bake strong. Always read baking temperature on that specific packet, because brands differ.
How To Make Polymer Clay Charms: The Basics
Every charm, from strawberry to cat, uses same five techniques.
1. Conditioning
Knead each colour for minute or two until smooth, soft, pliable. Properly conditioned clay does not crack at edges, blends cleanly with other colours.
2. Basic Shapes
Most charms start from simple shapes: balls, teardrops, cones, sausages, flat discs. Strawberry is teardrop with seeds pressed in. Donut is flattened ball with hole. Cat head is ball with two triangle ears. Practise rolling even balls first, because even shapes make neater charms.
3. Joining Pieces
Press pieces together firmly, smooth join with fingertip or ball stylus. For parts that must stay attached, such as ears or arms, use tiny drop of liquid polymer clay as glue before baking.
4. Adding Details
Use needle tool for lines, toothpick for dots, ball stylus for eyes/dimples. Work from large shapes to small details, keep hands clean between colours so bright clay does not pick up dark smudges.
5. Baking
Bake on parchment paper, following temperature/time on clay’s packet, usually around 130 degrees C (275 degrees F) for 15-30 minutes. Let charms cool completely on tray before handling them.
Cute Food Charms
Food charms most popular polymer clay charms of all. Instantly recognisable, fun to collect, perfect for keychains/earrings.
Strawberry Charm
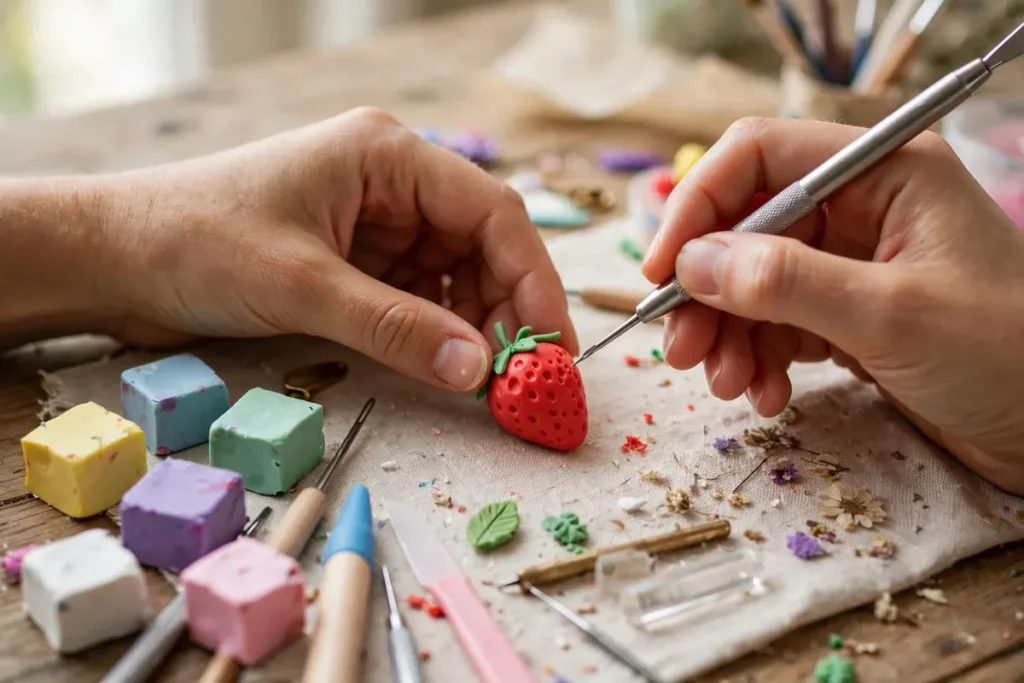
Roll red clay into teardrop shape. Press tiny yellow dots into surface with toothpick for seeds. Add small green star shape on top for leaves, tiny green stem. Push eye pin into top before baking.
Donut Charm
Roll beige clay into ball, then flatten slightly. Press small hole through centre with toothpick. Add wobbly disc of pink, chocolate, or mint clay on top for icing. Press tiny coloured sprinkles into icing with tweezers. Other easy food charms include cupcake, ice cream cone, avocado, boba tea cup, croissant. Food charms look best in small sets.
Cute Animal Charms
Animal charms use same basic shapes. Start with simple round animals before moving to detailed breeds.
Cat Charm
Roll ball for head, smaller oval for body. Add two small triangle ears, pressing firmly. Add tiny white muzzle dots, pink triangle nose, black bead eyes. Add thin tail curving around body.
Bear Charm
Roll ball for head, slightly larger oval for body. Add two small round ears, lighter oval for muzzle. Add small dark nose, two dot eyes. Add tiny arms/legs as flattened ovals. Other easy animals include bunny, frog, penguin, panda, chick. Keep animal charms simple/round. Cute chibi style forgiving for beginners, exactly what buyers look for.
Turning Charms Into Keychains And Jewelry
Push eye pin into top of charm before baking, leaving loop sticking out. After baking/cooling, attach split ring and keychain chain, or earring hook with jump ring. For necklace, use single charm on cord. For bag charm, attach two/three small charms to one clasp. Sand rough edges after baking, add thin coat of varnish, check every eye pin with gentle tug.
Common Beginner Mistakes
Fingerprints: Smooth surface before baking. Cracks after baking: clay was underbaked or too thin. Bake for full time on packet. Colours going muddy: Wash hands between colours, work light to dark. Charm breaking at join: Press pieces together firmly. Use liquid clay as glue. Burnt clay: Oven ran hotter than packet temperature. Use oven thermometer.
Frequently Asked Questions
Do I need a special oven for polymer clay?
No. Regular home oven works fine. Bake on parchment paper, follow packet temperature, ventilate room. Never microwave polymer clay.
How long do polymer clay charms last?
Properly baked charms last for years. Water resistant/sturdy, though can break if dropped hard on tile floor.
Can children make polymer clay charms?
Yes, with adult supervision. Adult should handle baking, craft knife, small findings such as jump rings.
Why did my charm crack in the oven?
Cracking usually means underbaking or very thin section. Bake for full recommended time, let charms cool slowly on tray.
Make Your First Charm Today
Start with one simple charm, strawberry or cat, bake it today. Will learn more from one finished charm than from week of planning. Which charm will you make first? Tell us in comments, share guide with friend who loves miniature crafts.